How to create a Qualitative Study?
Overview
With Decode, conducting qualitative research has never been easier. Qualitative research is a powerful way to gain a deeper understanding of your target audience by exploring their thoughts, feelings, and behaviours in detail. You can create One-on-one, Dyad, Triad, and Group meeting videos to analyze them and get insights to draw meaningful conclusions.
In this article, we'll take you through the process of designing a qualitative study that delivers insightful and actionable results.
Steps
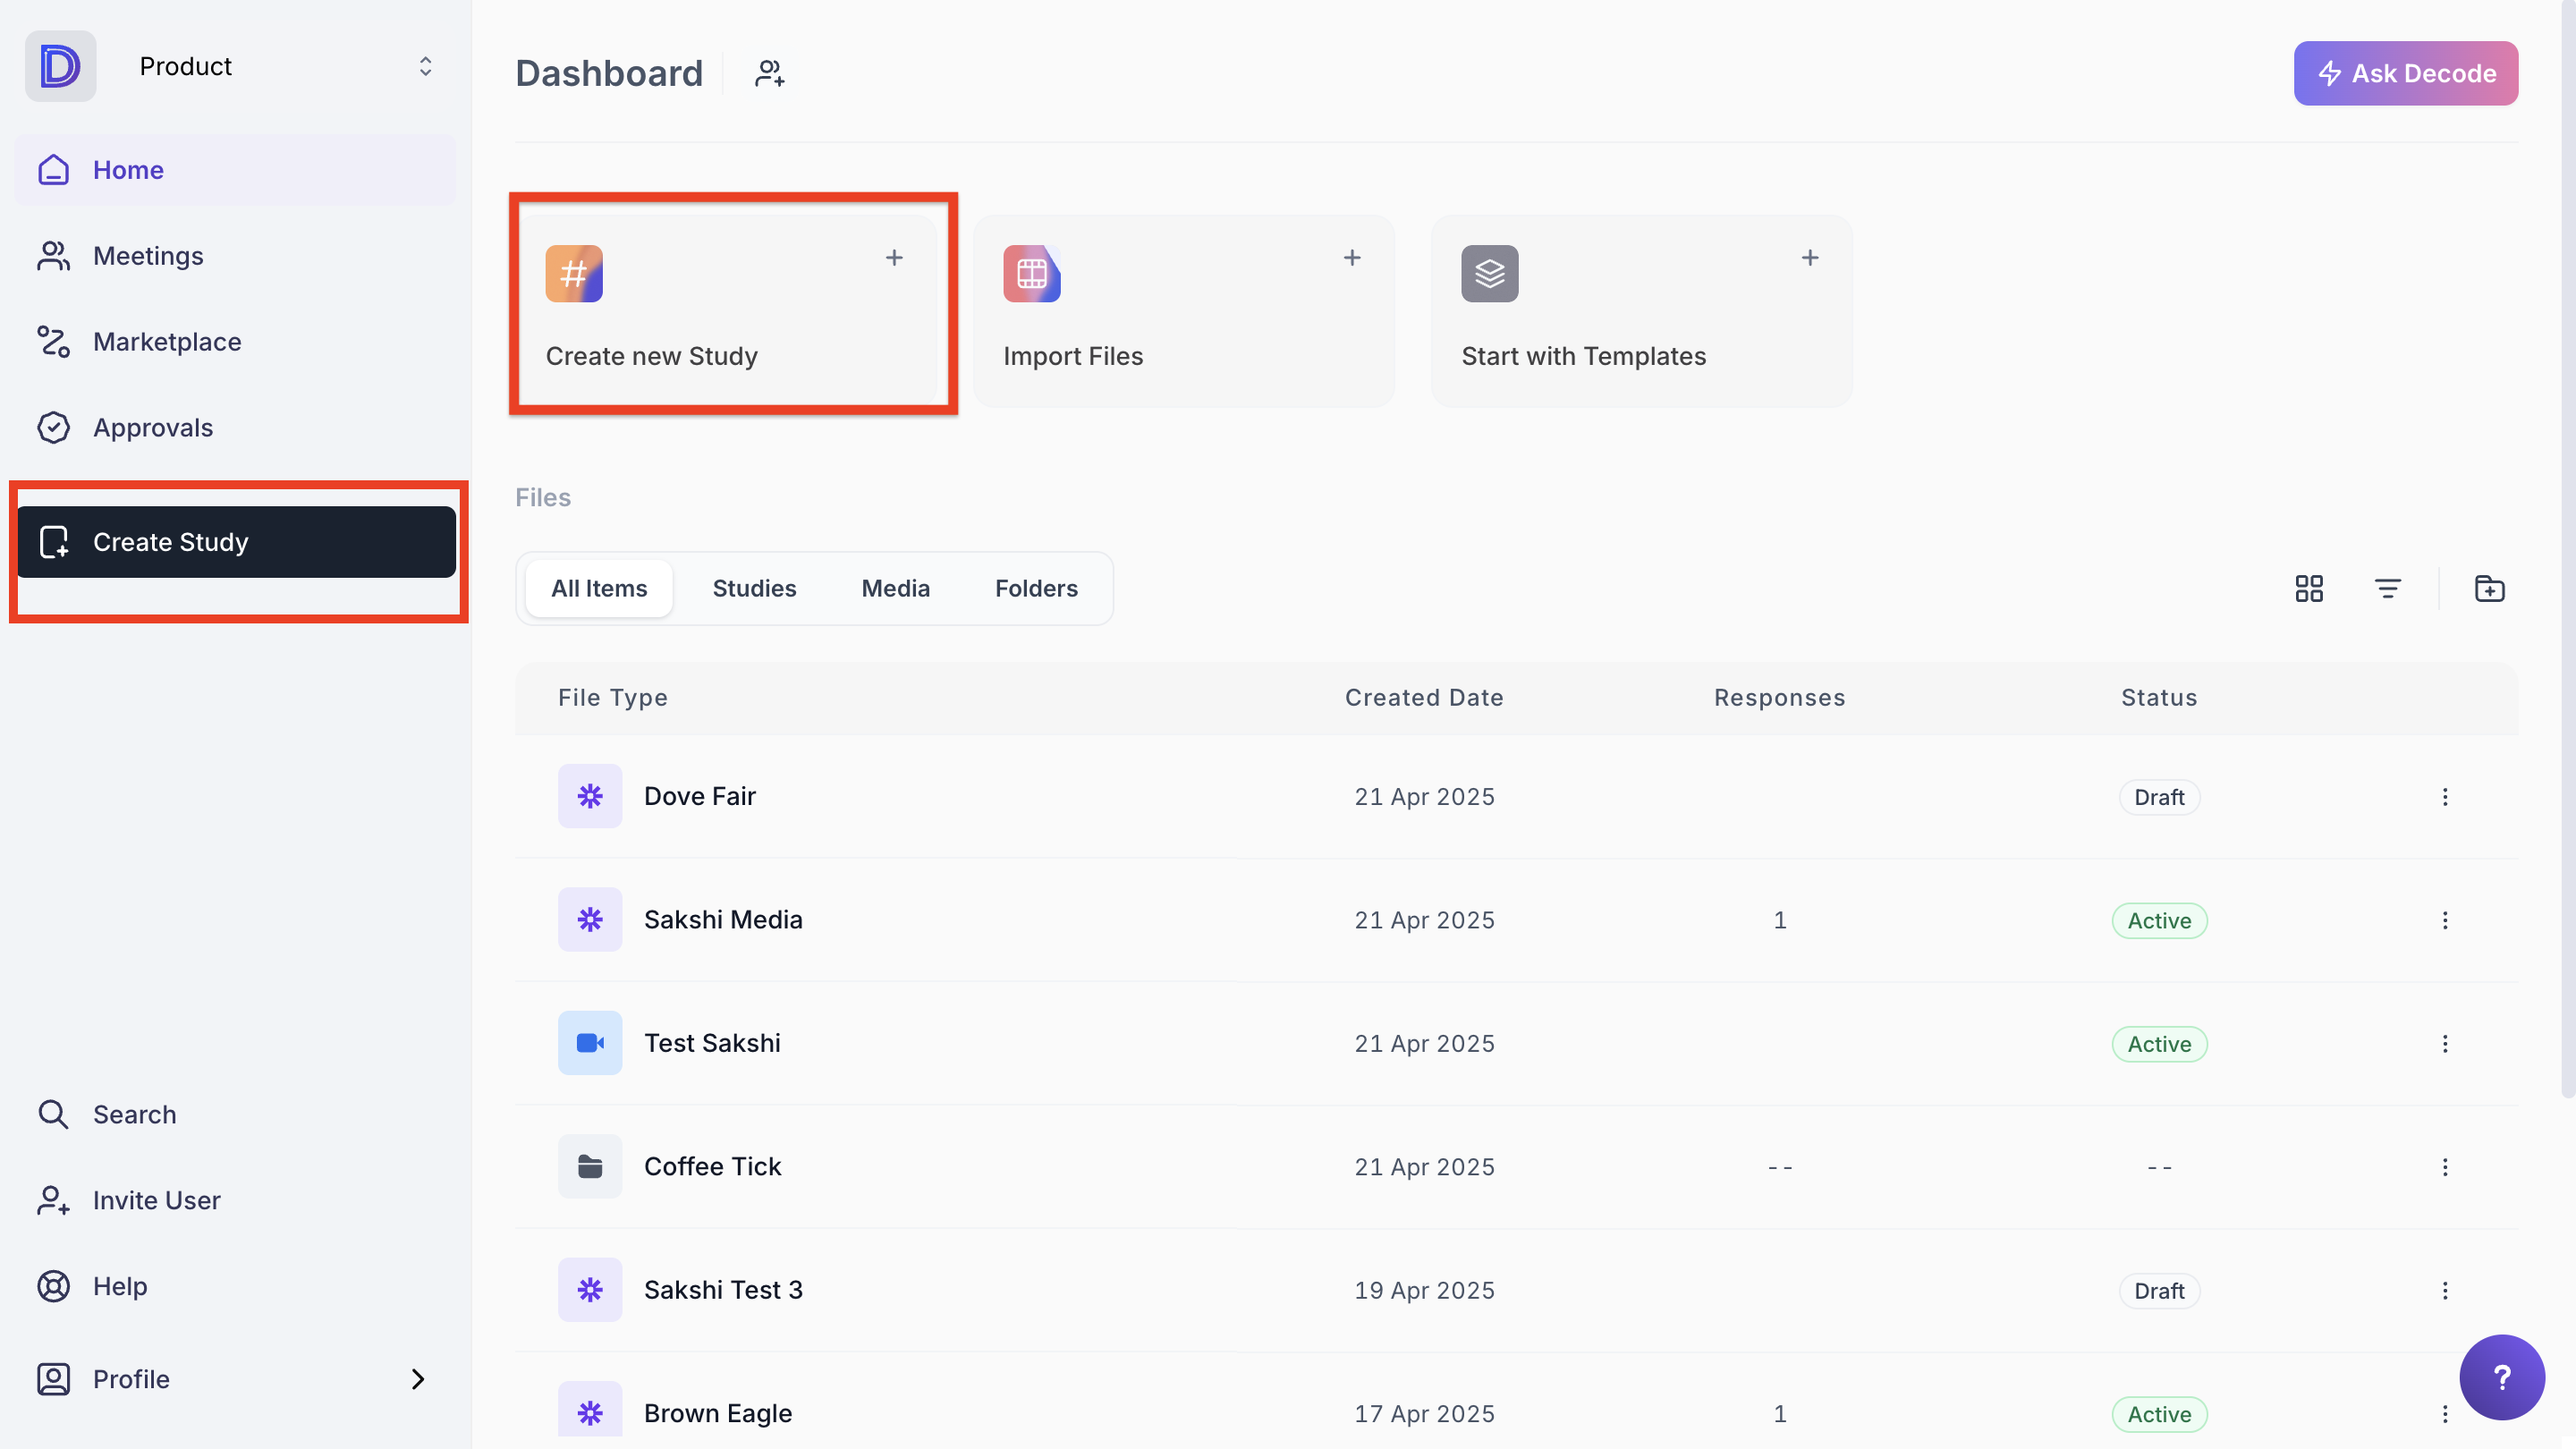
Step 1: Once you log into your Decode account, you will be directed to the dashboard.
Step 2: Click the “Create Study” button on the left navigation panel or from the dashboard.
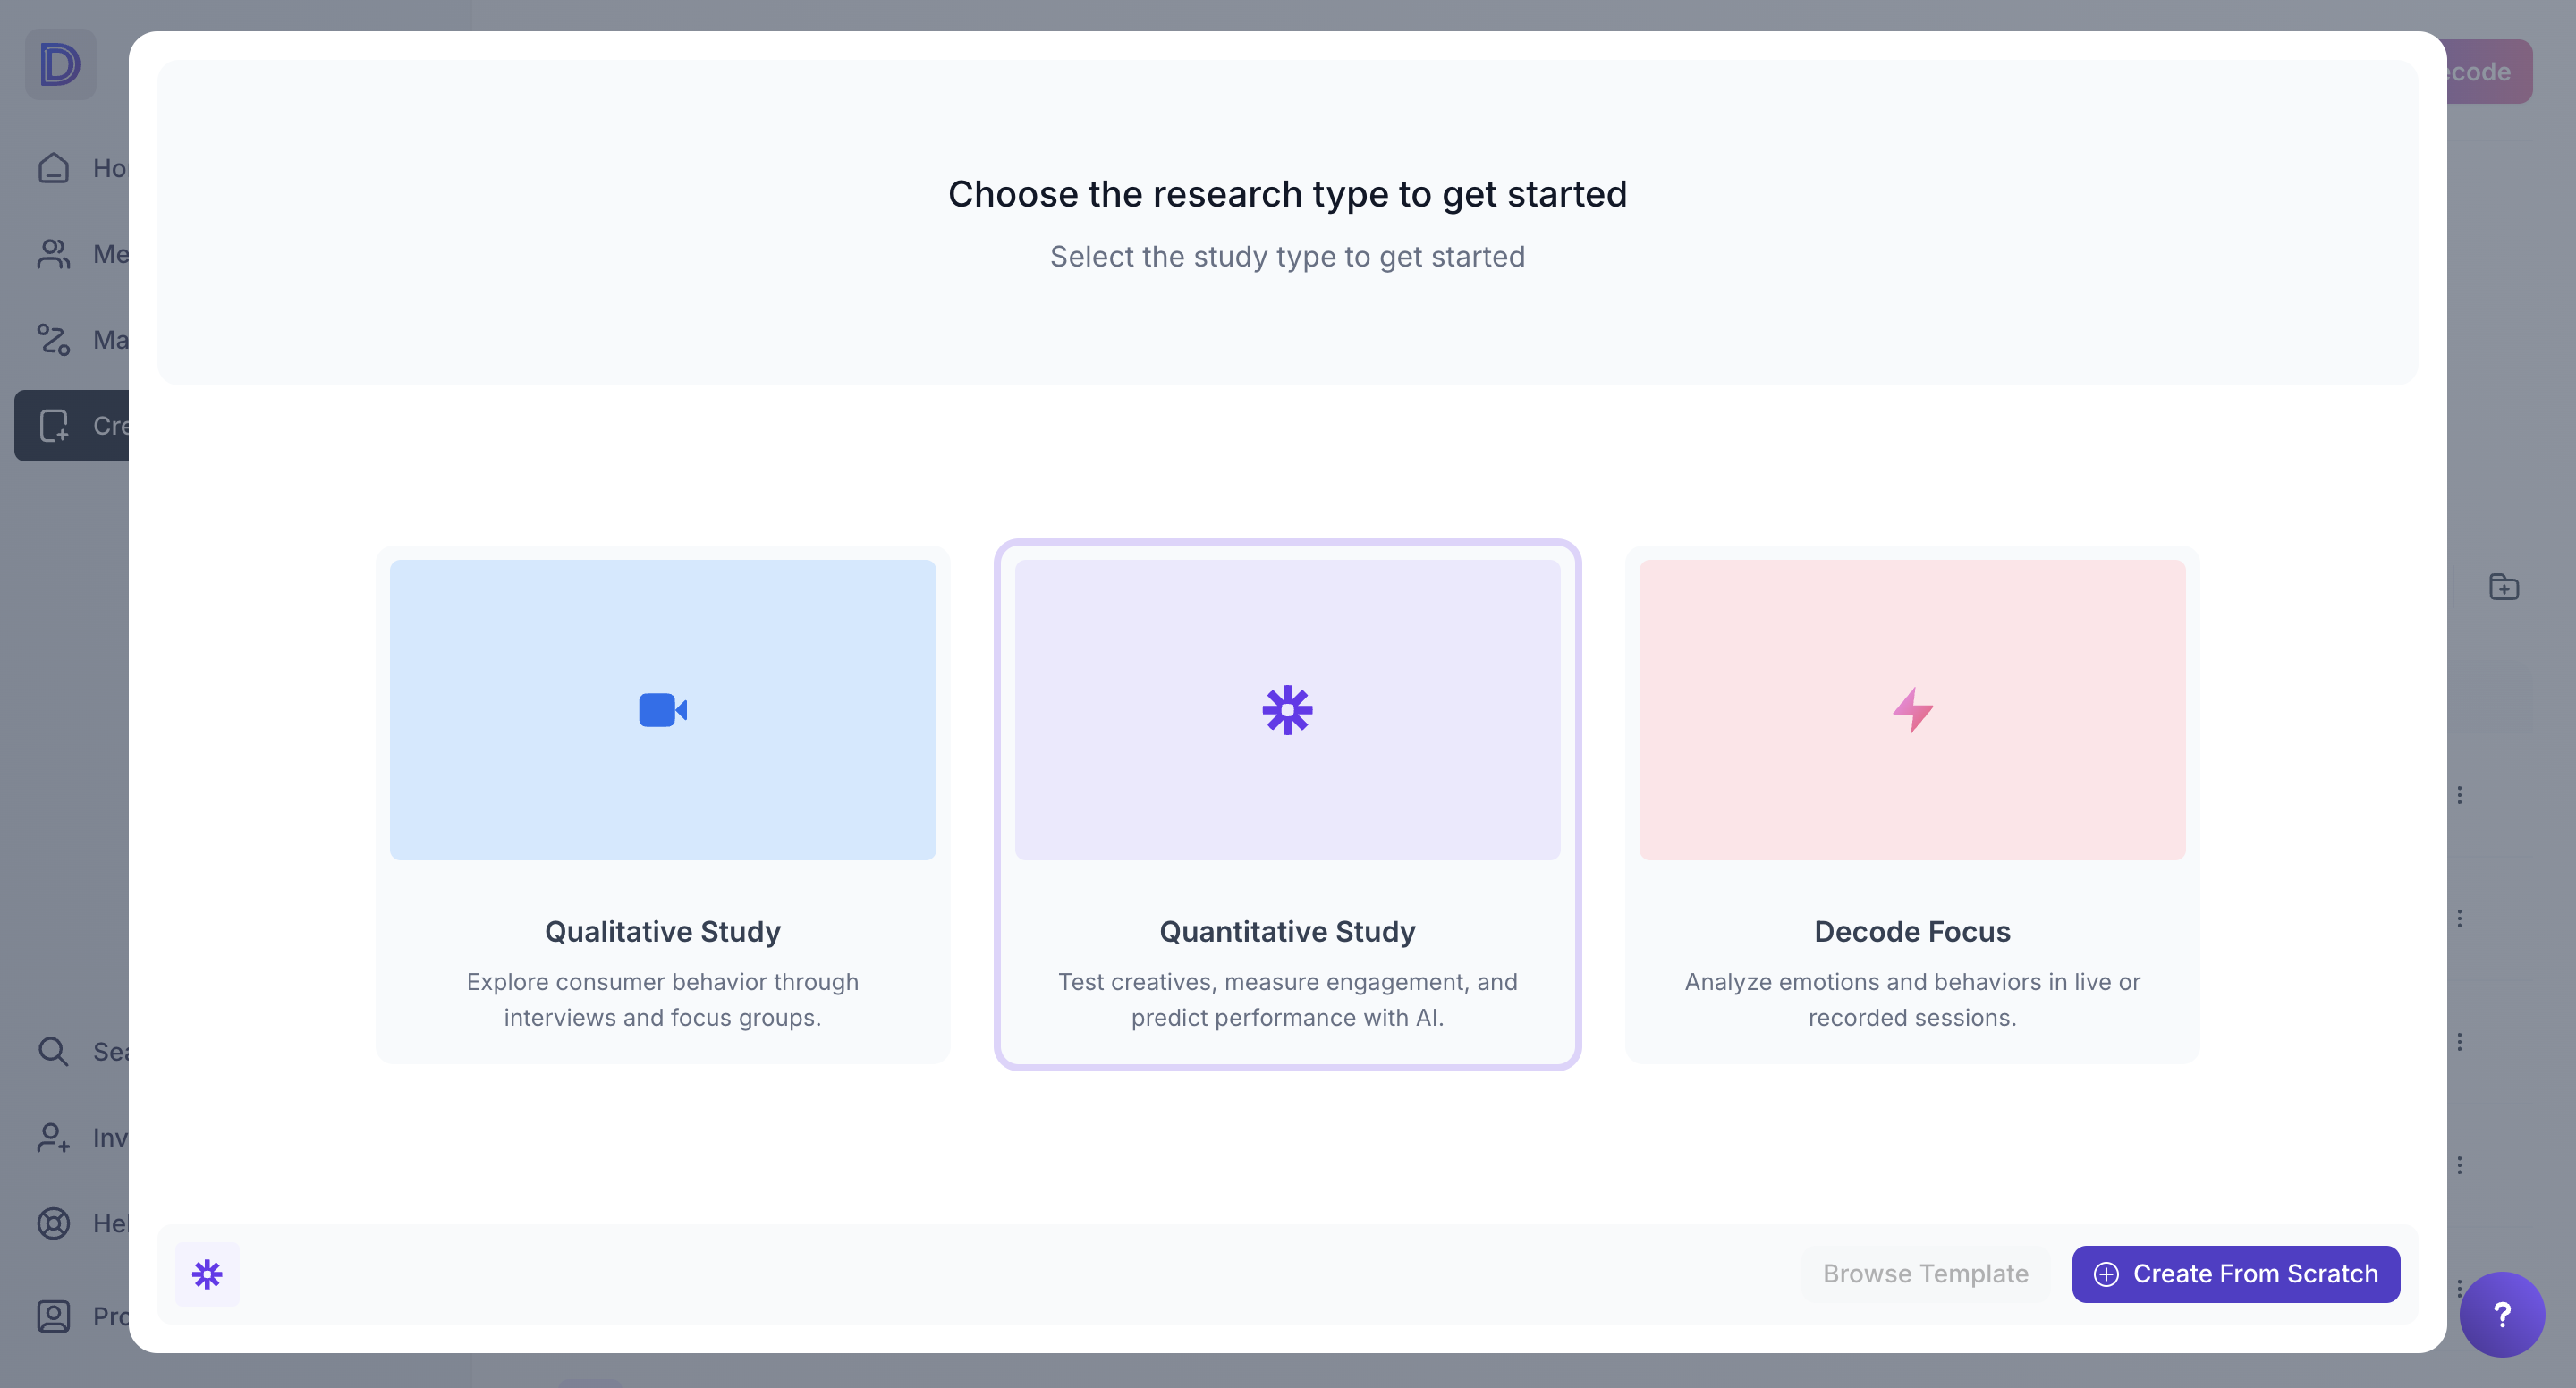
Step 3: When the prompt appears, you can select the type of research you wish to conduct. By default, the Quantitative Study option will be pre-selected. Select the "Qualitative Research" option from the prompt.
Step 4: After selecting your preferred option, you’ll be redirected to a new page where you can set up your meeting details. Fill in the following sections to complete the setup:
Details: Provide a brief overview or description of the meeting.
Availability: Choose the time slots during which you're available for the meeting.
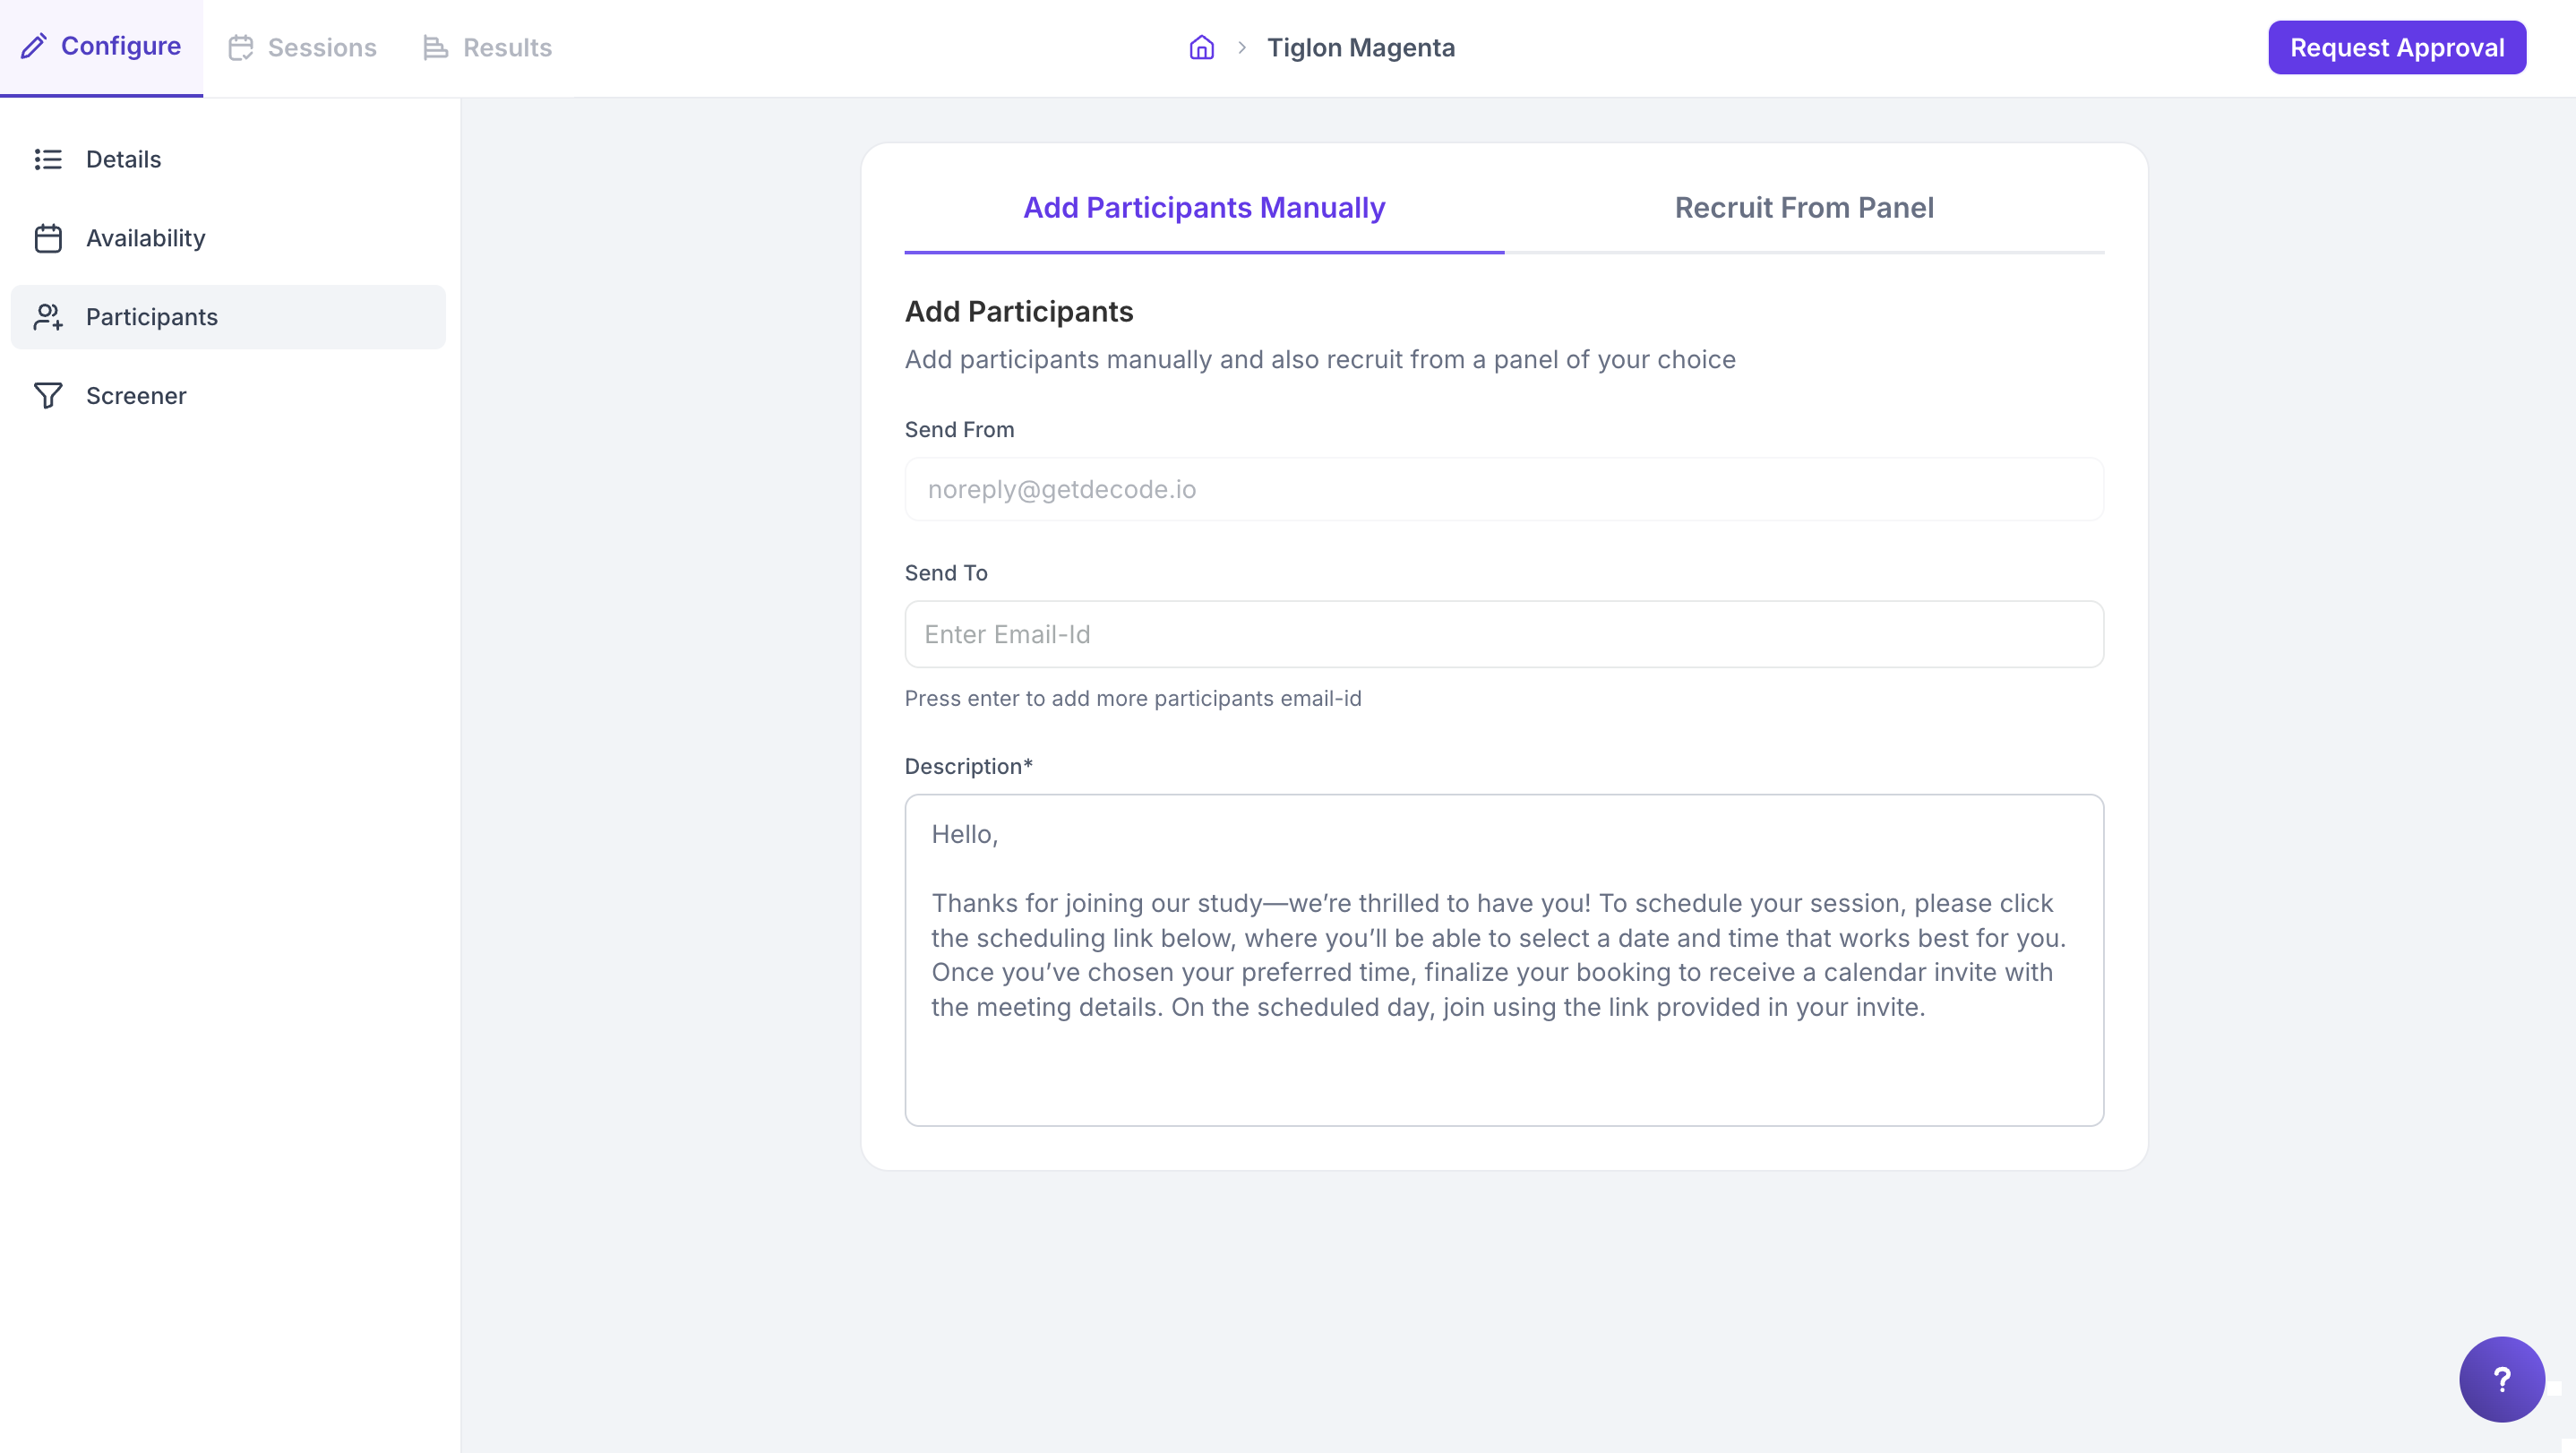
Participants: Add participants manually or recruit them from a panel, depending on your preference.
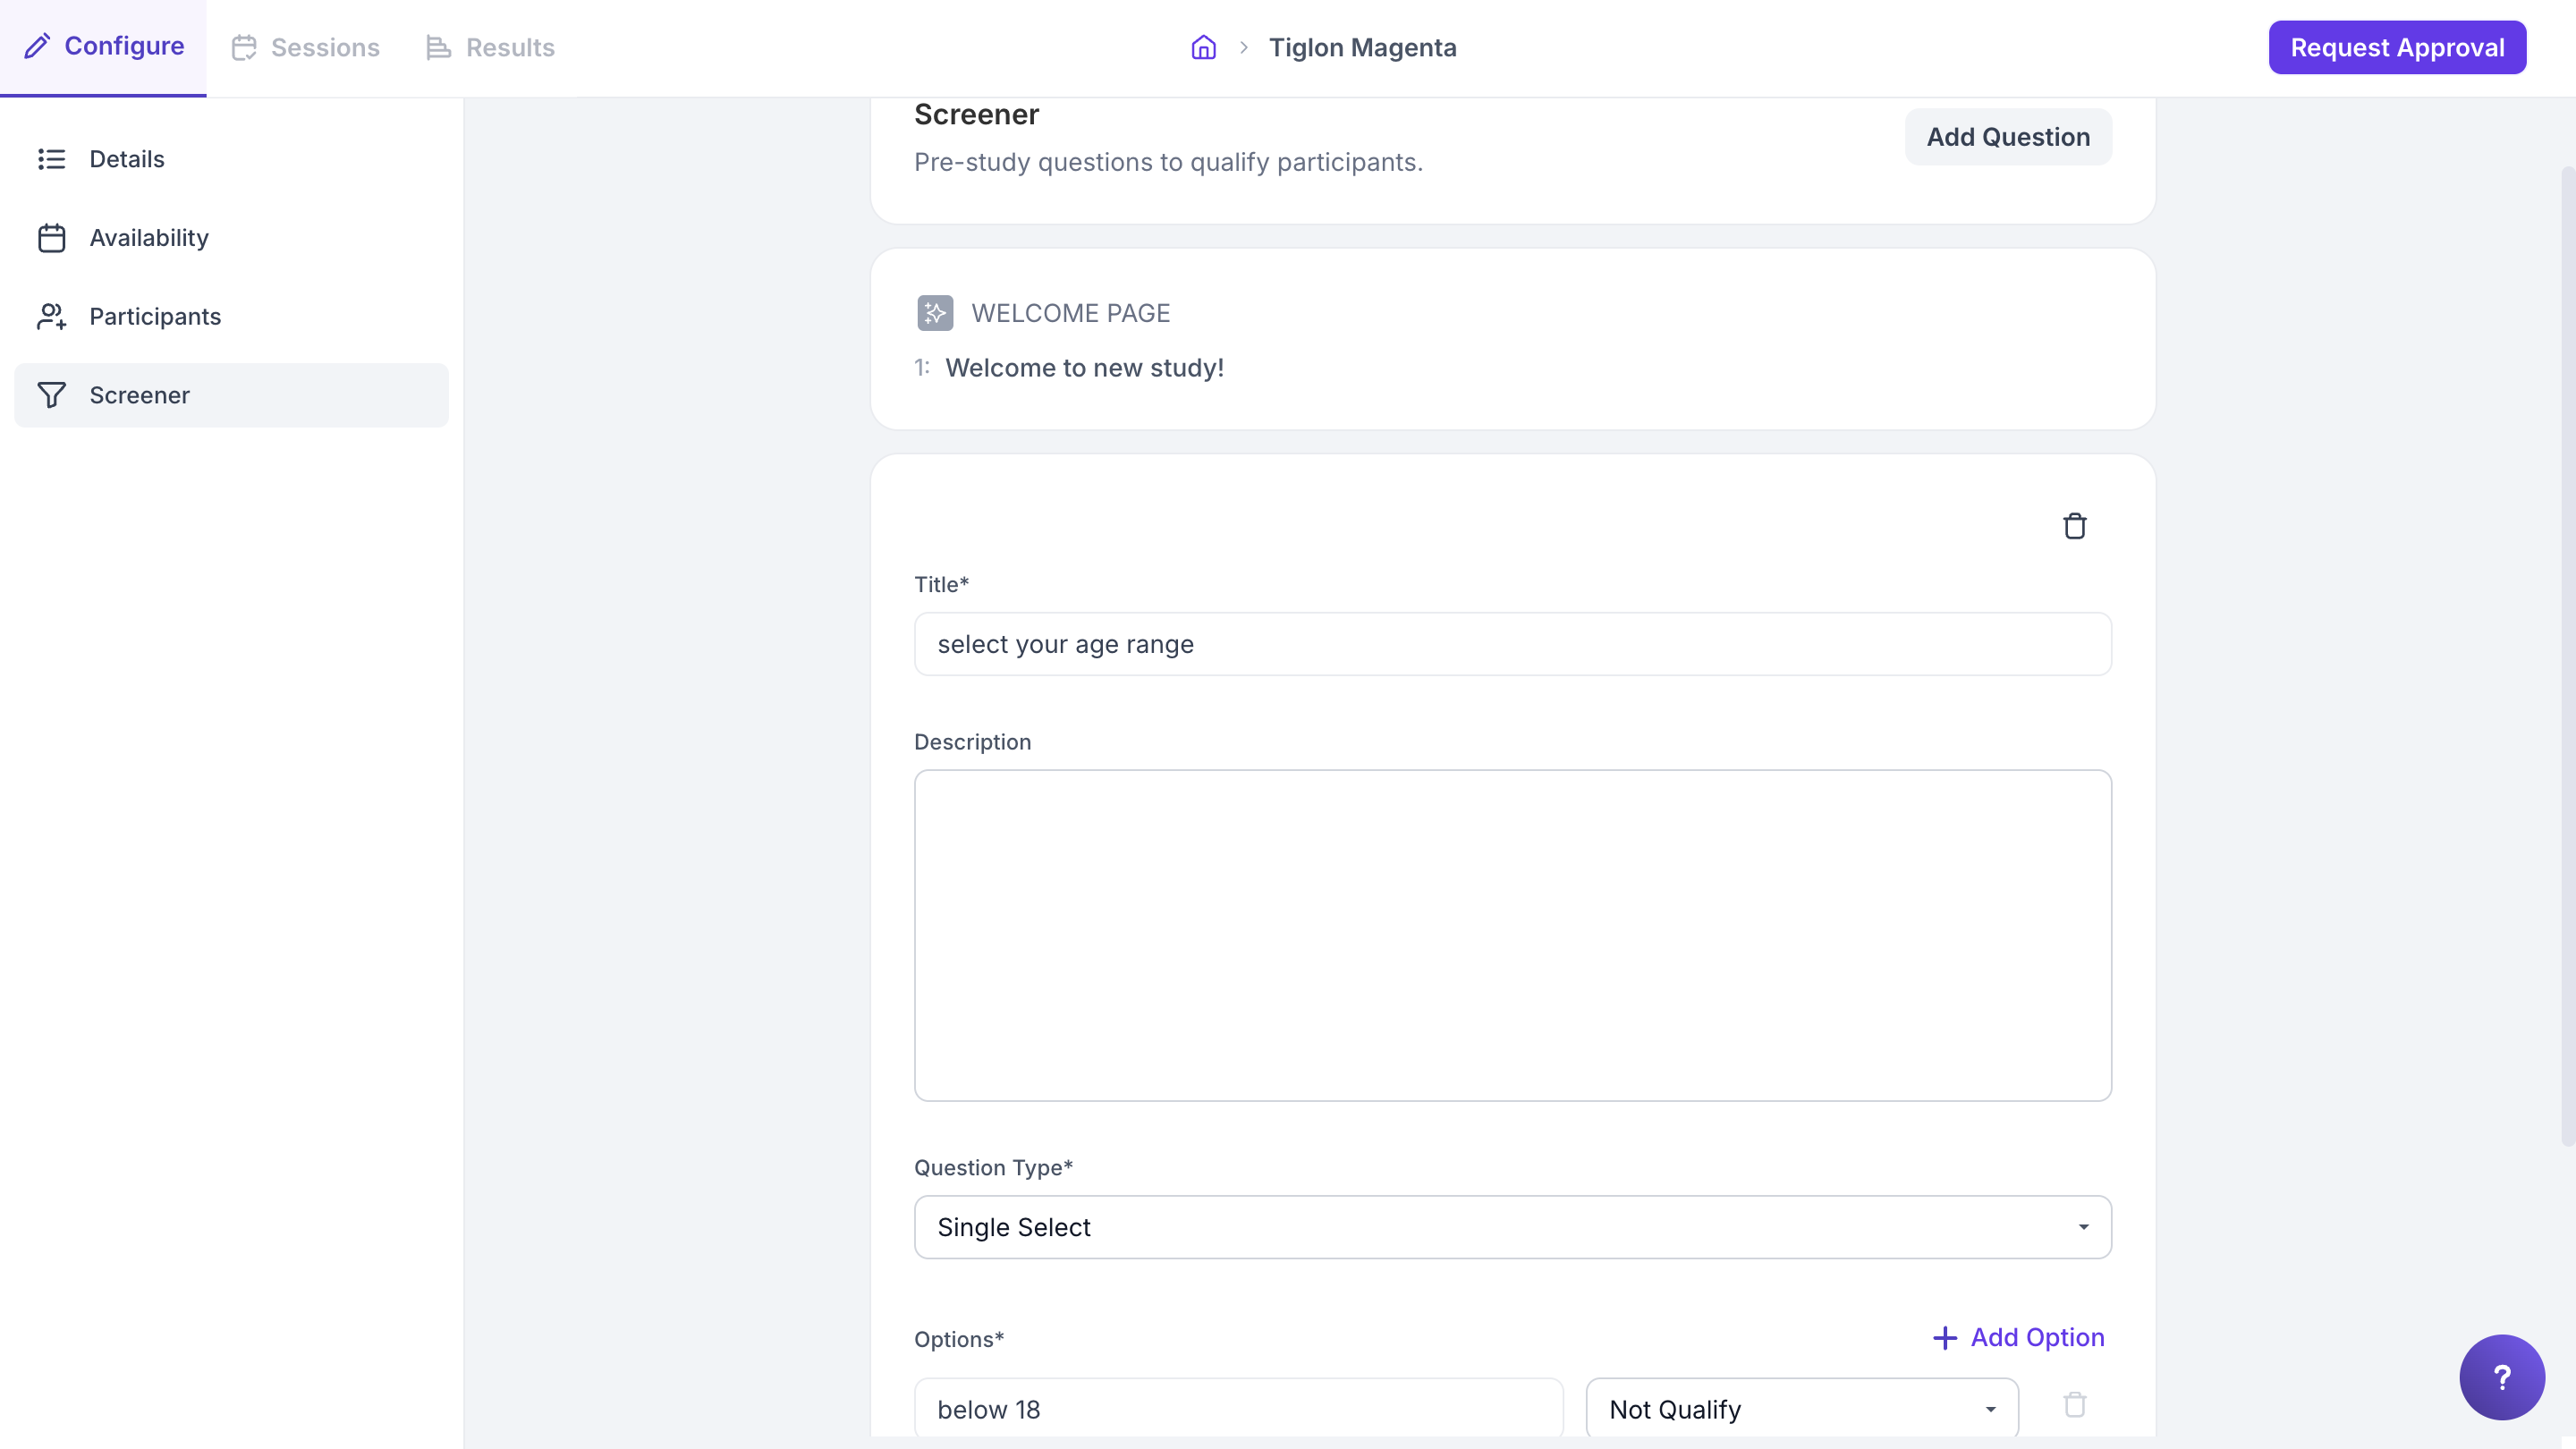
Screener: (Optional) Add screening questions to qualify participants before they book a slot.
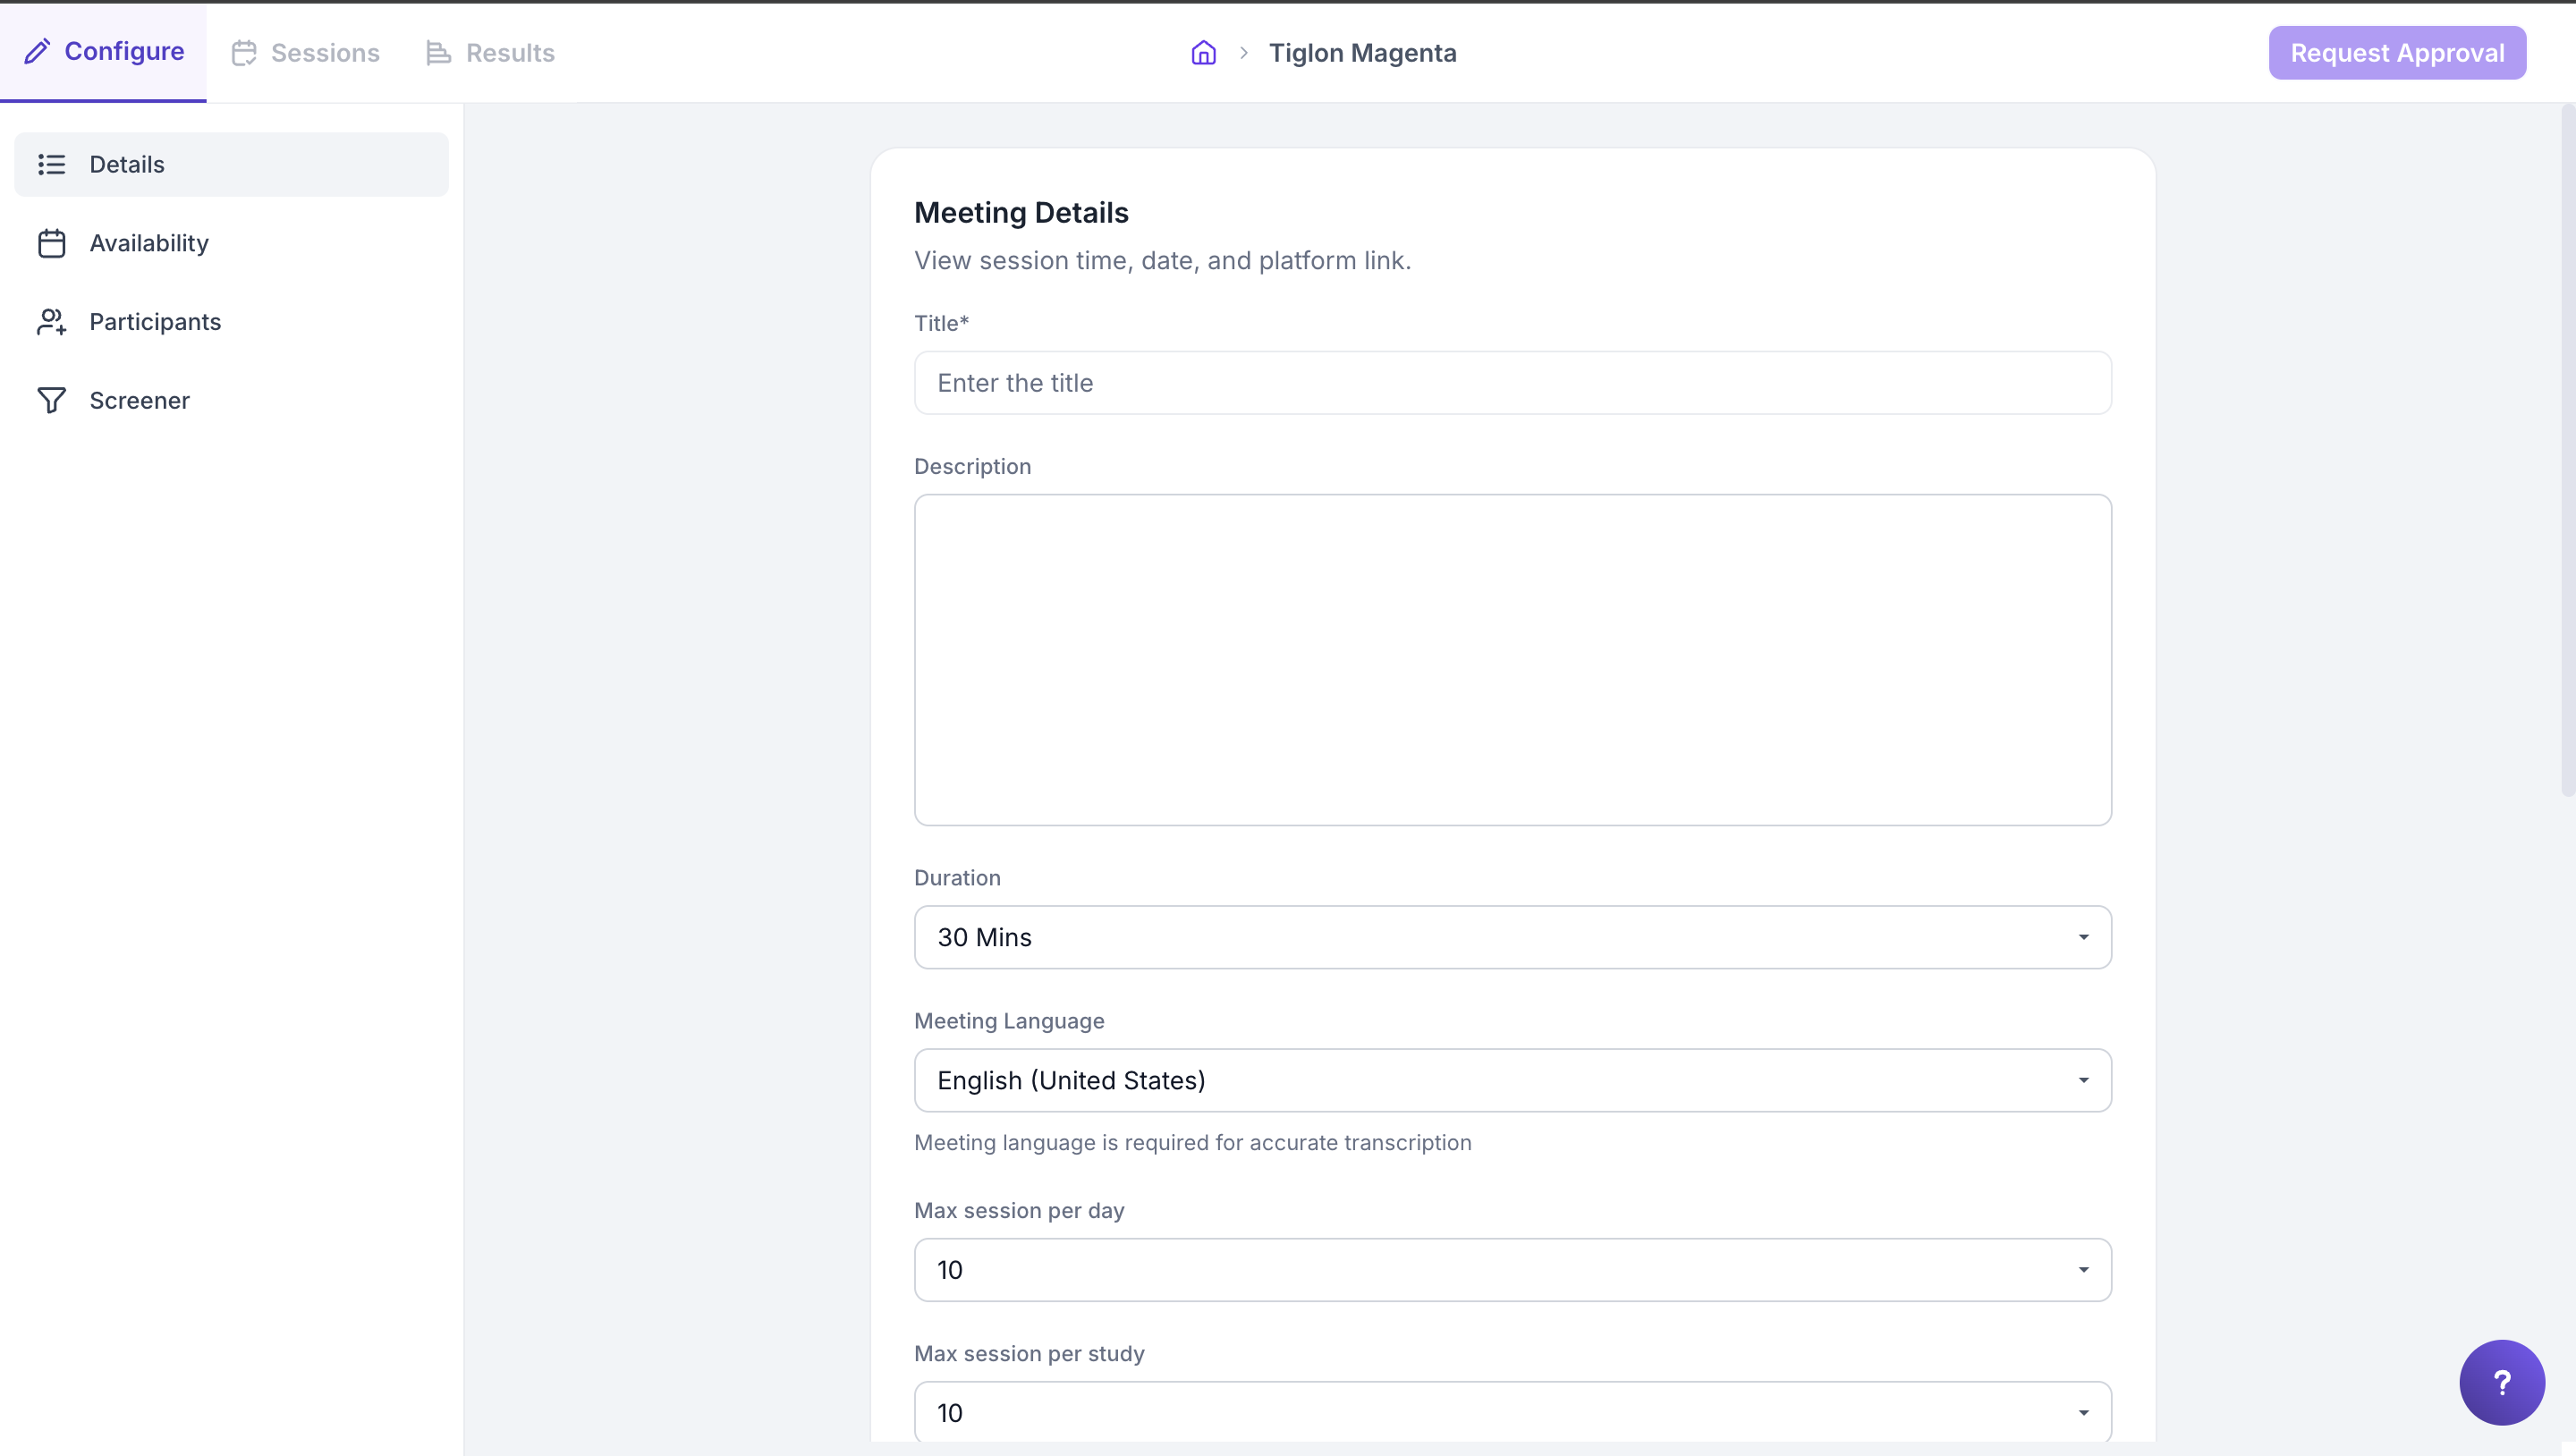
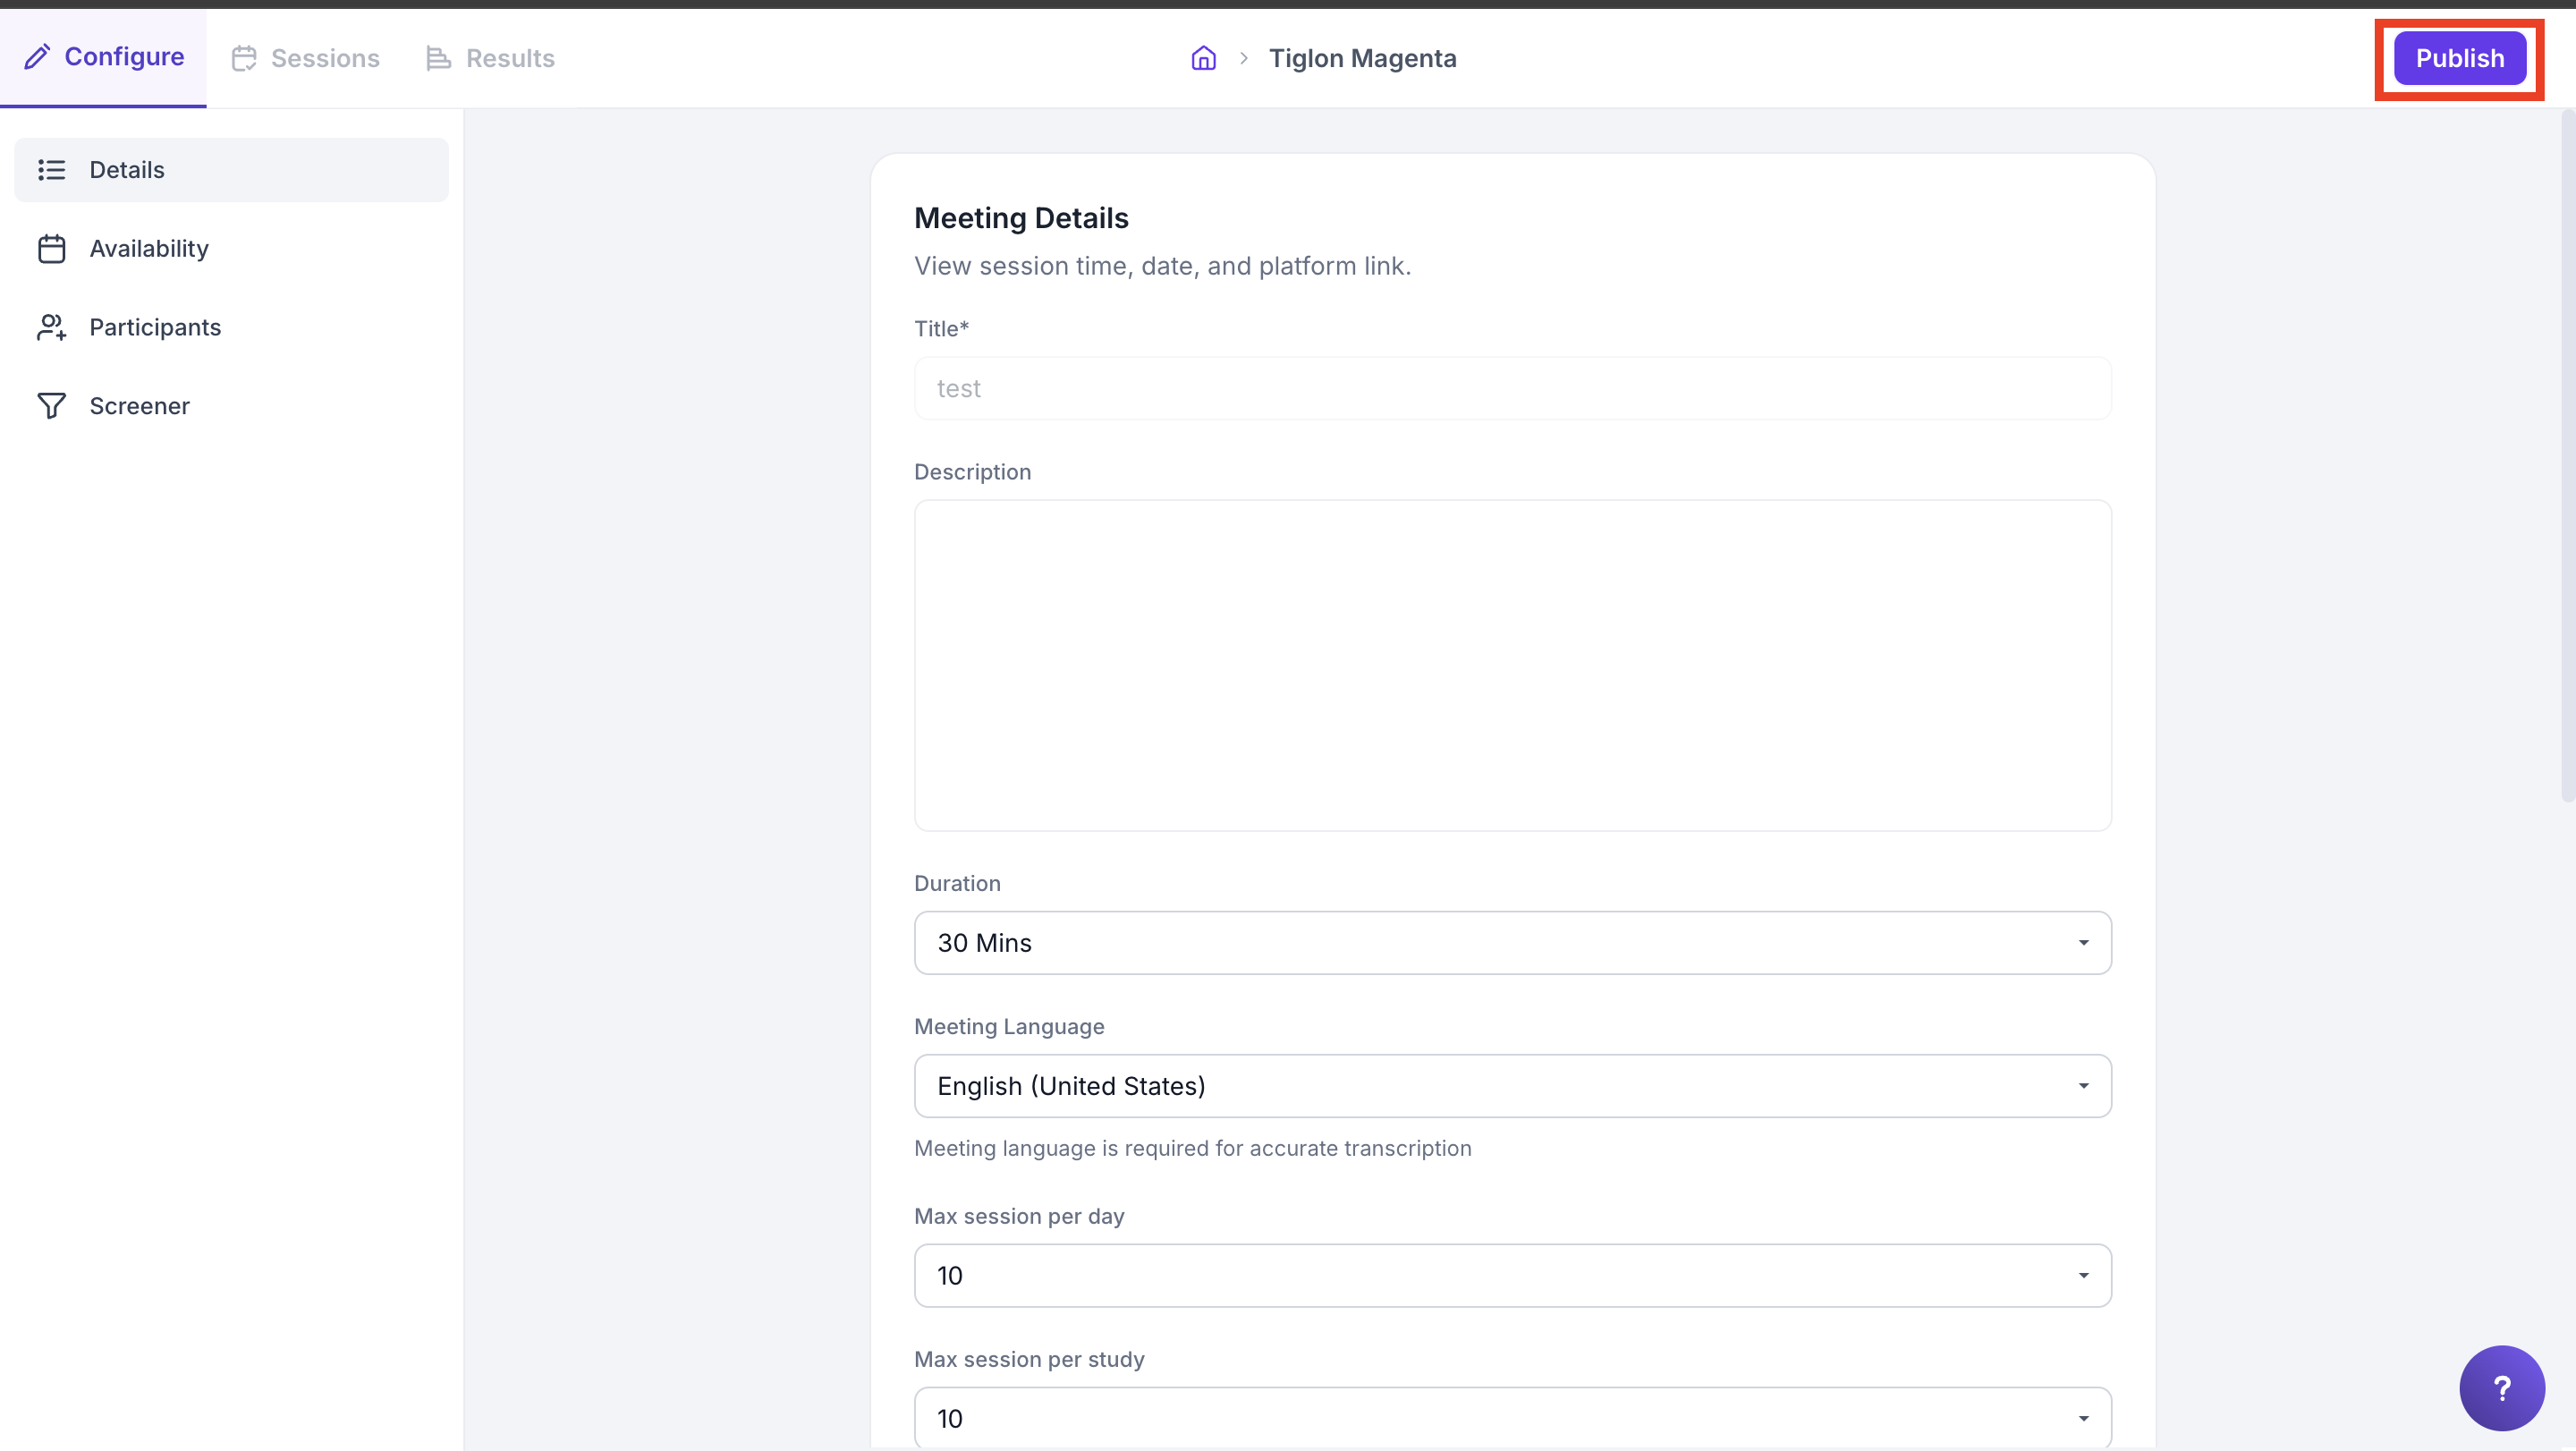
Meeting Detail
Set up your meeting by filling in the following information:
- Meeting Title: Enter a clear and concise title for the meeting.
- Description: Provide a brief summary or agenda for the session.
- Duration: Specify the start time and expected duration of the meeting.
- Language: Select the language in which the conversation will take place. This ensures that transcripts and other data are generated accurately.
- Max Sessions per Day: Set the maximum number of sessions that can be conducted in a single day.
- Max Sessions per Study: Define the total number of sessions allowed for the entire study.
- Moderator: Moderators play an active role in Decode meetings, with the same privileges as the organiser (the user who creates the meeting). Only Decode users can be assigned as moderators. Organisers and moderators can:
- Turn on video and audio
- Share their screen
- Mute other participants
- Observers: Invite team members to silently observe the session. Observers can be selected from a drop-down list. They can watch the meeting but cannot enable audio/video or participate in the chat.
- Facial Coding: Enable this feature to capture and analyse facial expressions during the session for deeper emotional insights.
- Face Redaction: This feature introduces enhanced privacy, offering users control over their visibility for a secure and personalised experience.
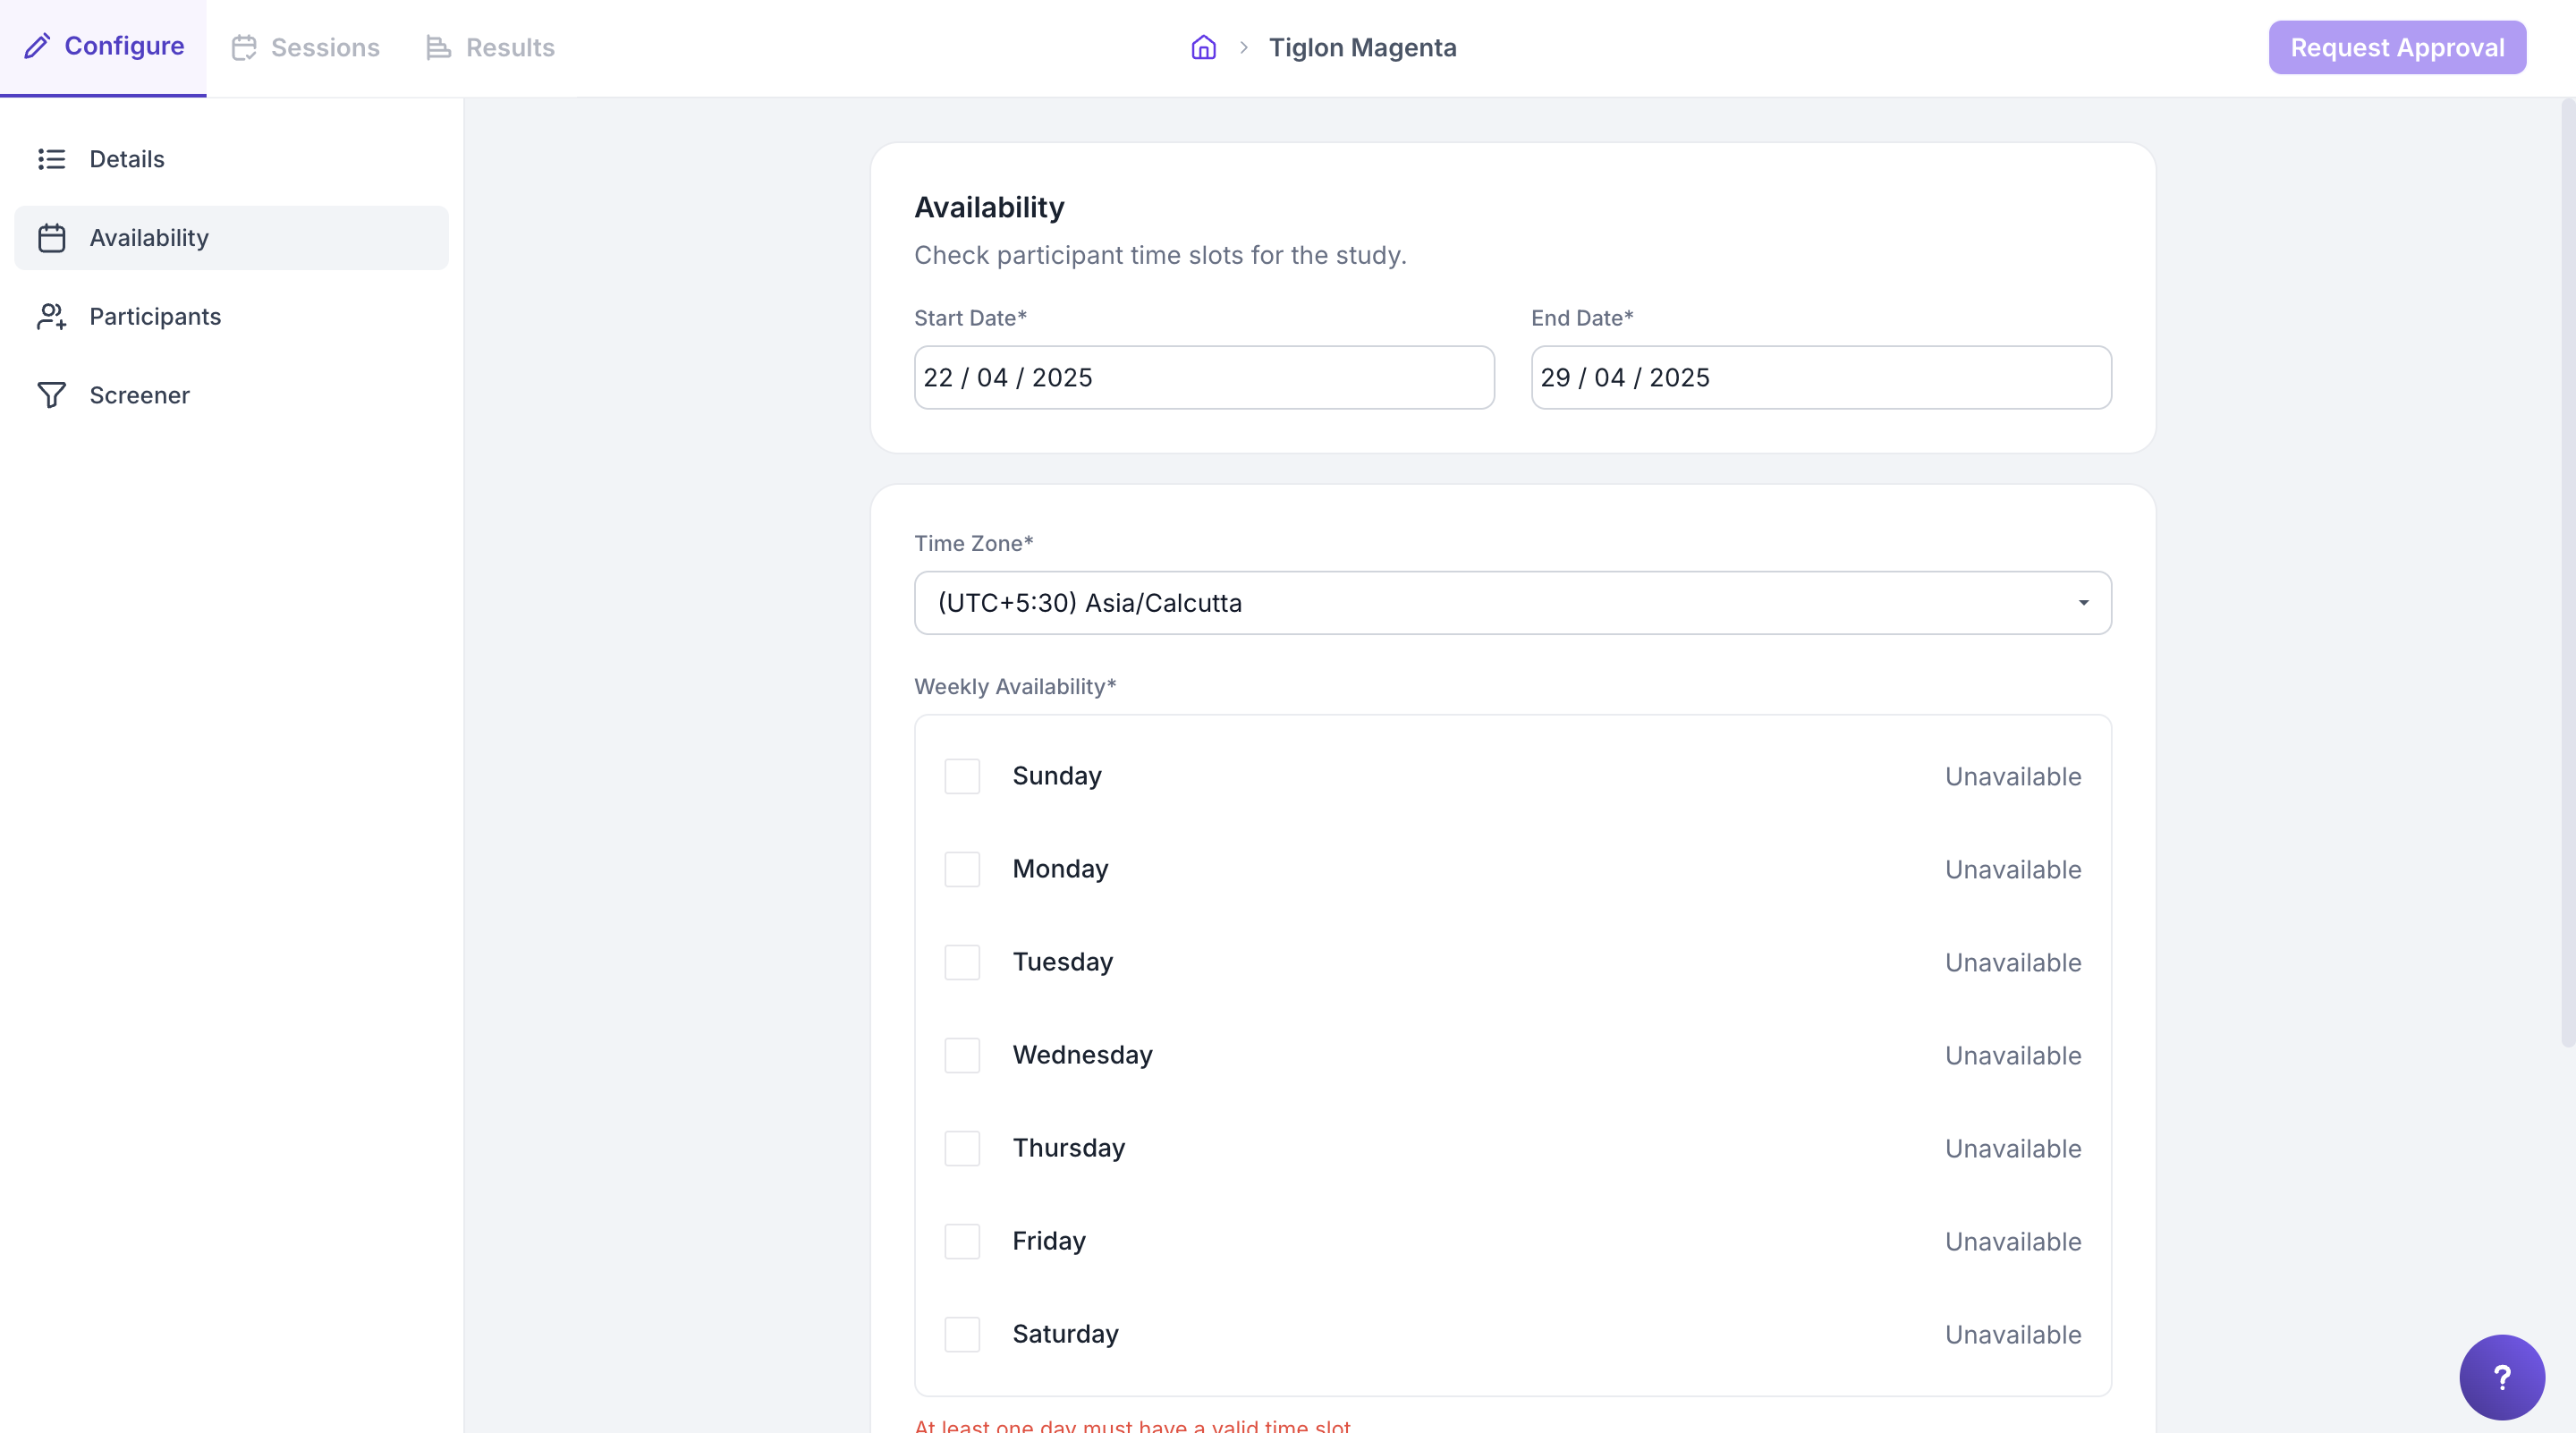
Availability
Set your availability by selecting the preferred dates, days, and time slots. These time slots will be visible to participants when they are booking a meeting, ensuring they can only choose from the times you’re available.
Participants
Invite participants by entering their email addresses. You can also customize the invitation email before sending it to ensure it aligns with your study’s tone and objectives.
Screener
Add screening questions to filter participants before they book a meeting slot. These questions help ensure that only qualified participants proceed to scheduling, based on your study requirements.
Step 5: Once you fill in the required details, click the "Publish" button to launch the study.
Step 6: Once the study is published, an invitation will be sent to the participant to schedule the meeting.
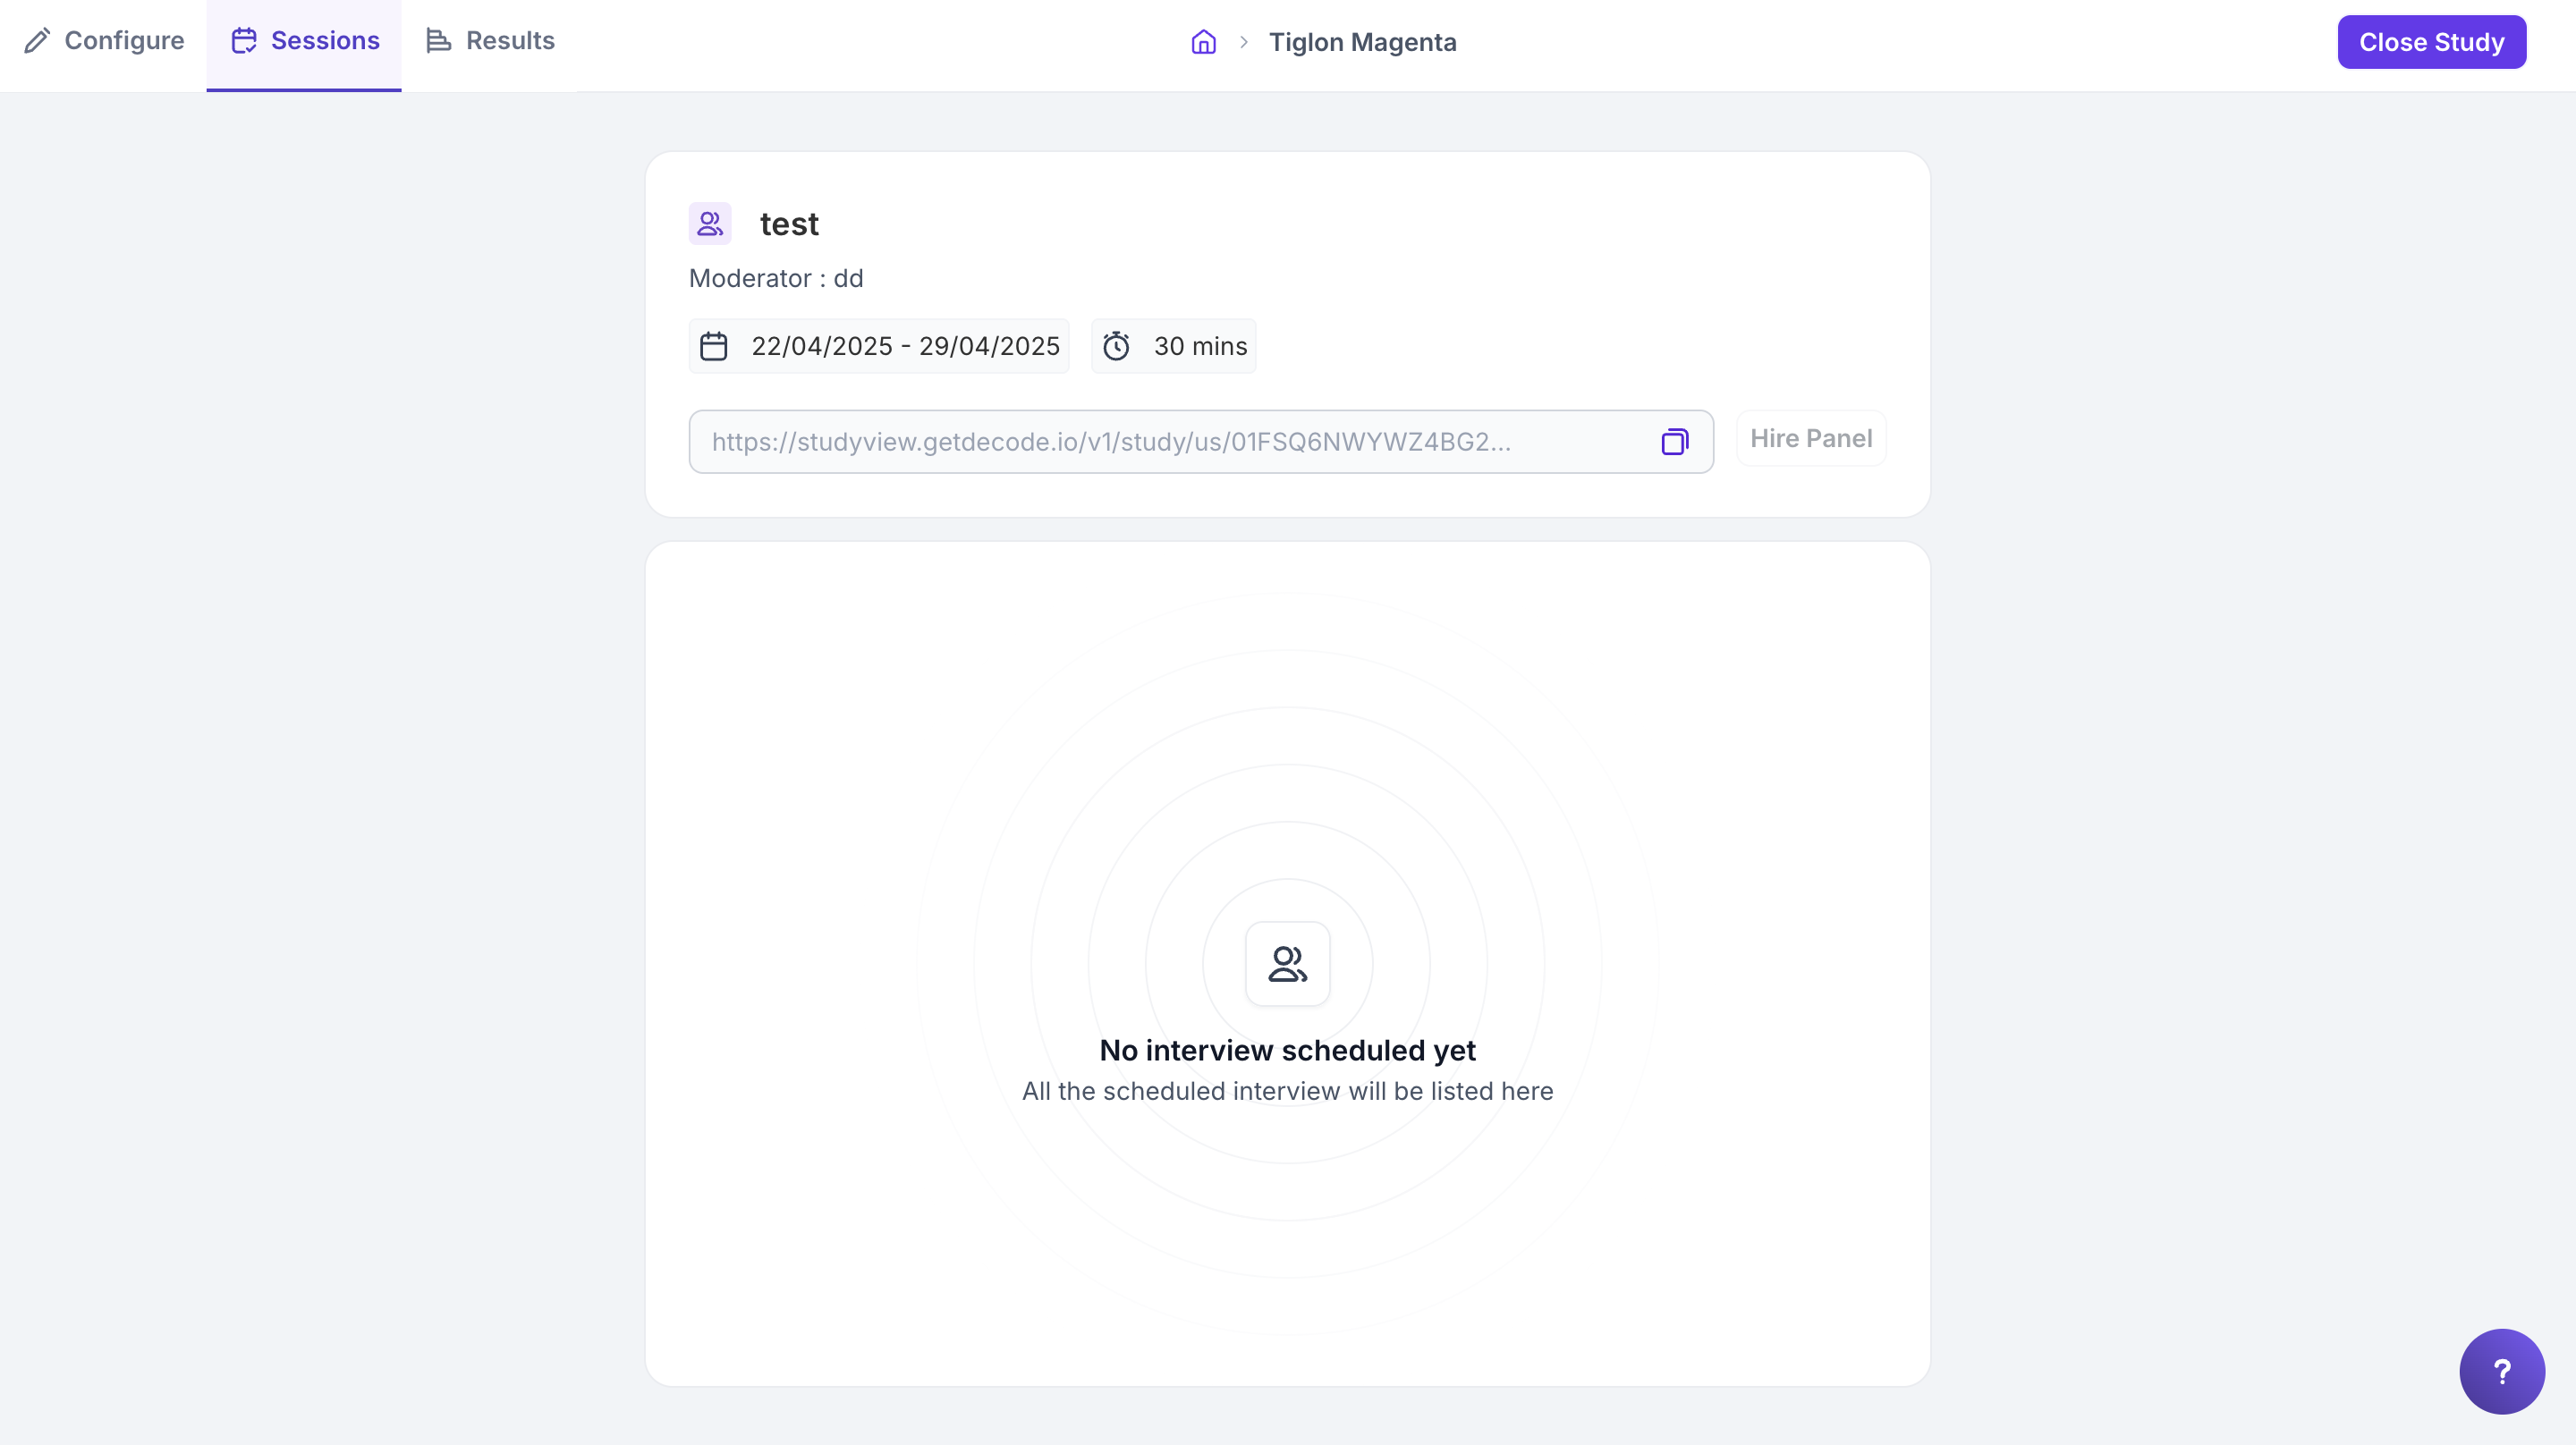
Step 7: After publishing the study, you will automatically be directed to the session tab, where you will find the Meeting URLS for sharing the meetings.