Setting up a Media Block
Overview
This page covers how to add and configure a Media Block in Decode. The setup process is the same for both block types ( YouTube and Vimeo / Local File ). The difference is in how the media is added, either by uploading a file from your device or by pasting a public video link.
Steps to setup the Media Study
Step 1: Add the Block
In the study configuration screen, click the + icon in the left panel to open the block selection panel. Under the Media section, select either Local File or YouTube and Vimeo depending on the type of media you want to add.
Step 2: Add Your Media
The next step depends on which block type you selected.
Local File
Click the upload area or drag and drop your file into the block. The file will be embedded and previewed once uploaded. You can rename the media title for clarity. To replace the file, click Reset File and upload a new one.
File upload limits
Maximum file size: 200 MB. Maximum files per block: 1. Supported formats: MP4, MOV, JPG and PNG.
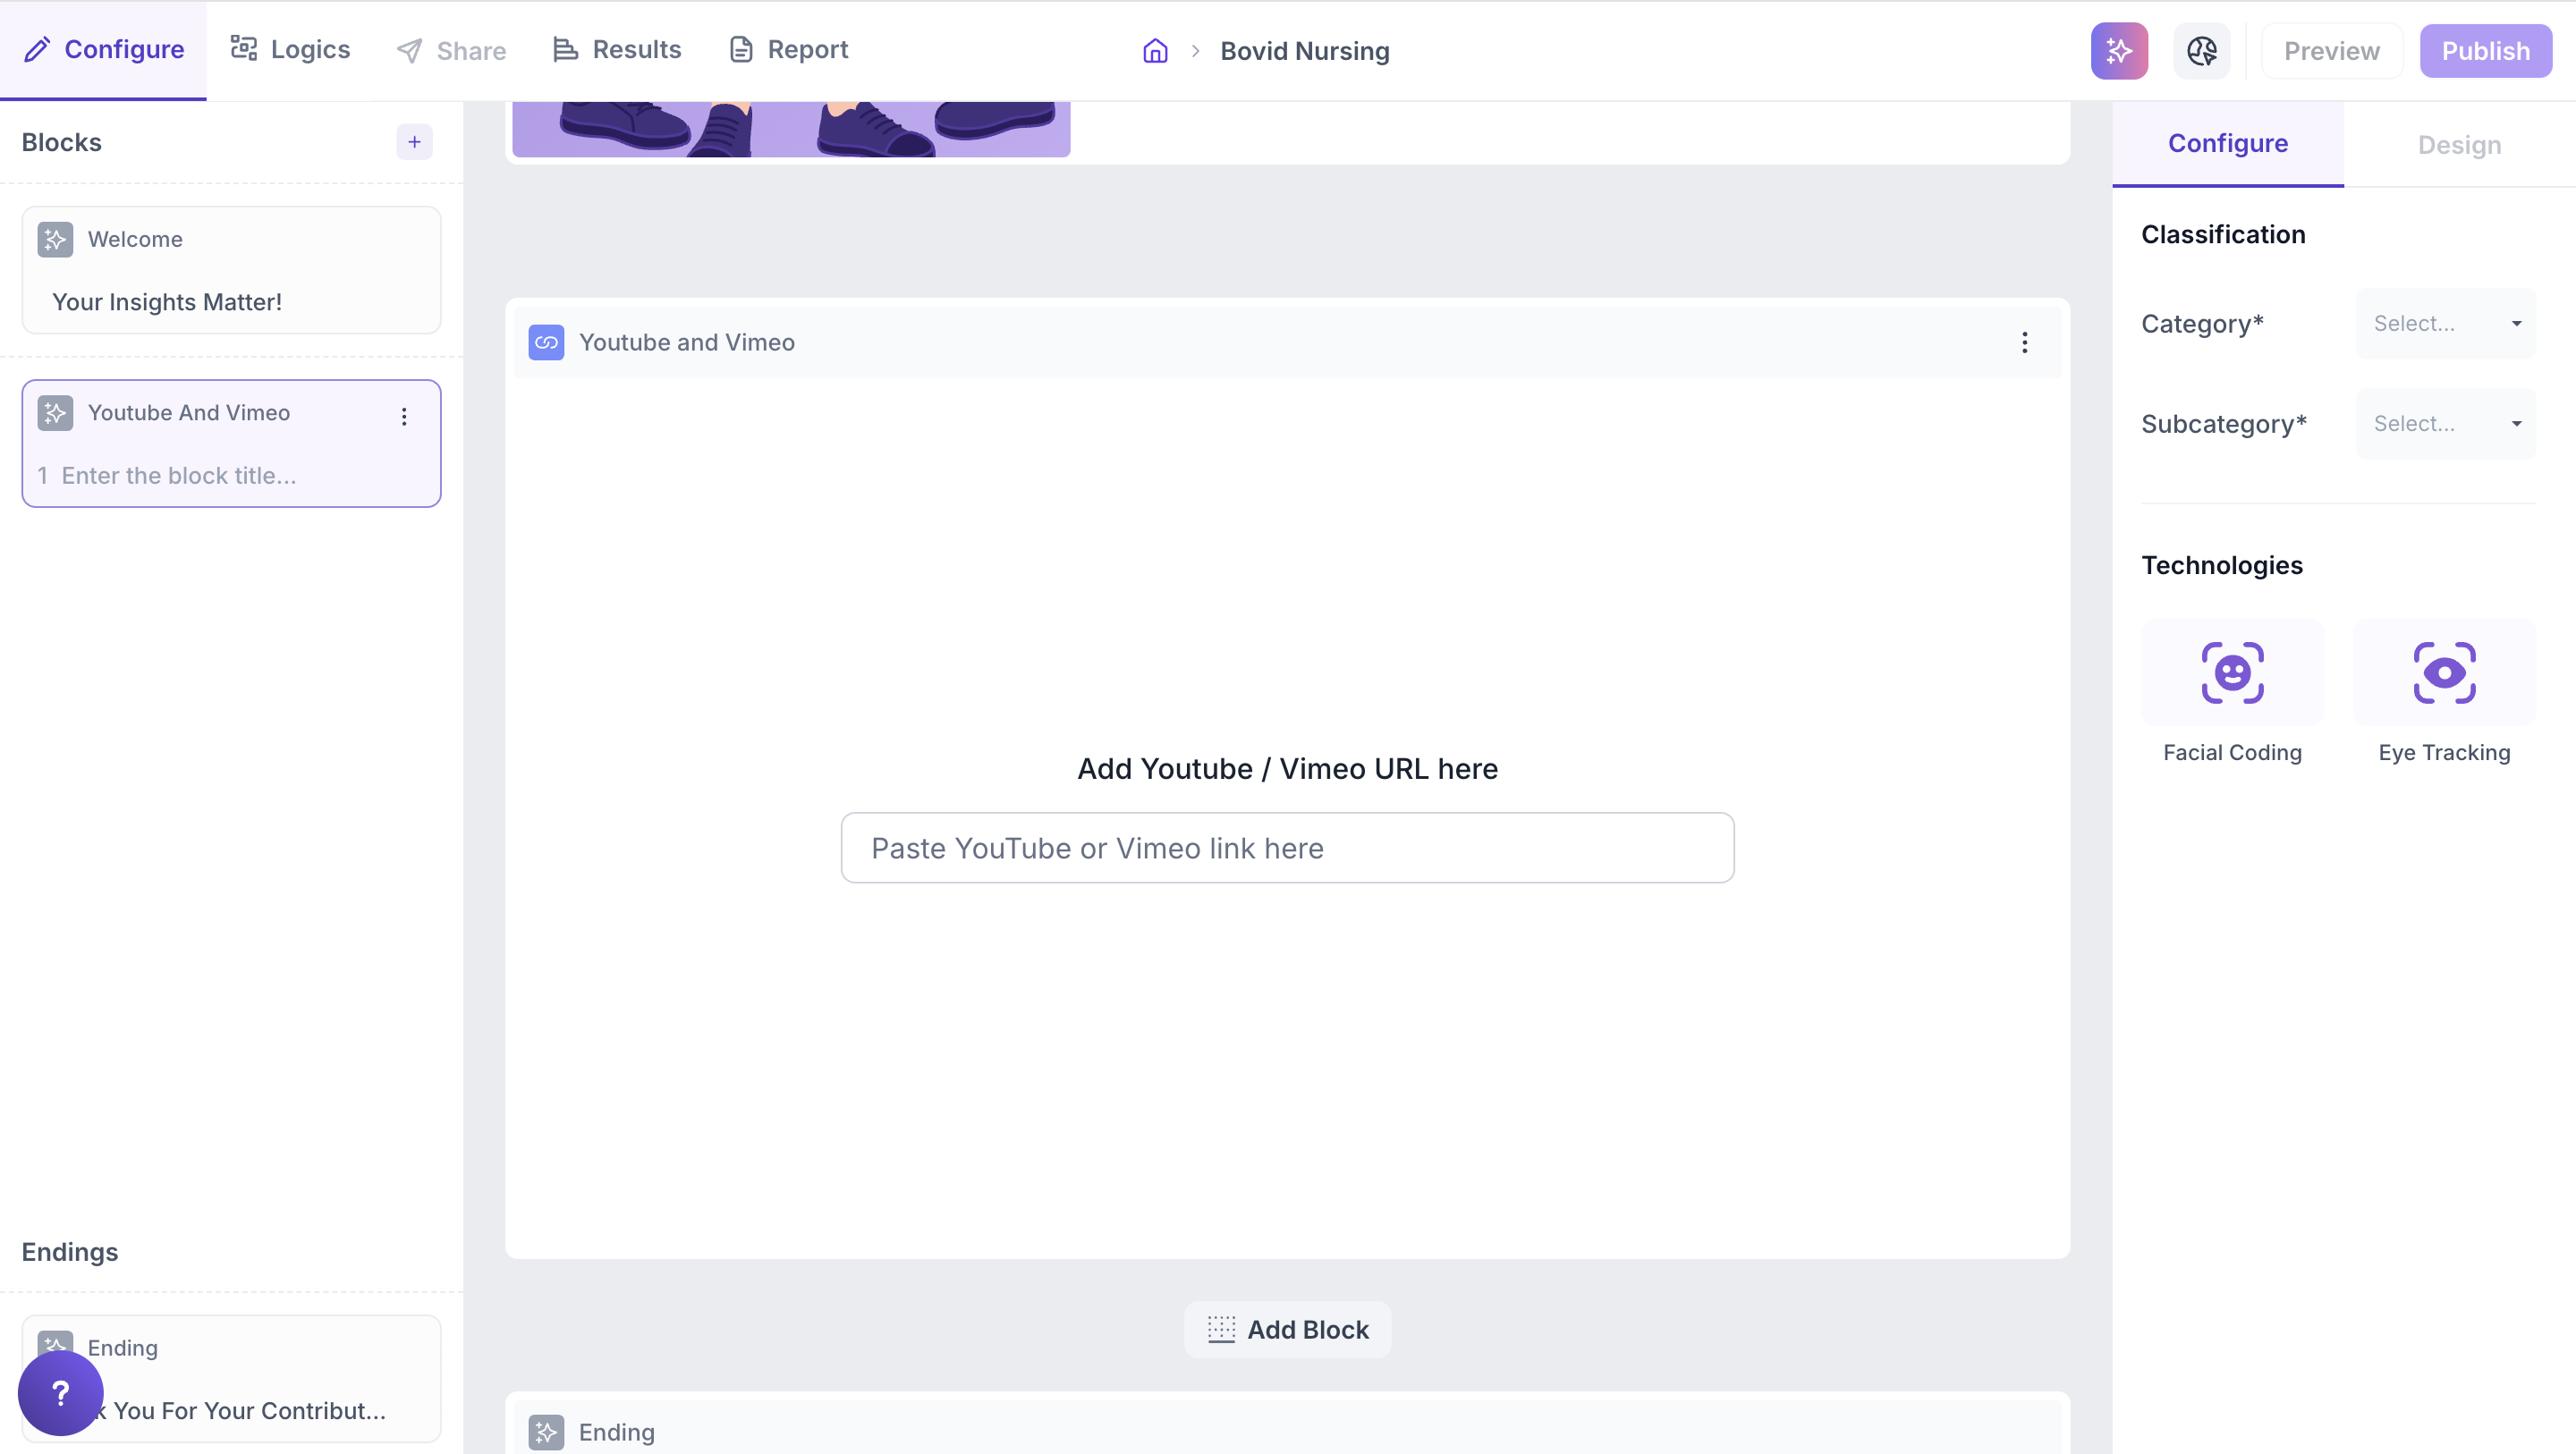
YouTube and Vimeo
Paste the public video URL into the URL field. The video will be automatically processed and a preview will appear once the link is validated. You can edit the video title as needed. To replace the video, click Reset File Link and enter a new URL.
Note
If the video is private or embedding is restricted by the platform, an error message will be shown and the video will not load for participants.
Properties
Both block types share the same configuration options in the right side Properties panel.
Category: Classify the media under a broader group. This is used to benchmark the media's performance against other content in the same category such as TV ads, product demos or UI walkthroughs. Click the dropdown and select the relevant category.
Subcategory: Further refine the classification for more specific comparisons. Select the appropriate subcategory from the dropdown.
Tracking Technology: Select how you want to track participant behaviour while they view the media. You can enable one or both options.
- Facial Coding: Tracks facial expressions to identify emotional responses such as happiness, surprise, anger and more. Requires the participant's camera to be enabled
- Eye Tracking: Monitors eye movement and gaze to understand which parts of the media received the most visual attention

Adding Follow Up Questions
After adding a Media Block, you can add follow up questions directly below it. Use question types such as rating scales, multiple choice or open ended text to capture participant reactions immediately after they view the media.
If you need to control the flow based on which media a participant viewed or how they responded, set up conditions in the Logics tab at the top of the screen.