
Setting Up a Qualitative Study
Setting Up a Qualitative Study
This article explains how to create and configure a Qualitative Study in Decode. A Qualitative Study lets you run live moderated sessions with participants and analyse the recordings in one place.
SETUP
Step 1: Create a New Study
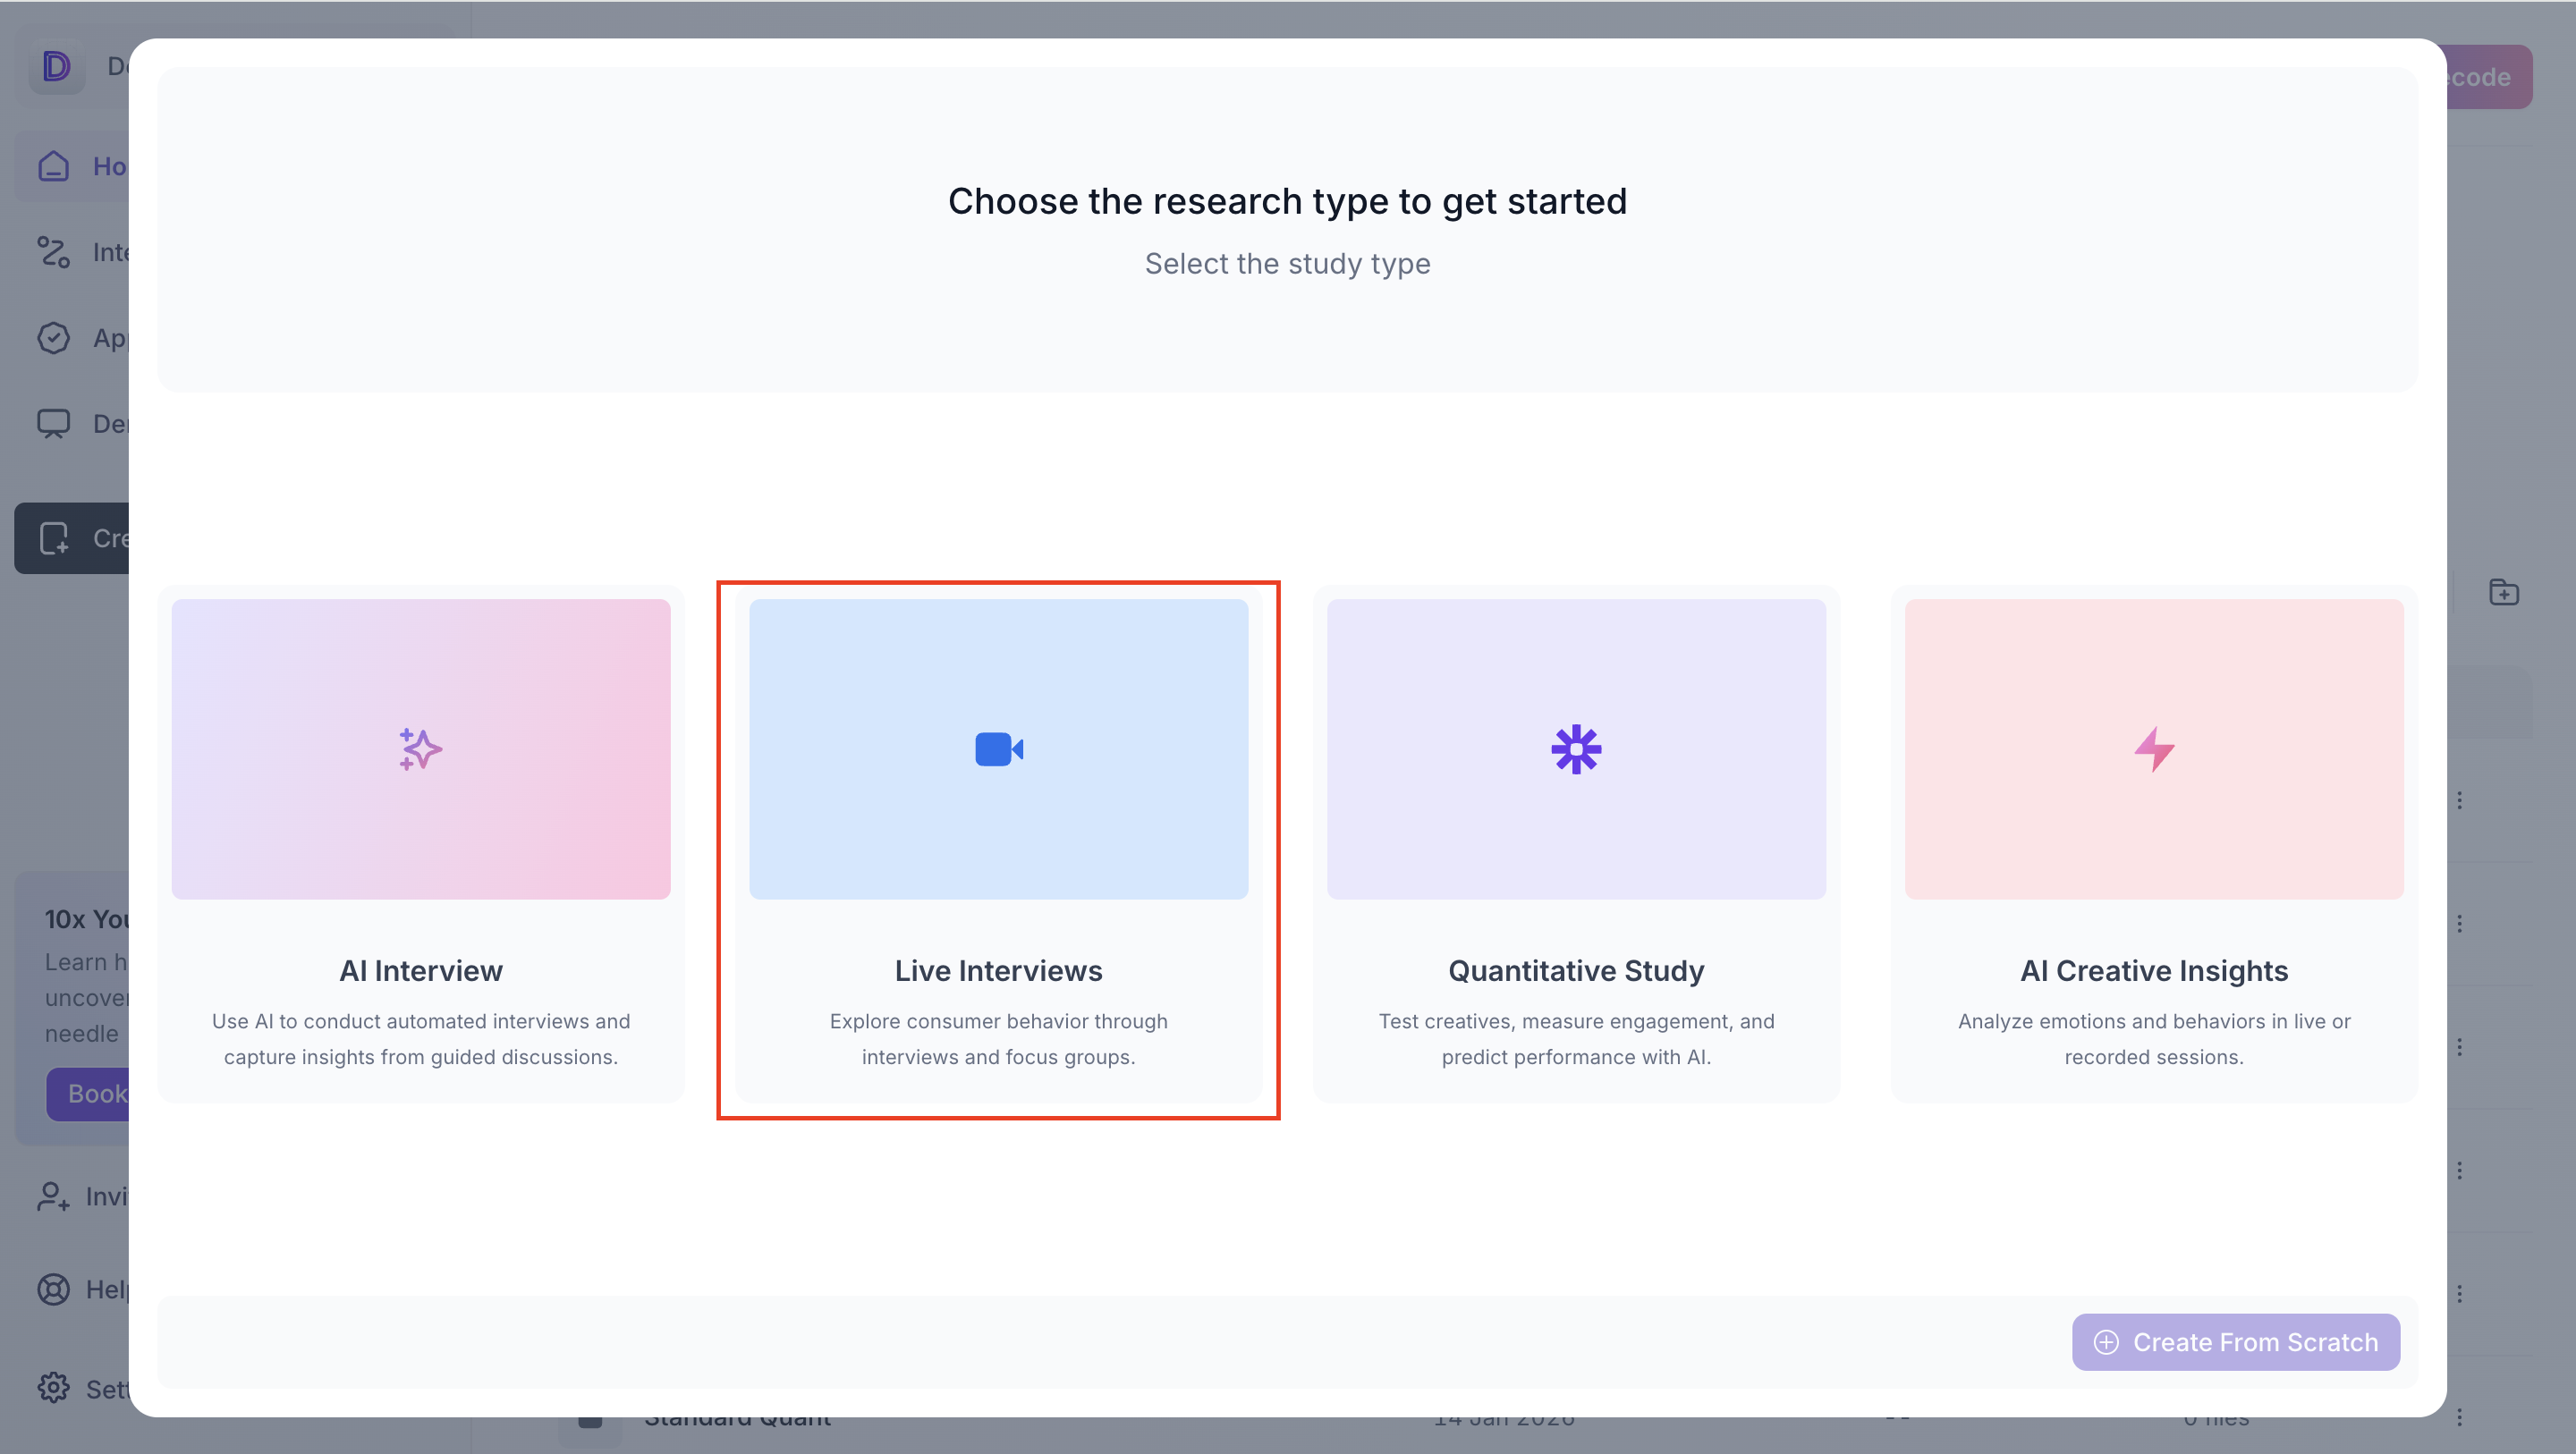
From the Decode dashboard, click Create New Study and select Live Interviews. You will land on the Configure view with four sections in the left navigation: Details, Availability, Participants, and Screener.
Step 2: Fill In Meeting Details
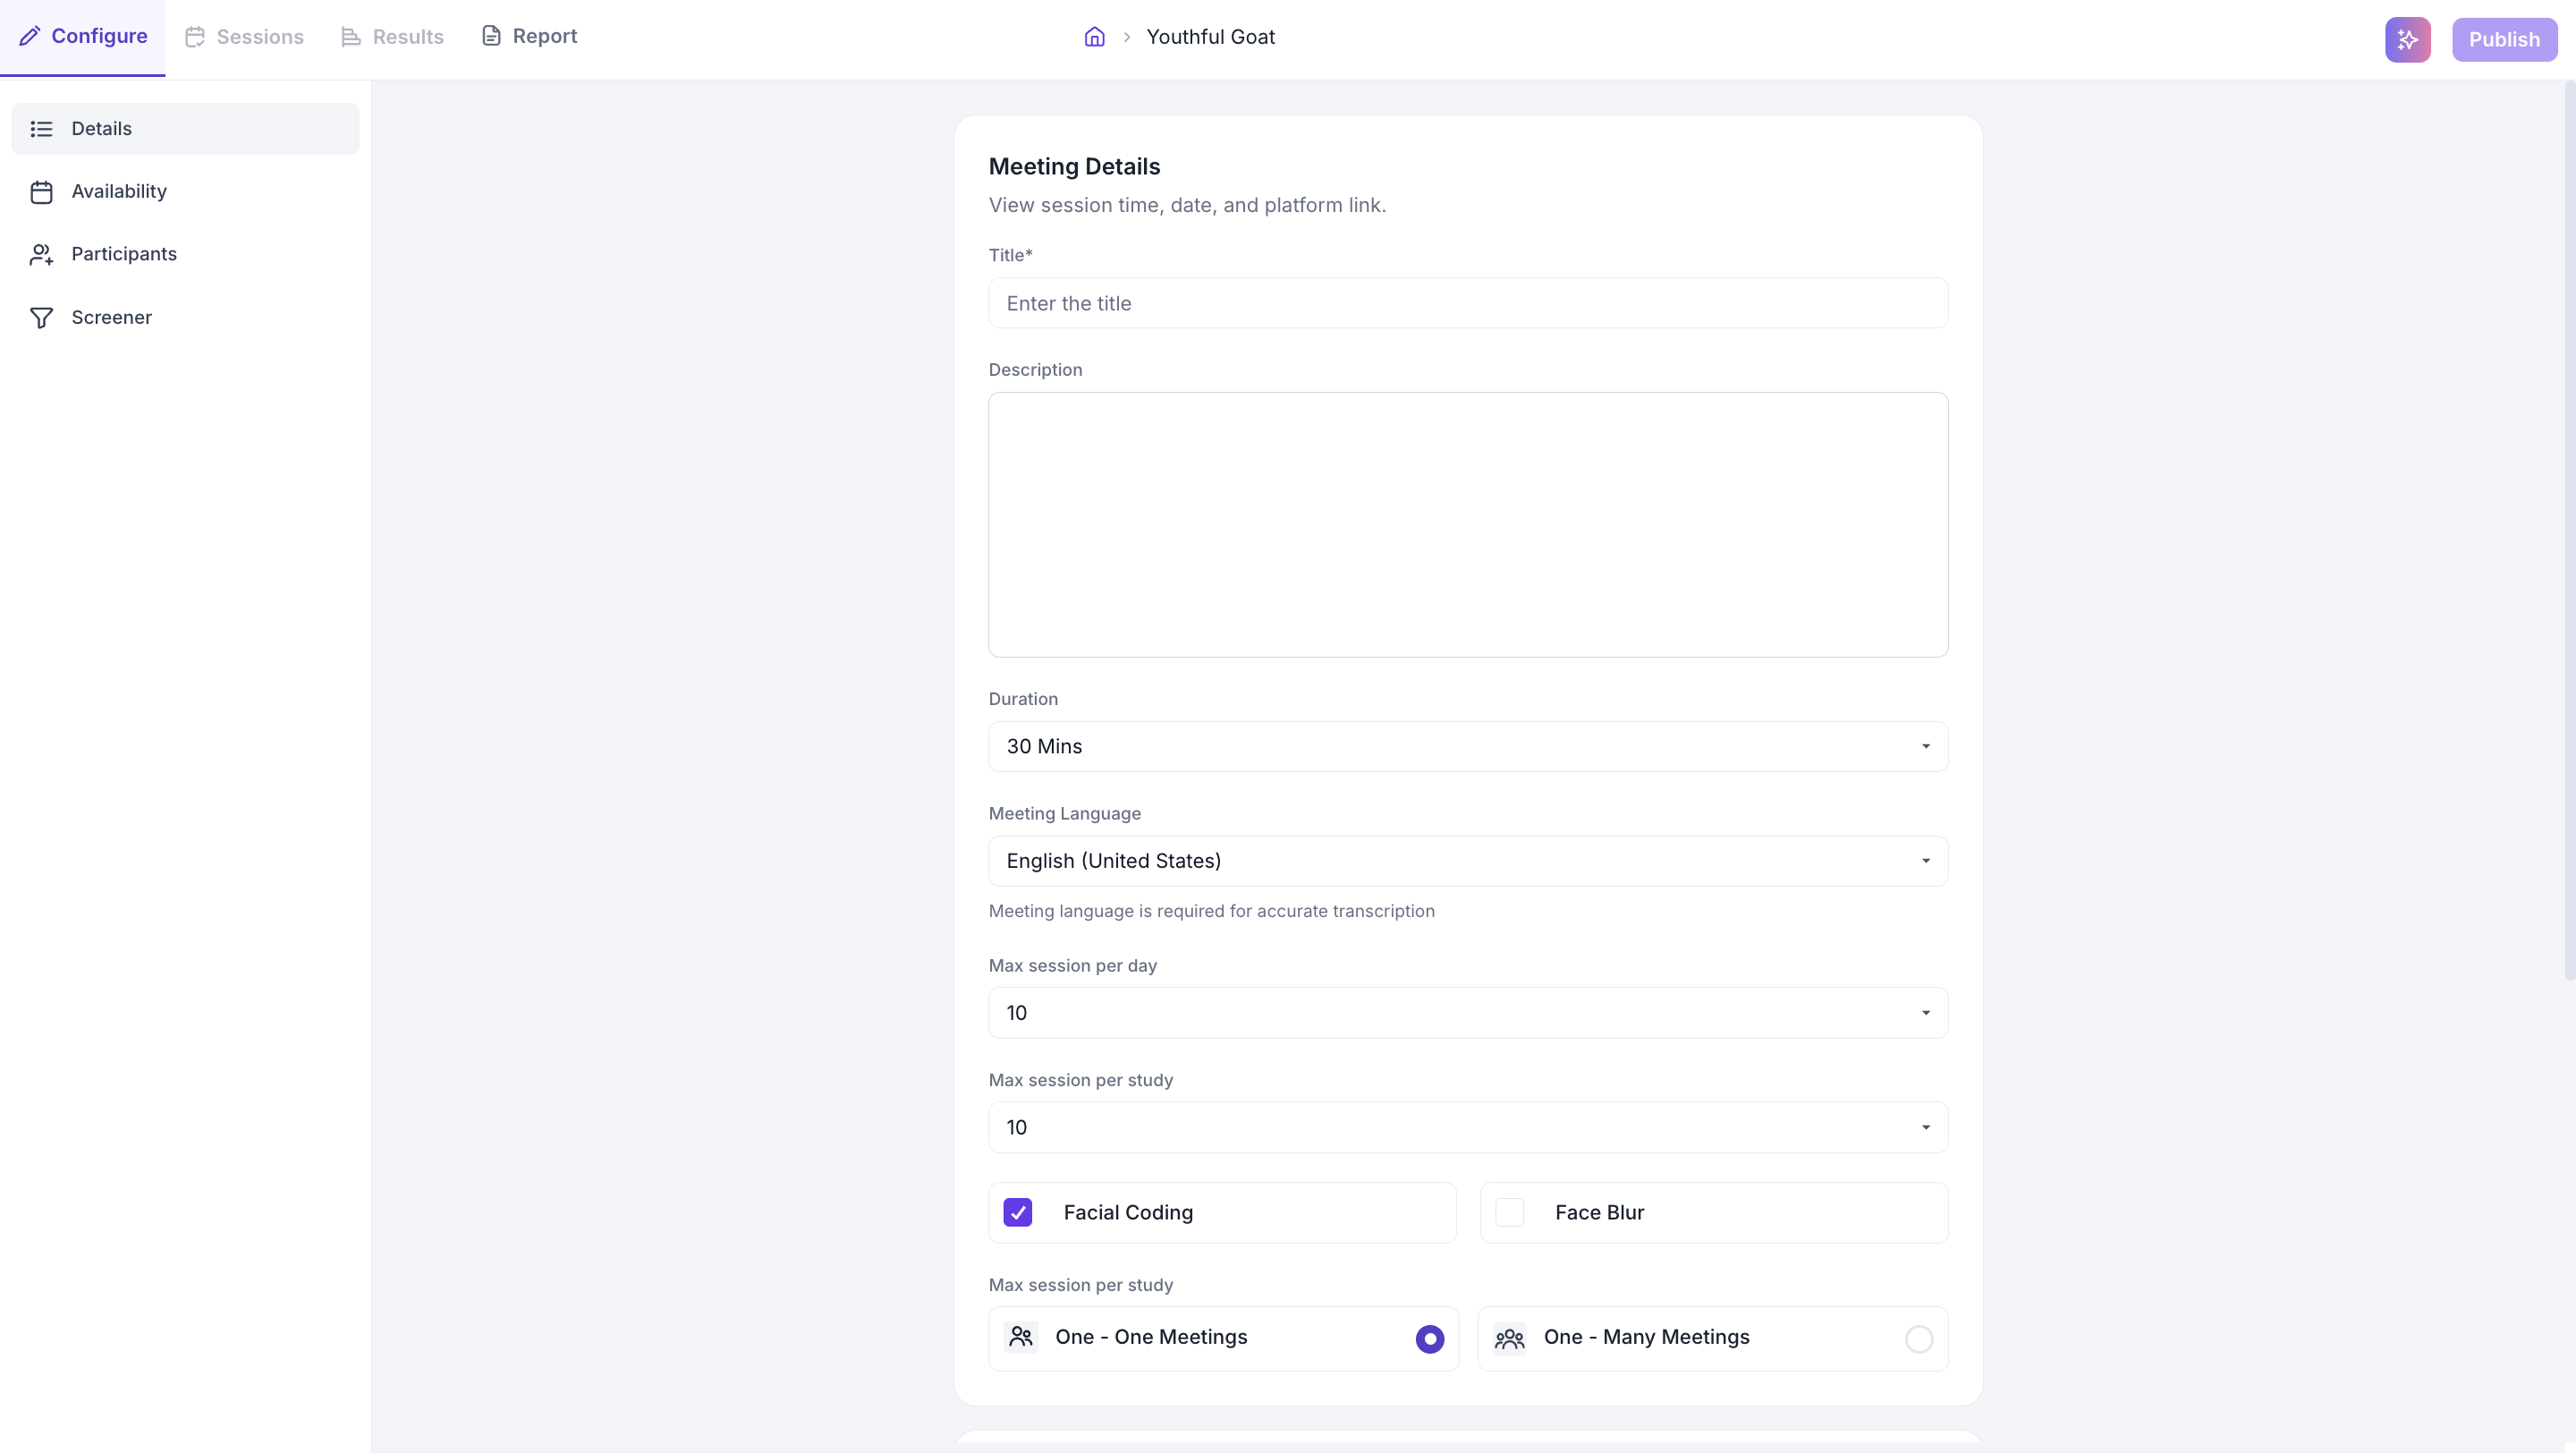
Title and Description
Give your study a clear title. The description is optional but helps participants understand what to expect before the session.
Duration
Select the session length from the dropdown. The default is 30 minutes.
Meeting Language
Select the language spoken in sessions. This is used for auto-transcription.
Session Limits
Max Sessions per Day - The maximum number of sessions that can be booked on any single day.
Max Sessions per Study - The total number of participants who can book a session using the study link.
Technologies
Facial Coding - Captures emotional data from participant faces during live sessions.
Face Blur - Blurs participant faces in the recording. Enable this if participants have requested anonymity.
Session Format
One-on-One Meetings - The moderator conducts individual sessions with each participant.
One-to-Many Meetings - The moderator runs a session with multiple participants at the same time, such as a group discussion. A maximum of 5 participants can join a single session.
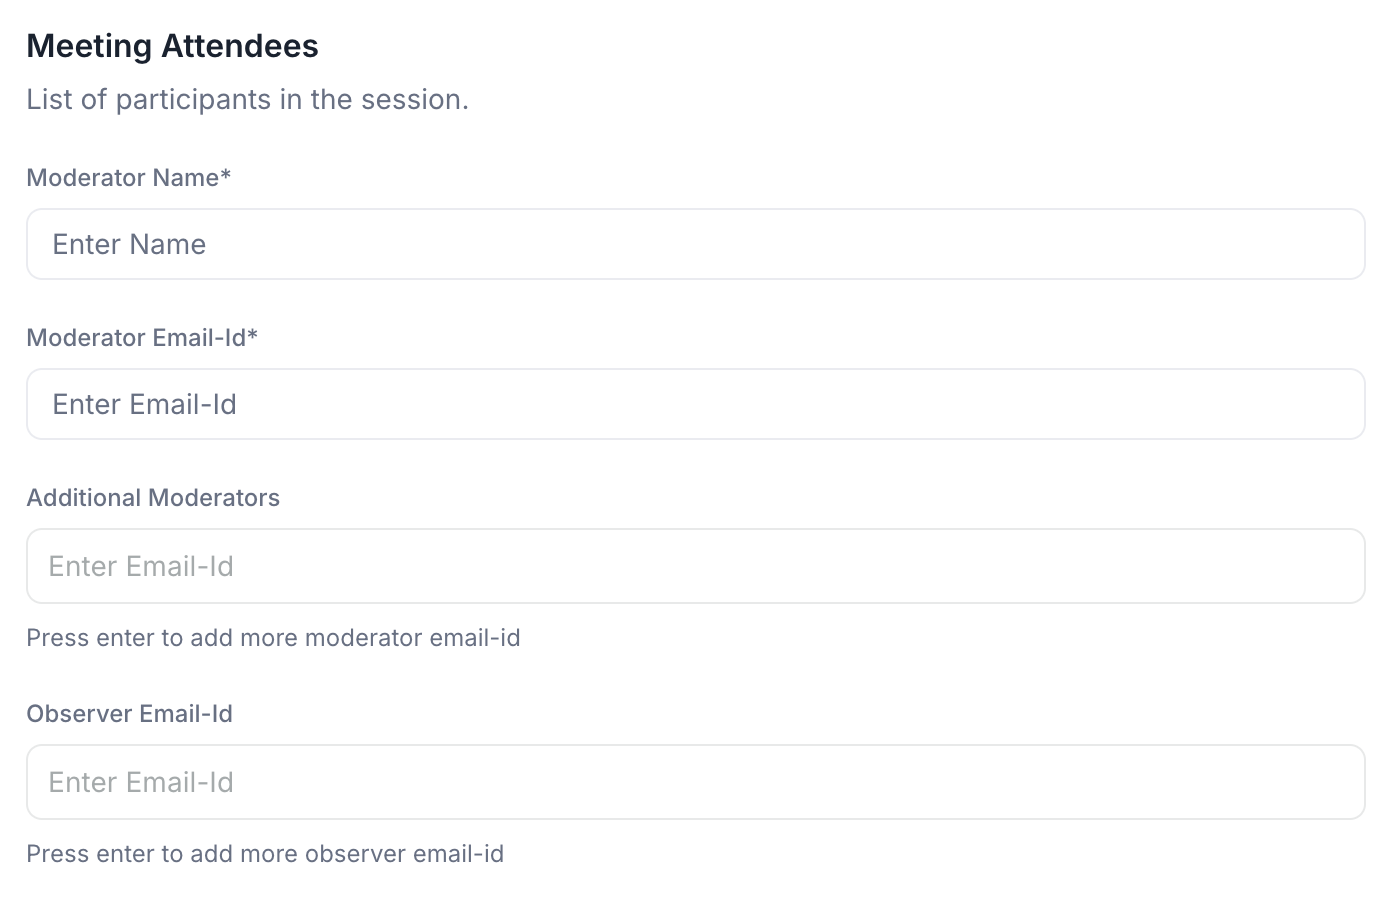
Meeting Attendees
Scroll down within the Details section to add attendees.
- Moderator Name and Email (required): The moderator leads the session and receives a dedicated join link.
- Additional Moderators (optional): Enter each email address and press Enter to add more than one moderator.
- Observer Email ID (optional): Observers can watch the session without participating. Enter each email and press Enter to add multiple observers.
Step 3: Set Availability
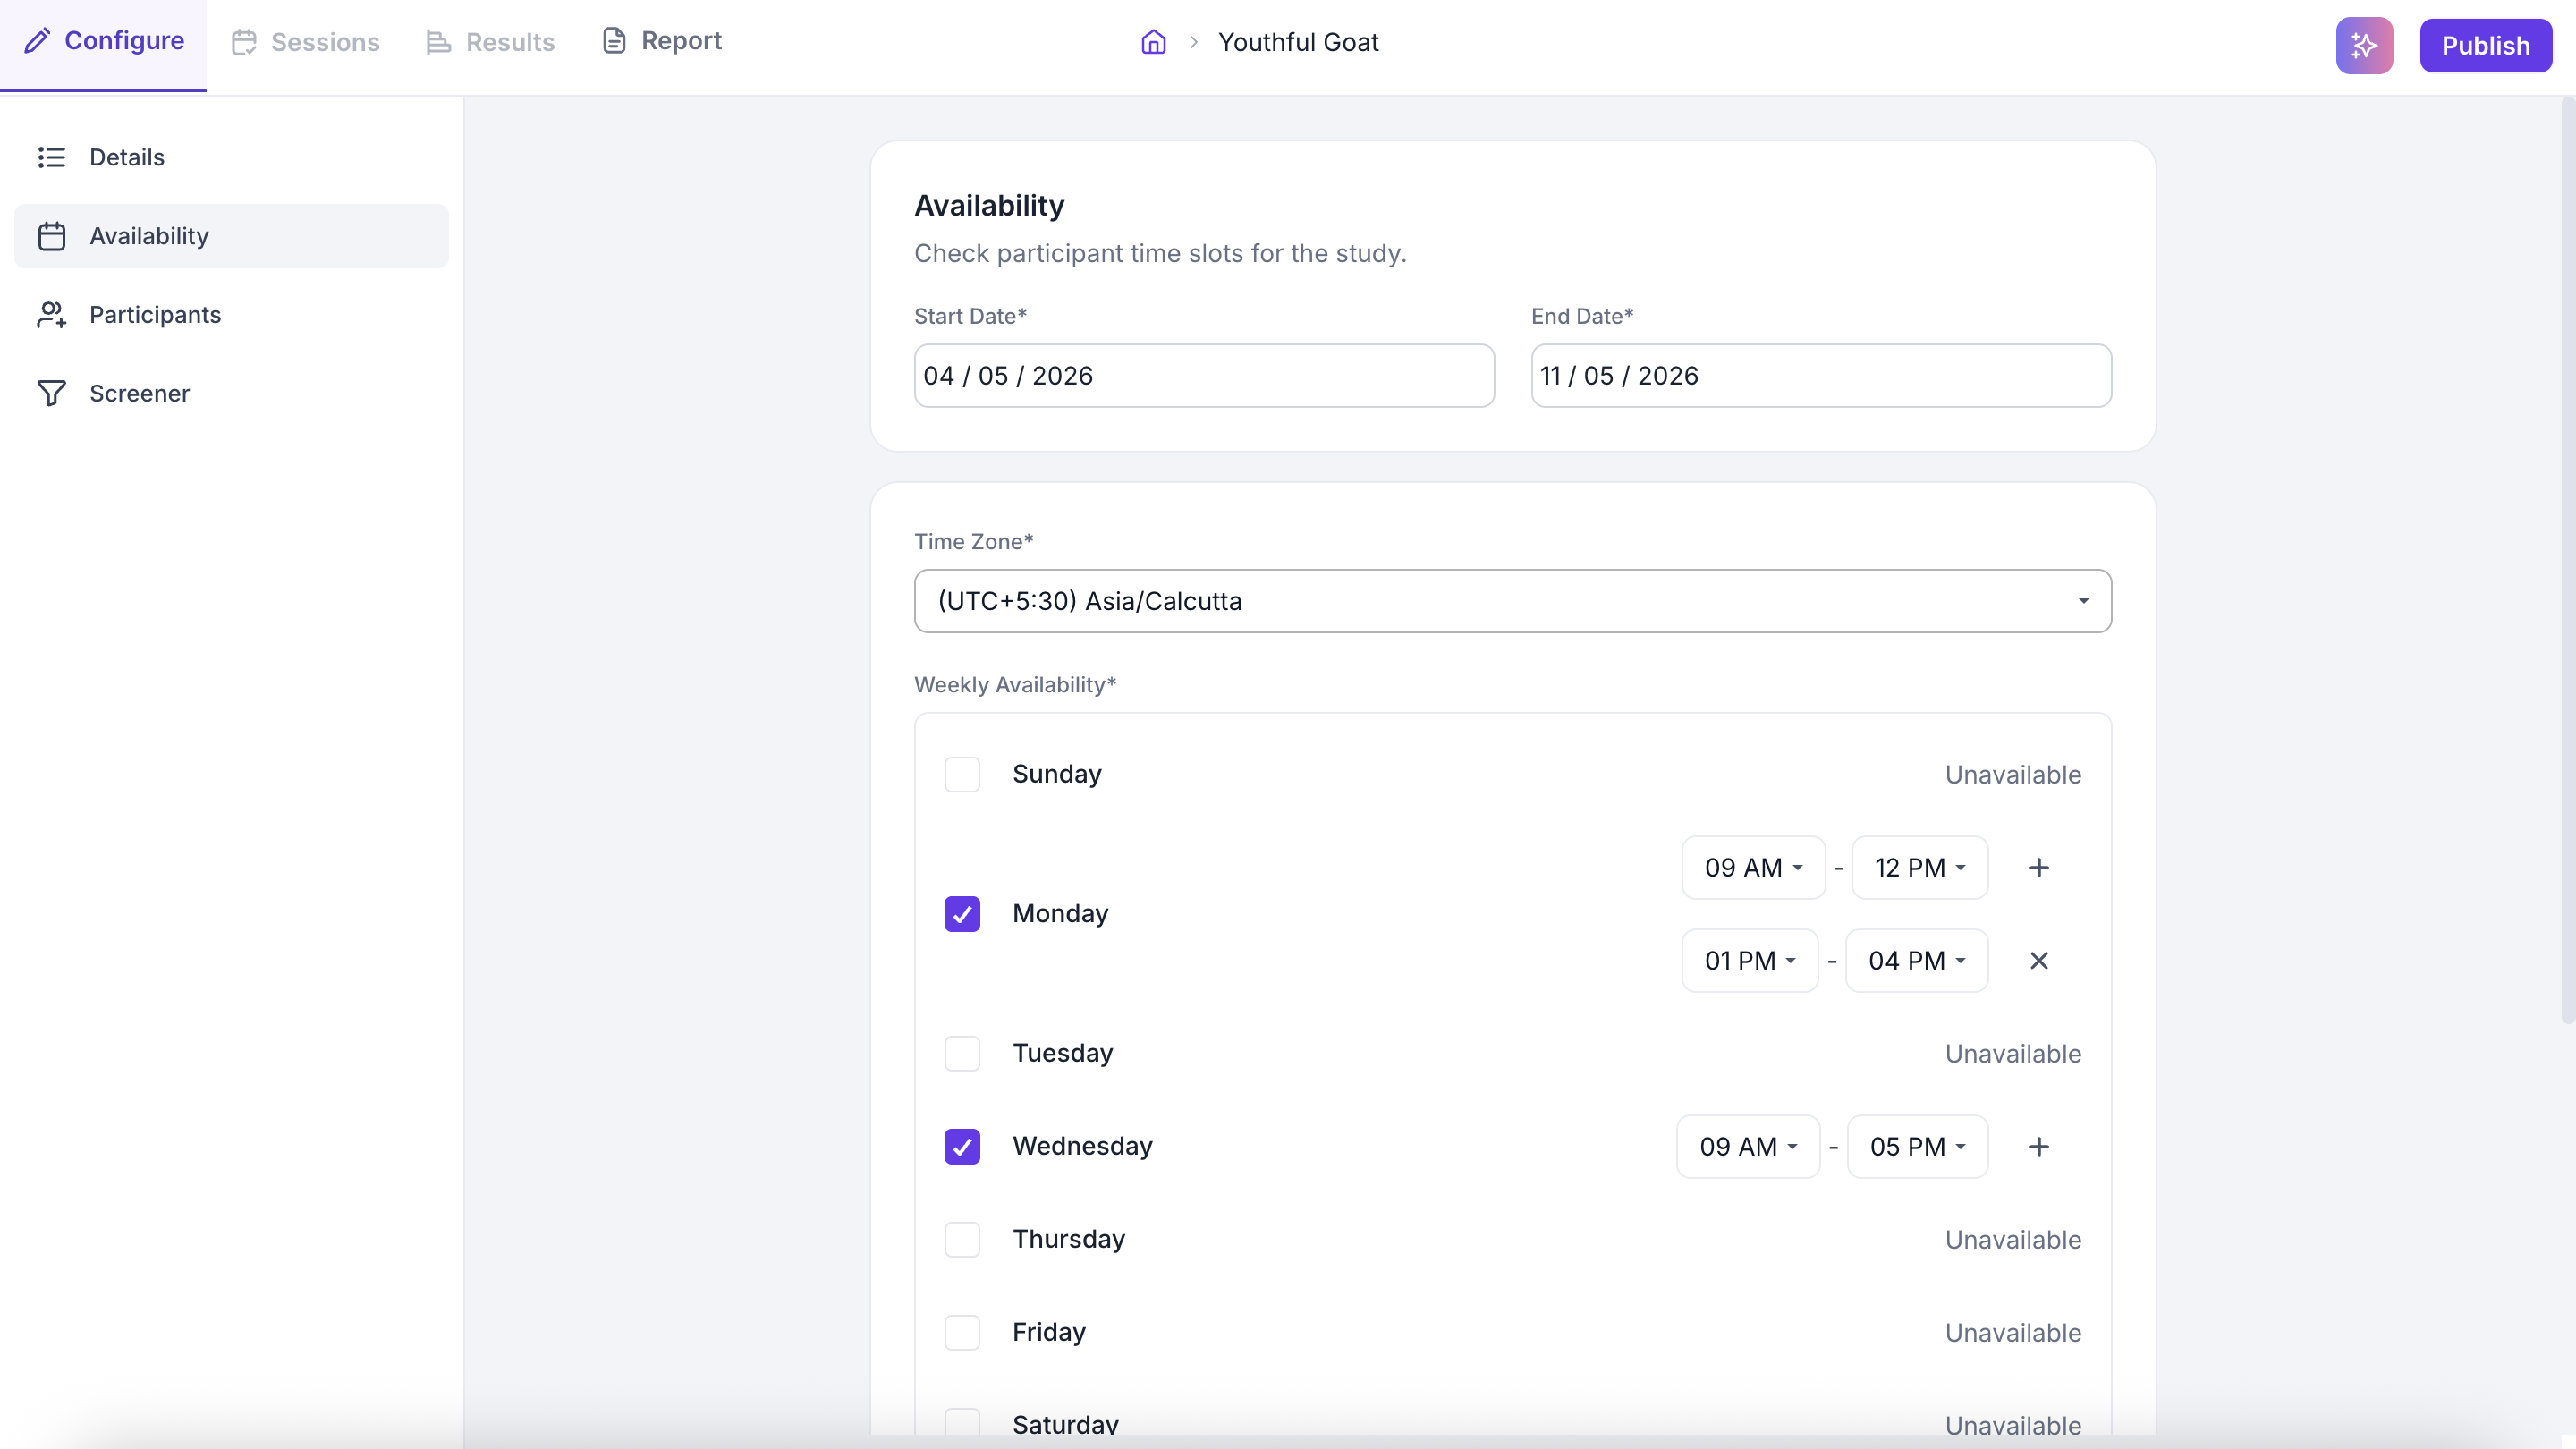
Go to the Availability section to set when participants can book sessions.
- Start Date and End Date: This is the date range of the study itself, not when participants book. Participants book within whatever slots are available inside this range. So:
- Start Date and End Date: Set the date range for the study. Sessions can only be scheduled within these dates.
- Time Zone: Select your time zone. Participants will see available slots in their own local time zone.
- Weekly Availability: Select the days you are available each week and set the time window for each day. Use the + button to add multiple time slots on the same day. Days left unchecked are not available for booking.
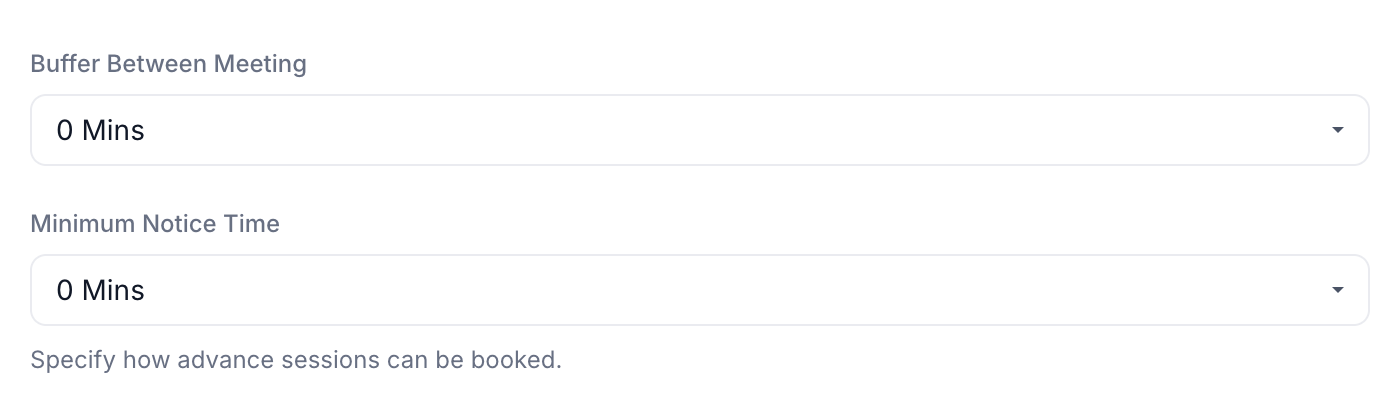
- Buffer Between Meetings: Set a gap between sessions. For example, a 15-minute buffer gives you time between consecutive sessions.
- Minimum Notice Time: Set how much advance notice you need before a session can be booked. For example, setting 24 hours means participants cannot book a session starting within the next 24 hours.
Step 4: Add Participants
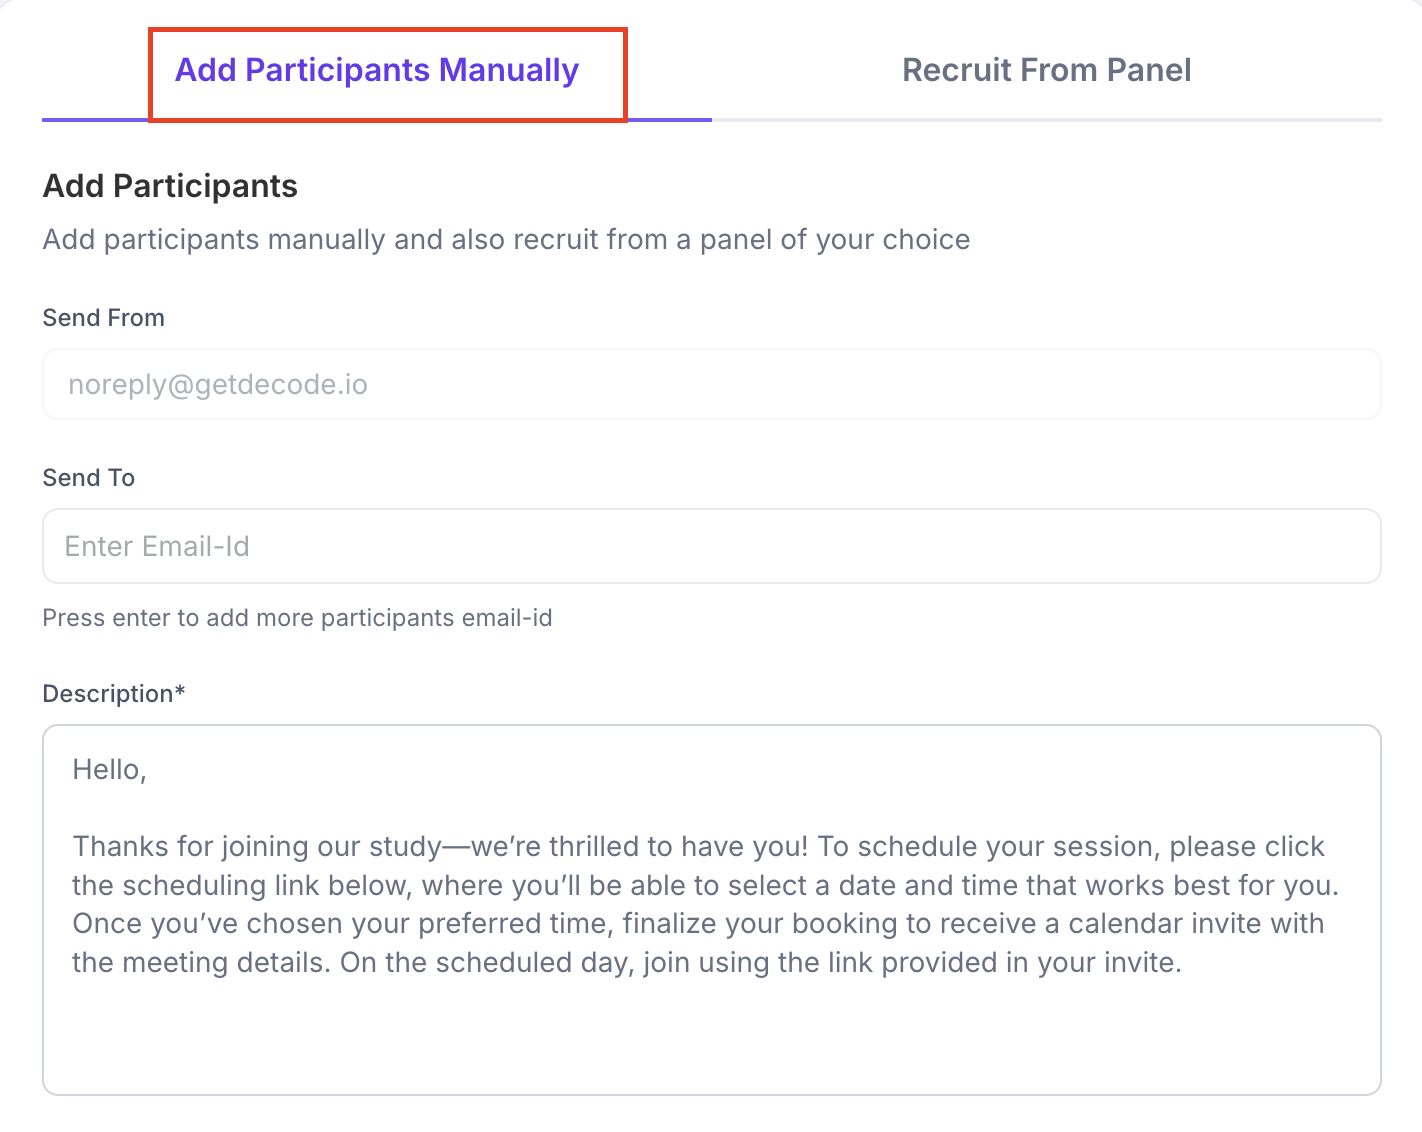
Add Participants Manually
Enter participant email addresses in the Send To field and press Enter after each one. Participants receive an invitation email from noreply@getdecode.io with a link to schedule their session. The invitation message is pre-filled but can be edited before sending.
Step 5: Configure the Screener
The Screener lets you add qualification questions so only eligible participants can book a session. Two pages are included by default.
- Welcome Page - Shown to all participants when they open the study link. The title and description are editable.
- Screenout Page - Shown to participants who do not meet your criteria. The default message is "Sorry, you are screened out!" and can be customised.
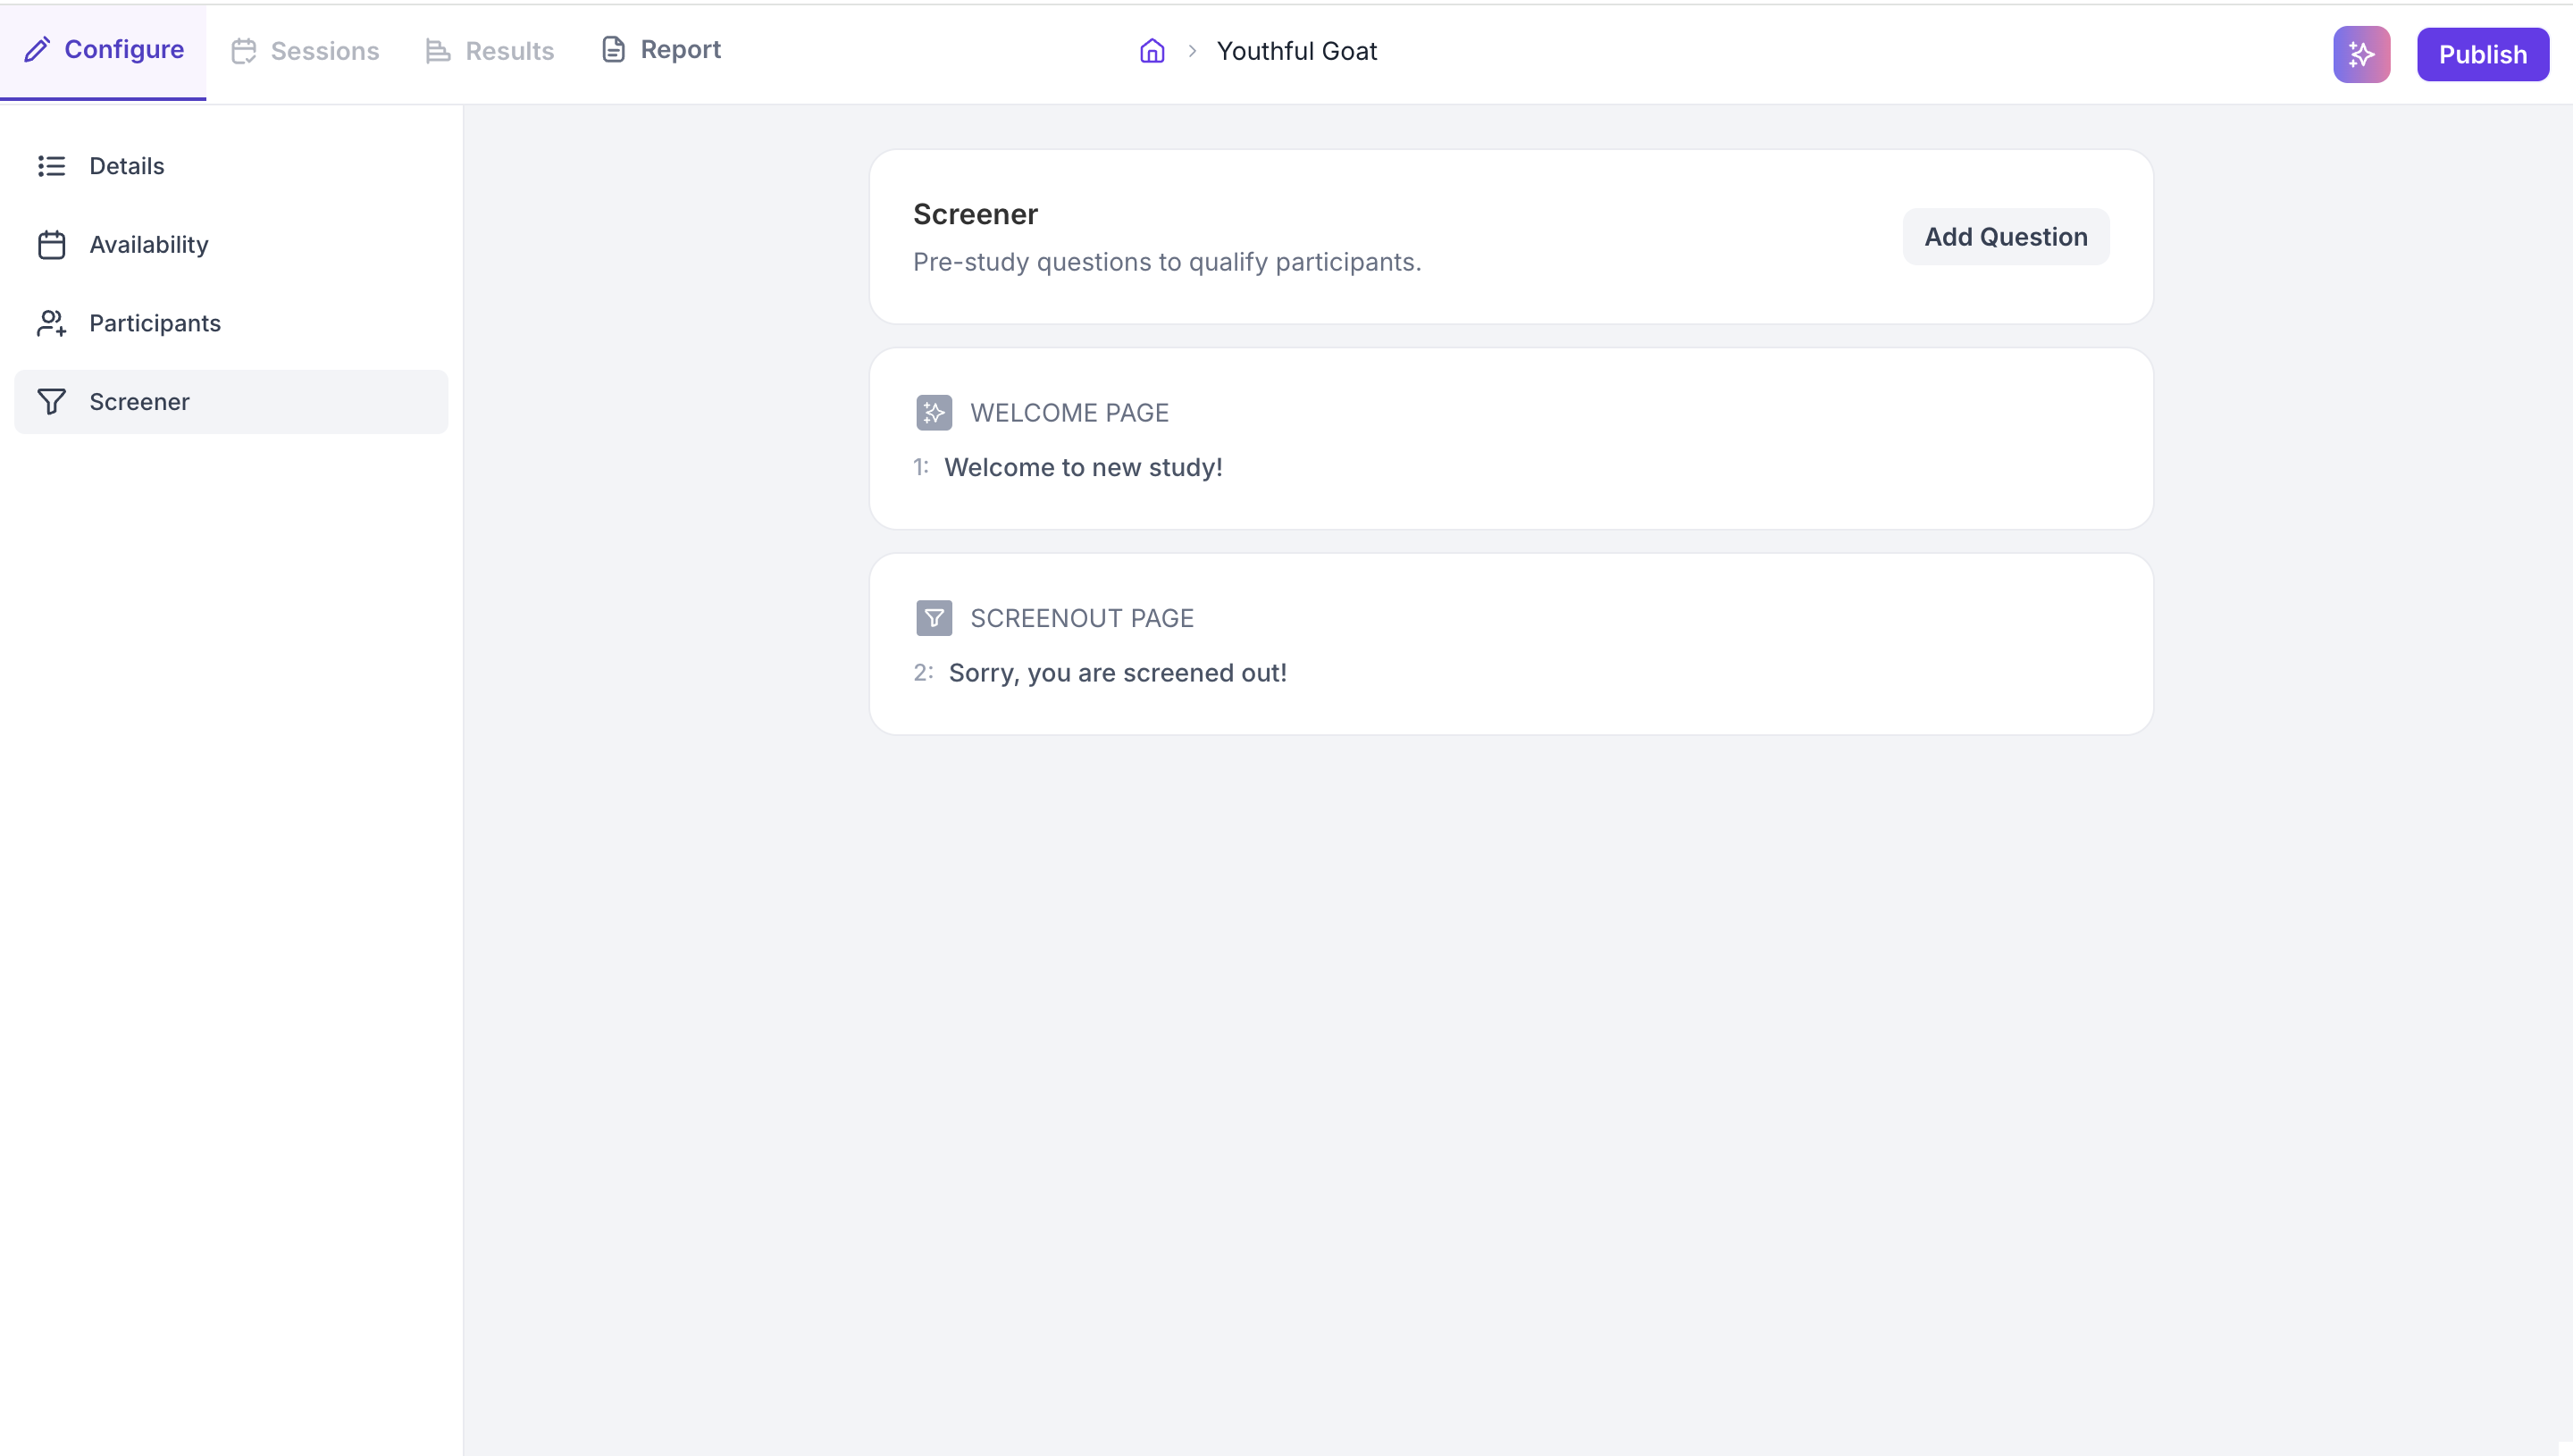
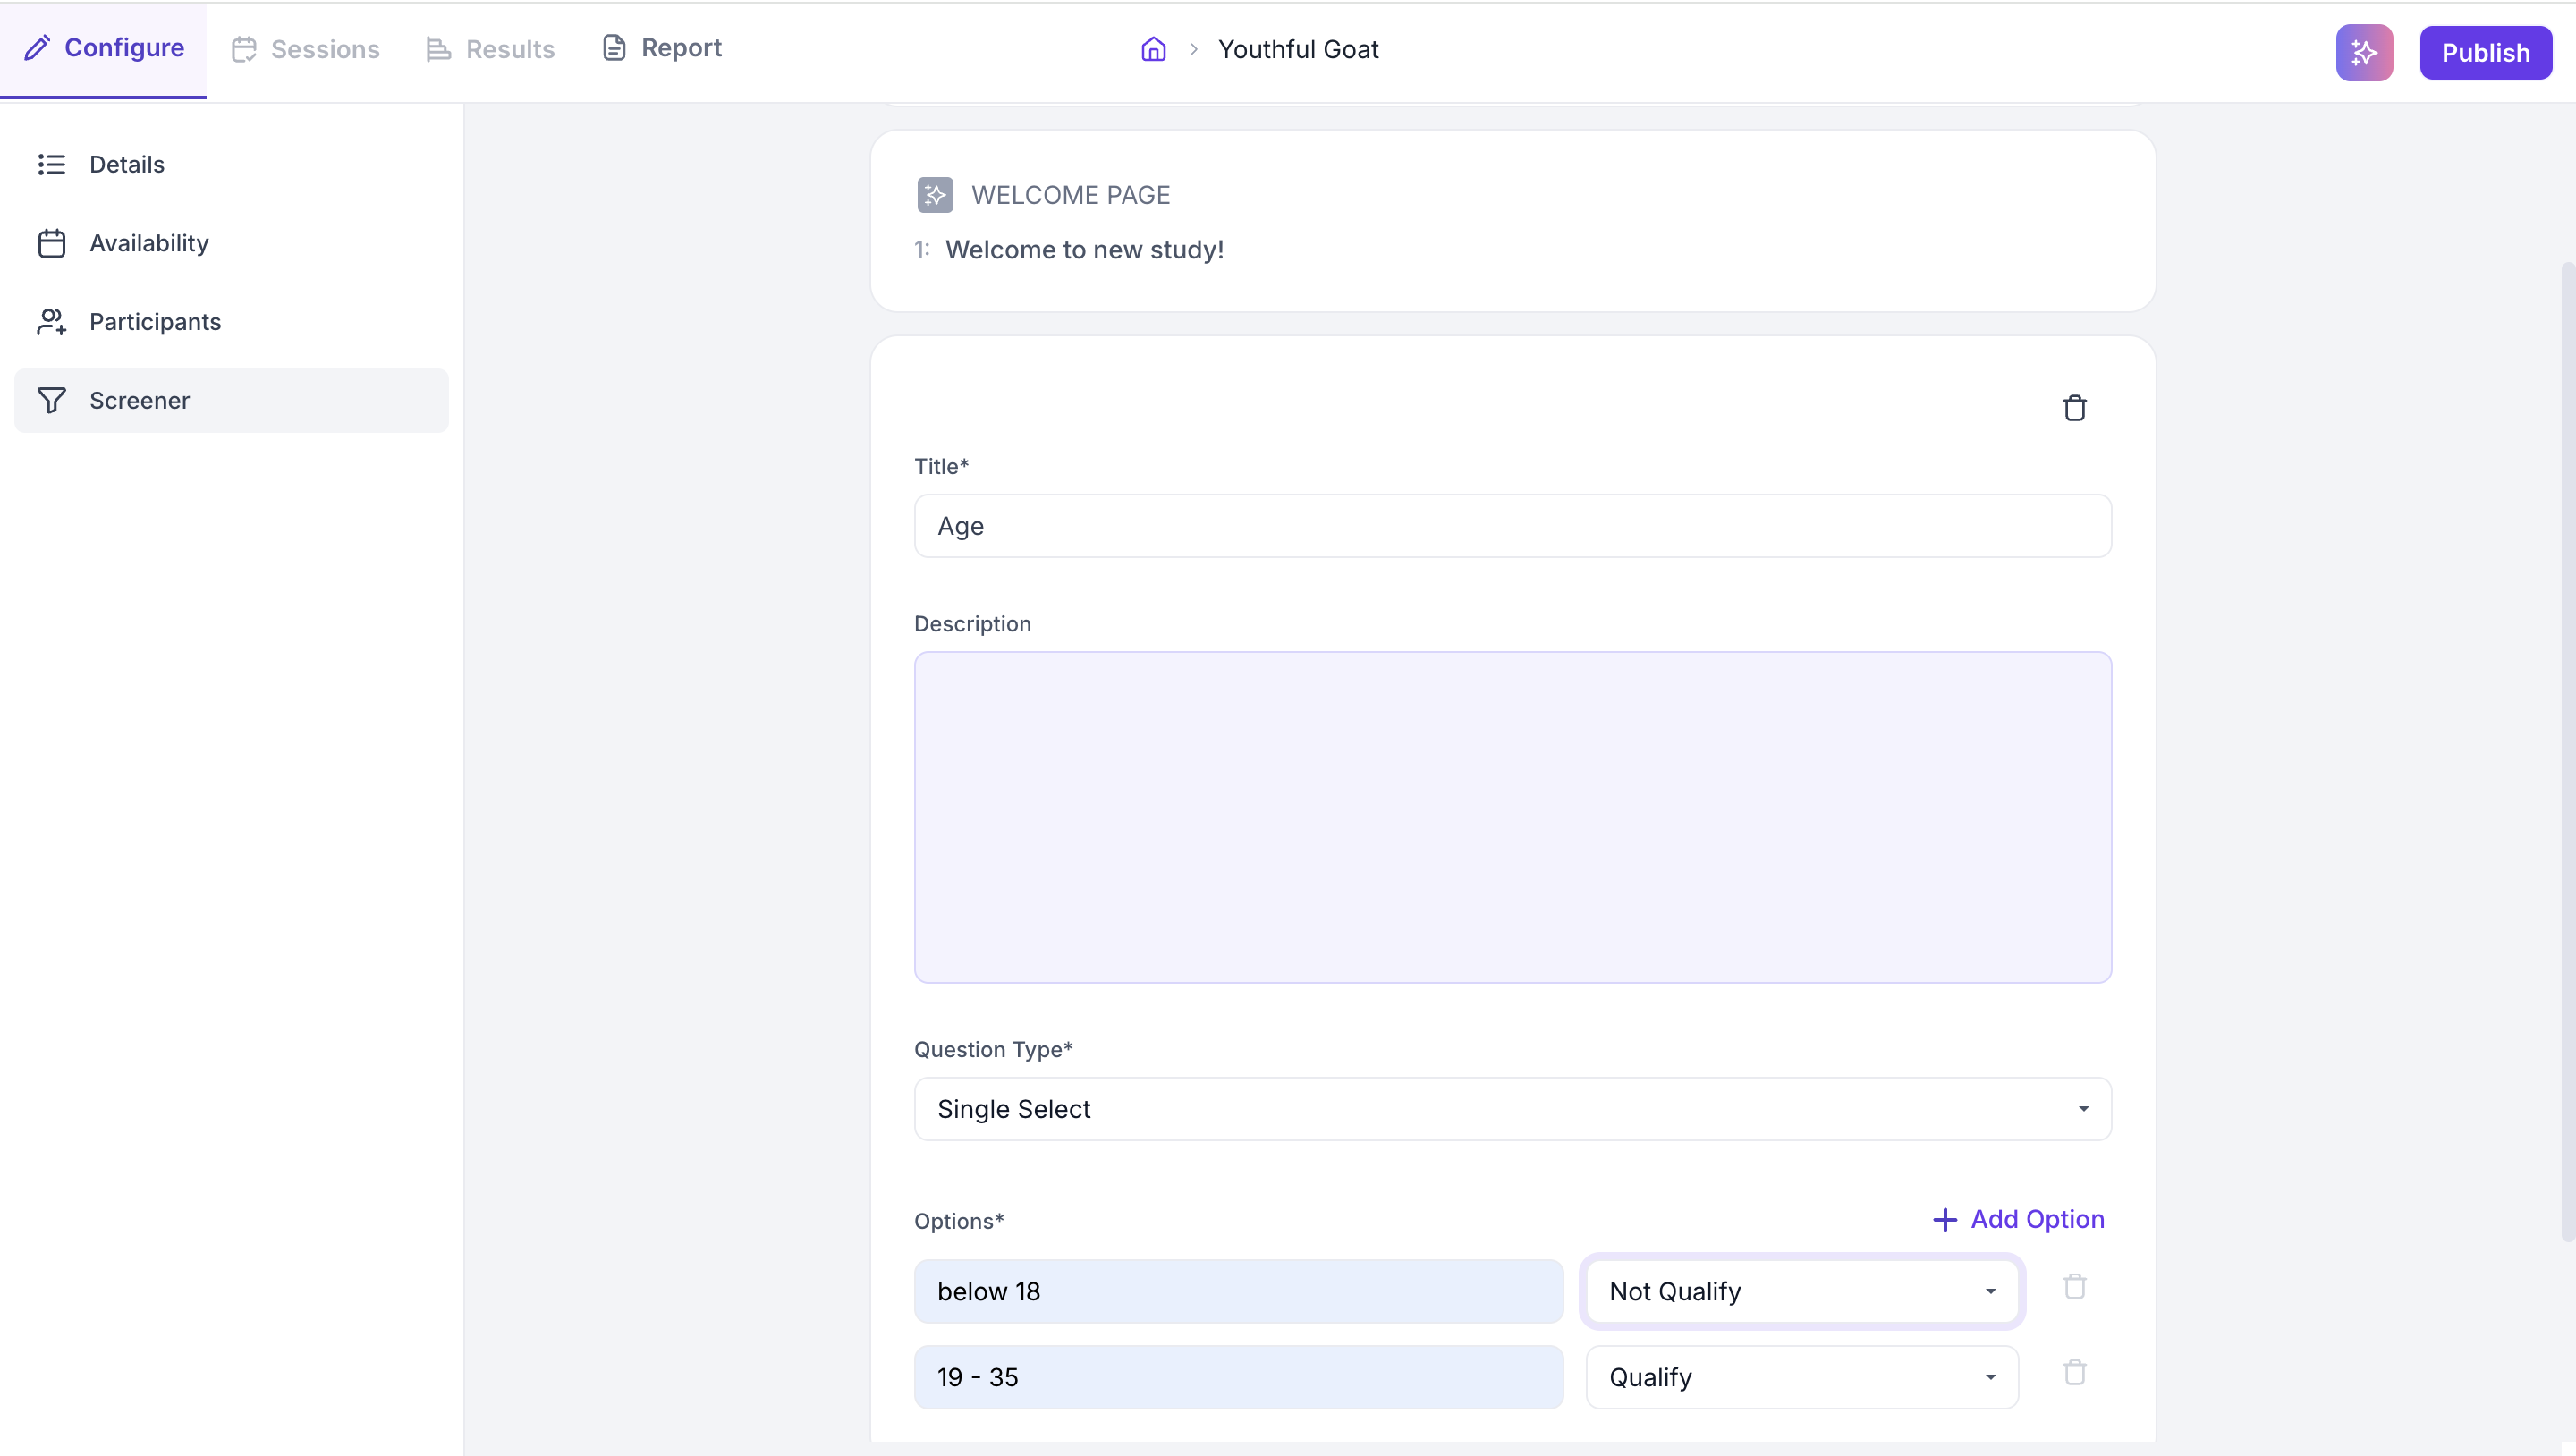
To add screening questions, click Add Question and insert an MCQ block. For each question, set the answer condition that routes a participant to the Screenout Page. Participants who meet the condition proceed to booking.
Step 6: Publish
Once all sections are complete, click Publish in the top right. The study moves to the Sessions tab where the shareable study link is available. Share this link with participants. When a participant selects a slot, they receive a calendar invite with their join link.
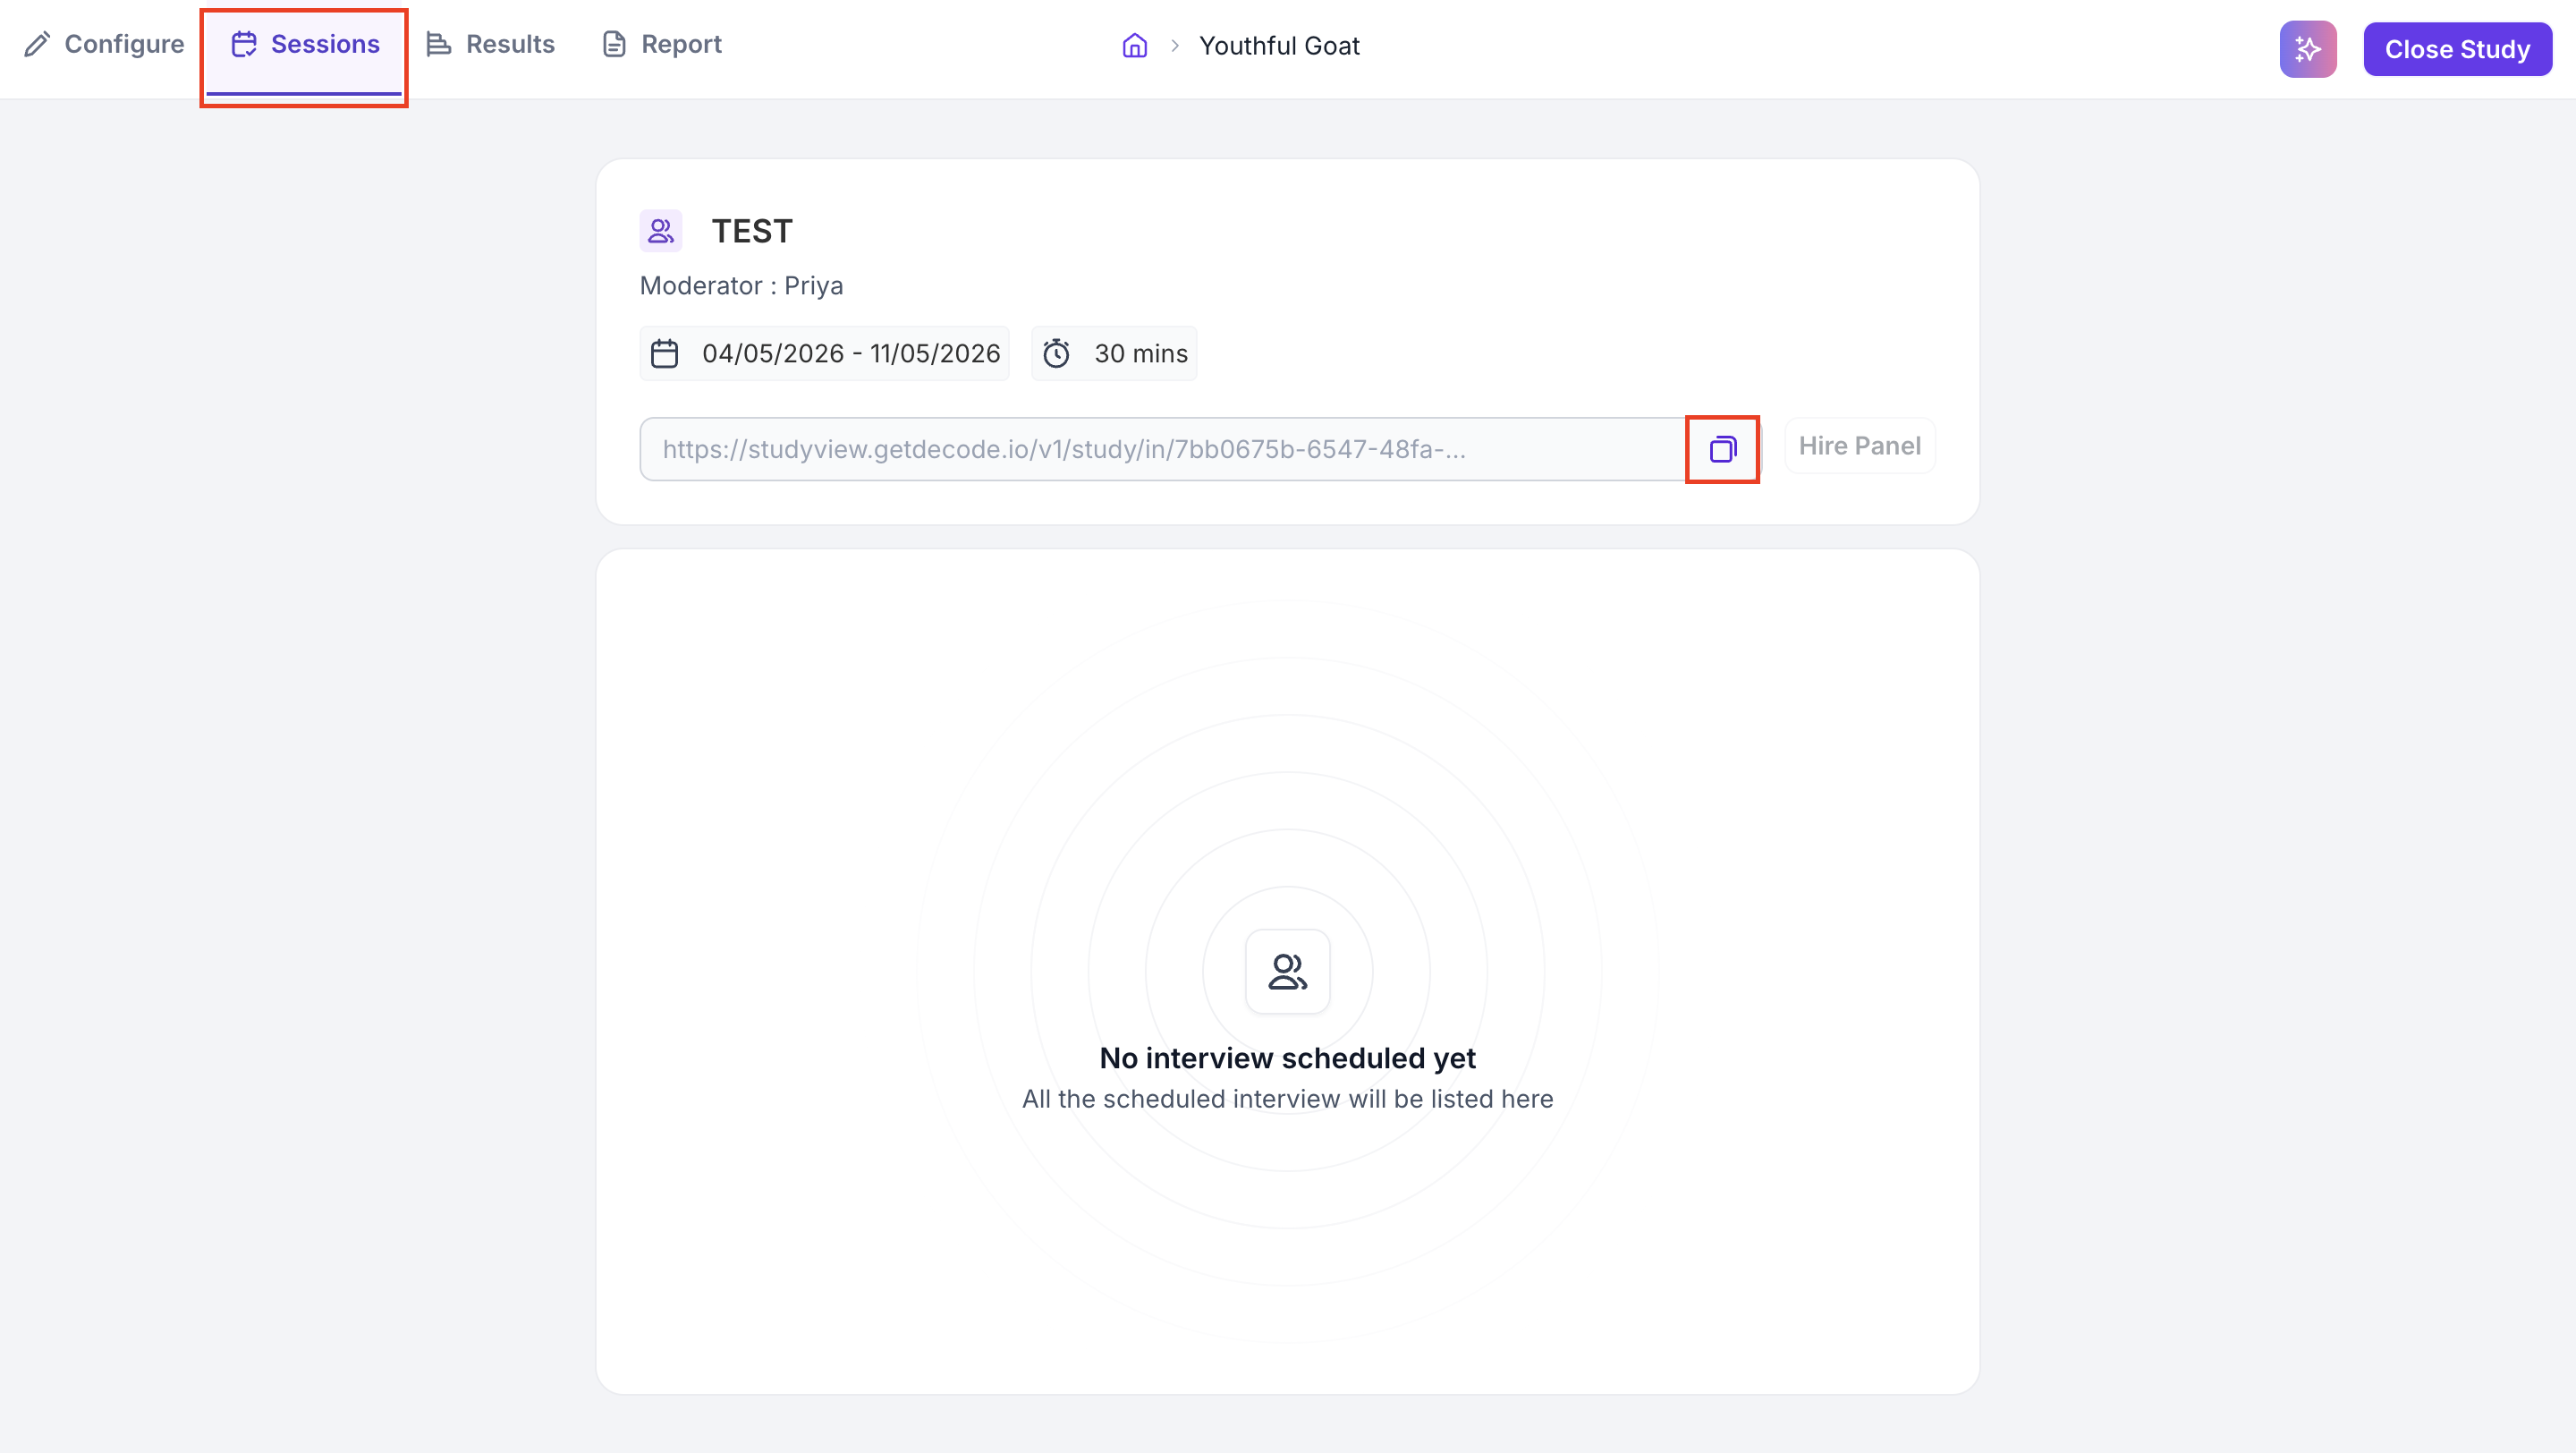
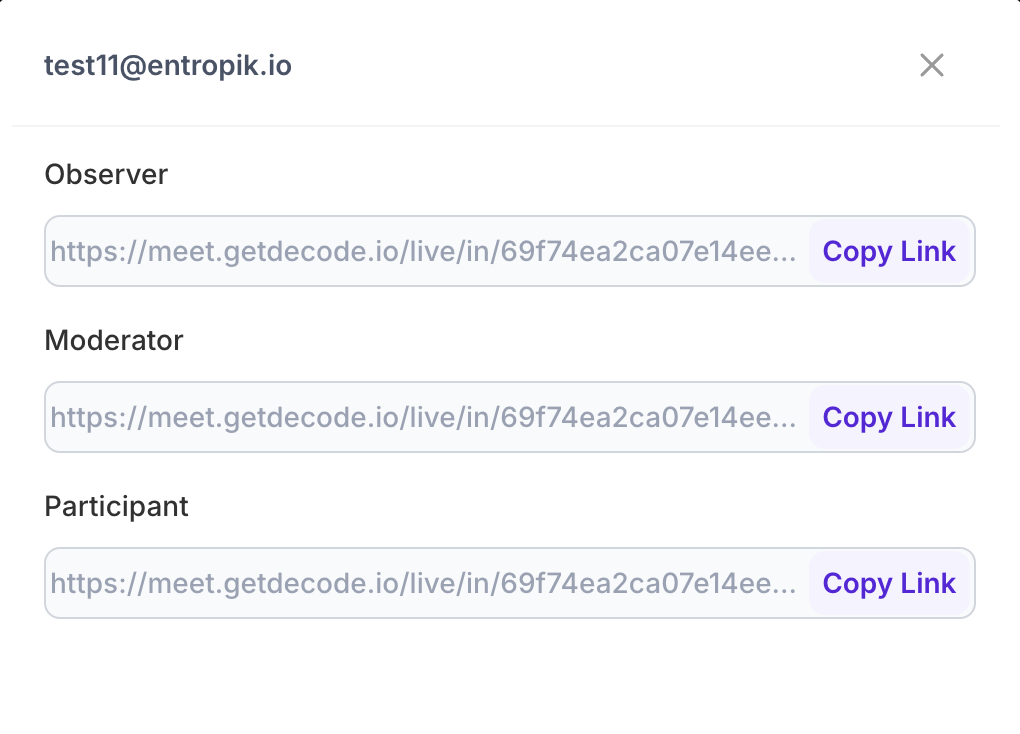
Each role gets a separate join link. From the Sessions tab, click the link icon on any booked session to see the individual links for the Observer, Moderator, and Participant.
MANAGING SESSIONS
After publishing, the Sessions tab shows all booked interviews. Each session card shows the participant email, scheduled time, and current status.
Session Statuses
- Scheduled: The participant has booked a slot and is yet to attend.
- Completed: The session has been conducted successfully.
- No Show: The participant did not join at the scheduled time.
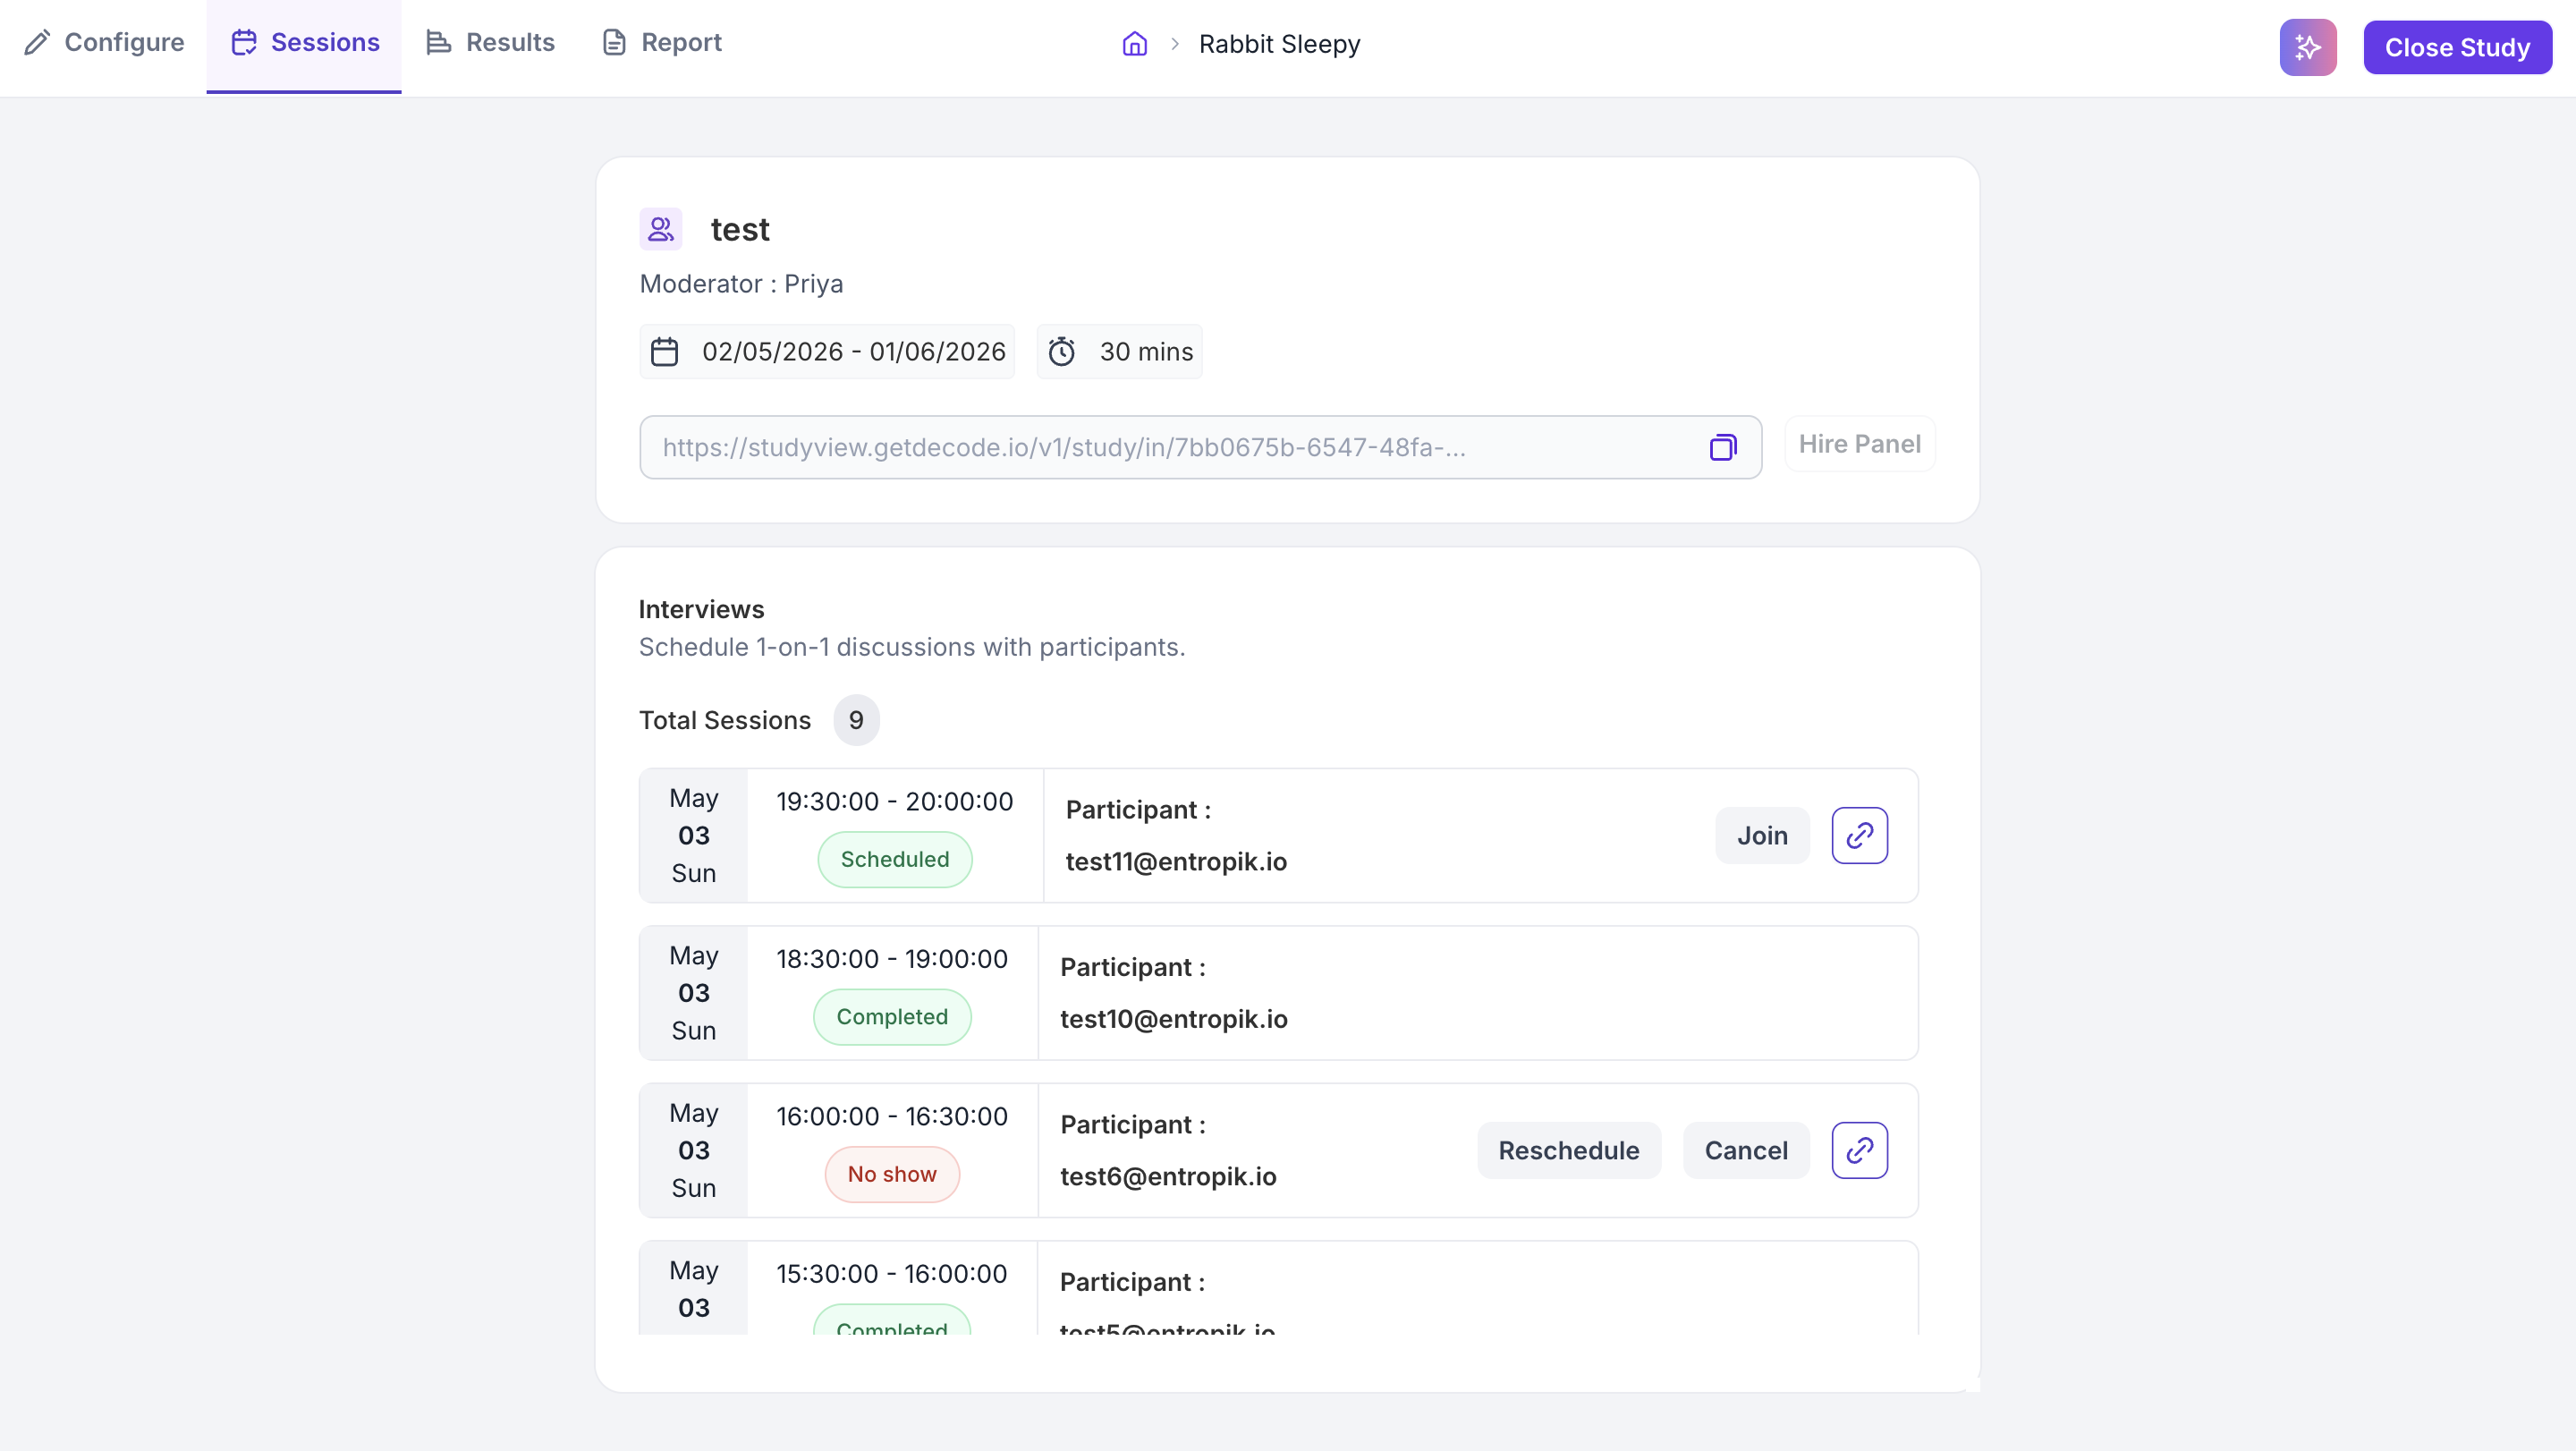
Session Actions
- Join: Click Join to enter the session as a moderator. This opens the Decode Live meeting link for that session directly.
- Reschedule: Click Reschedule to propose a new time to the participant. They will receive an updated calendar invite with the new slot.
- Cancel: Click Cancel to remove the session. The participant will be notified that the session has been cancelled.
- Link icon: Click the link icon to view the join links for that session. A modal opens with separate links for the Moderator, Participant, and Observer. You can copy each link individually to share with the relevant person.