
Setting Up an AI Interview
Setting Up an AI Interview
An AI Interview is a qualitative research session where an AI moderator conducts the interview with participants instead of a human researcher. The AI follows a discussion guide you set up, asks questions, listens to responses, and probes deeper based on what participants say. This allows you to run qualitative interviews at scale without scheduling individual sessions with a human moderator. This article covers how to set up an AI Interview, share it with participants, and what participants experience when they join.
SETUP
Step 1: Build Your Interview Plan
From the Decode dashboard, click Create New Study and select AI Interview. You will land on the Configure view with four sections in the left navigation: Setup, Details, Participants, and Screener.
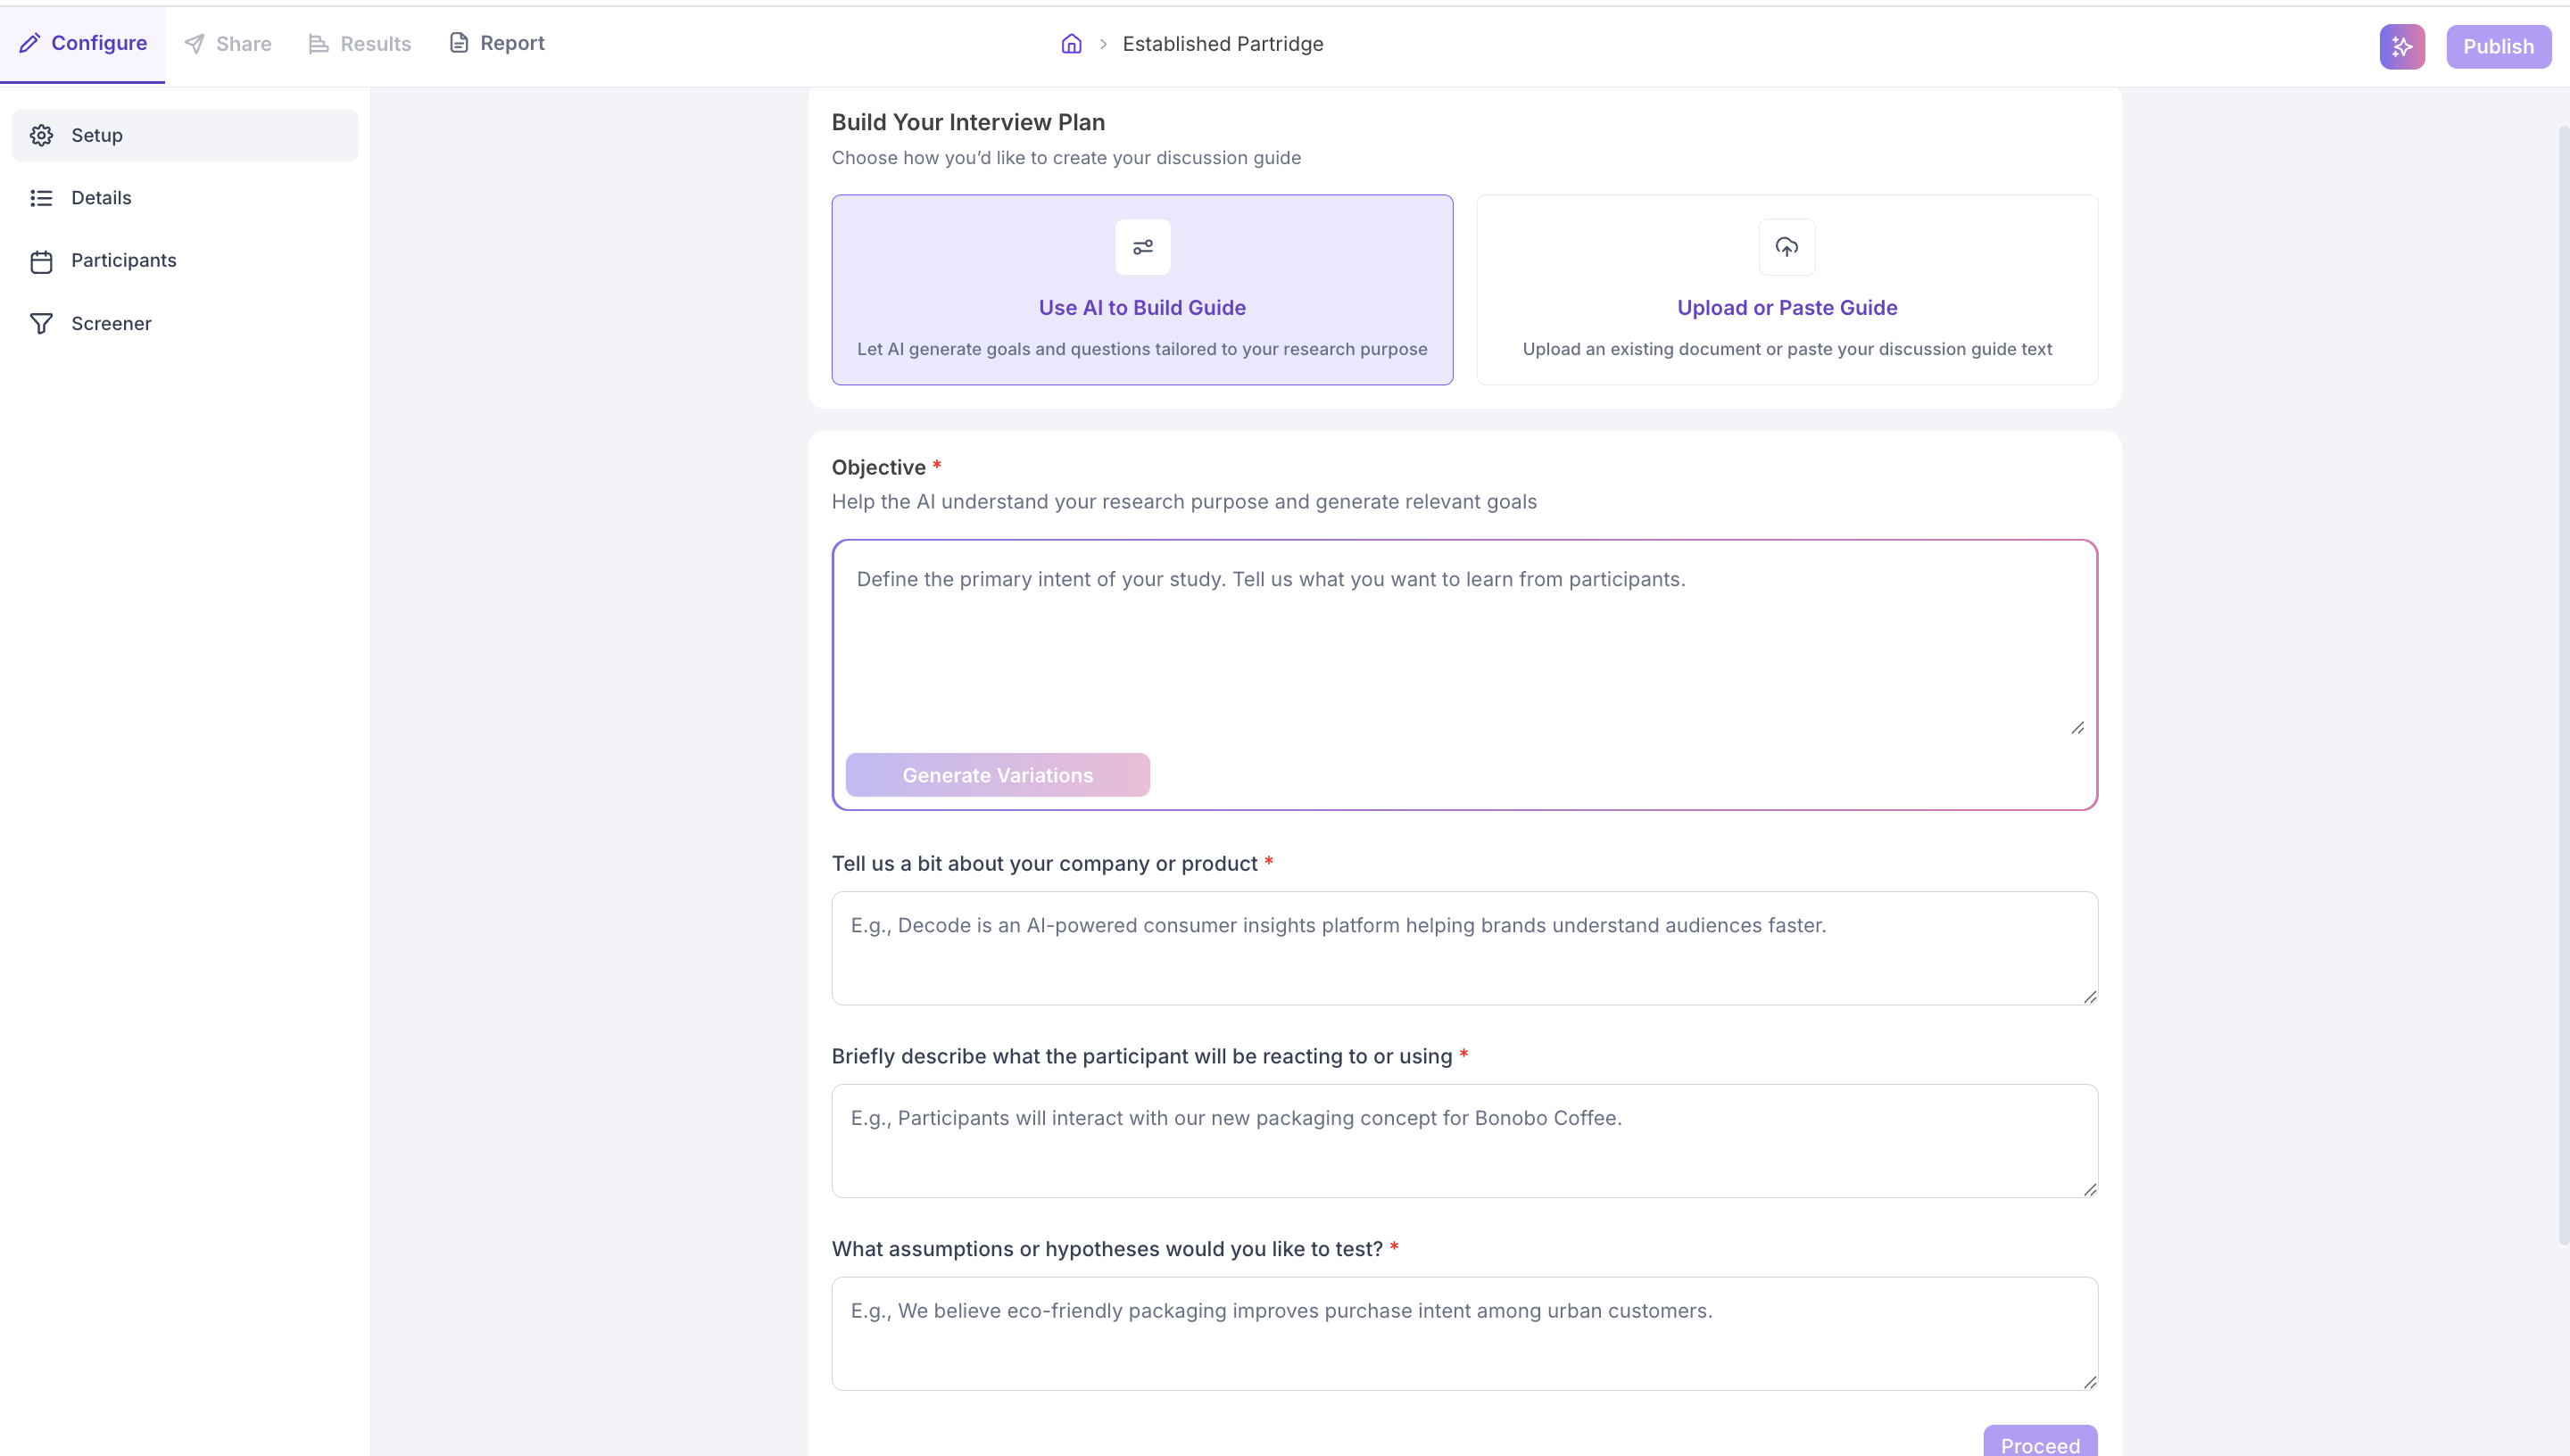
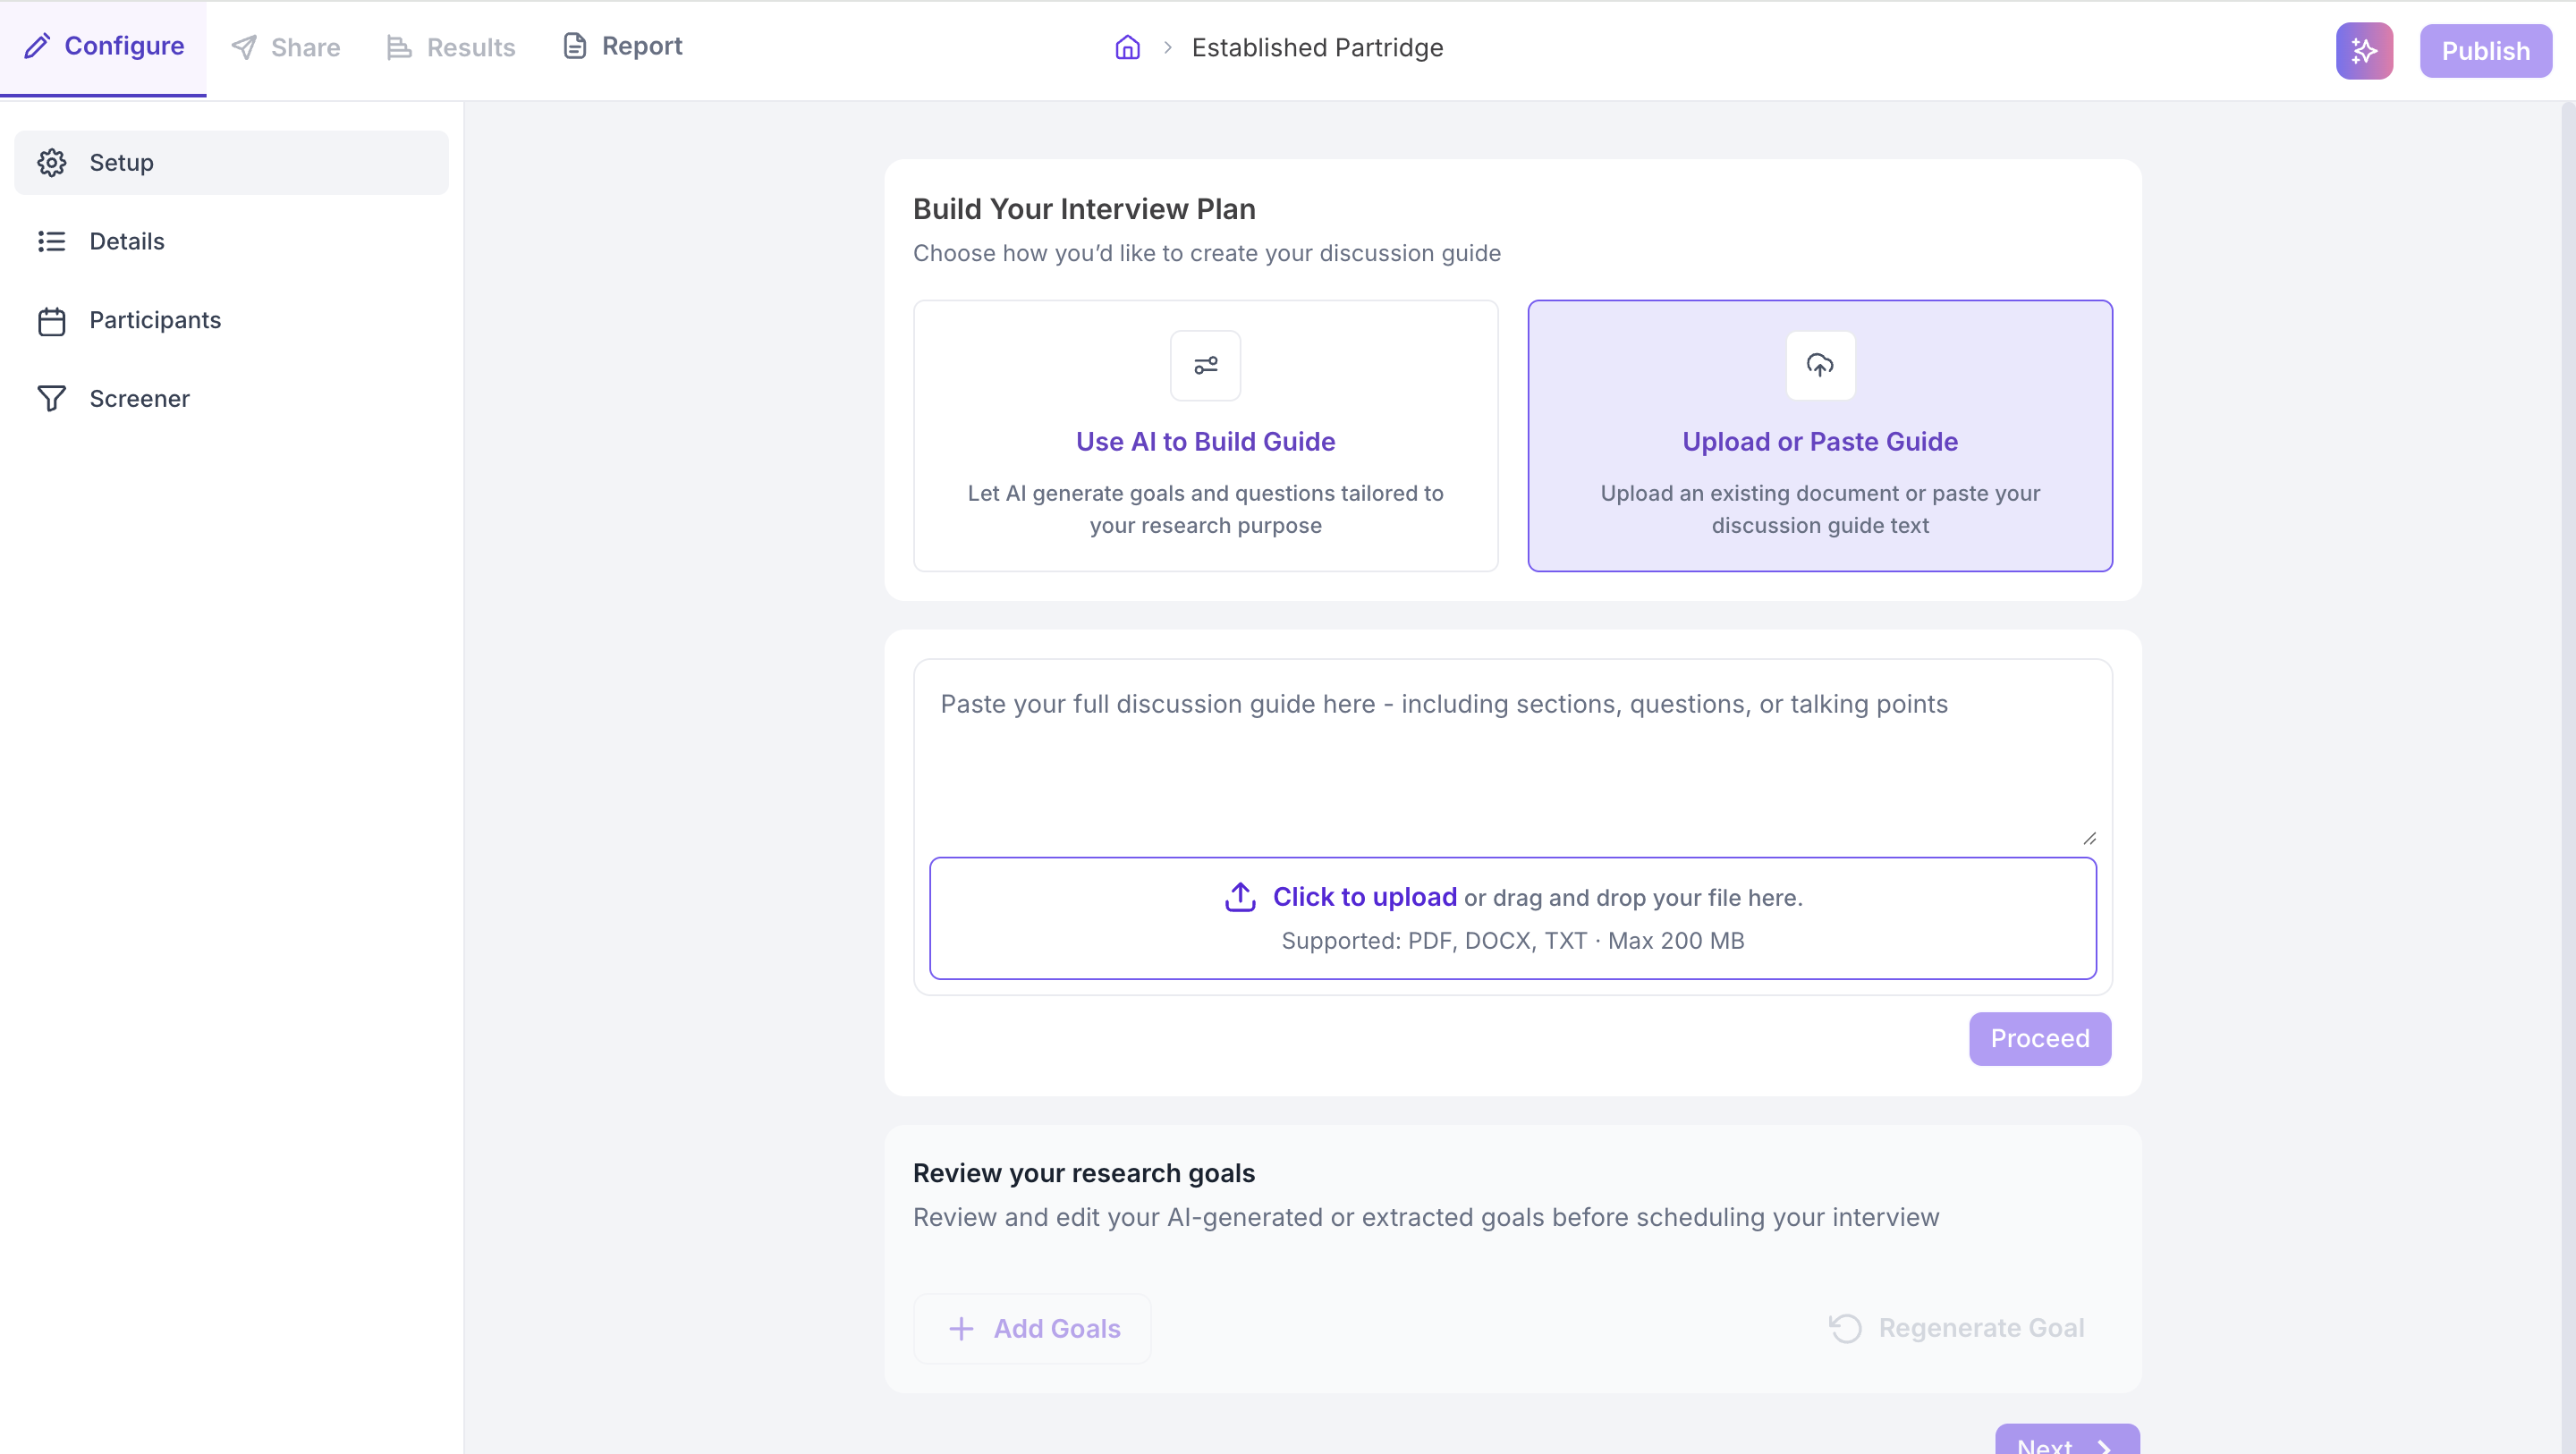
The first thing you set up is your Interview Plan, which is the discussion guide the AI moderator will use to conduct the session. You have two options.
Use AI to Build Guide
Select this option to let Decode generate your discussion guide based on your research purpose. Fill in the following fields.
- Objective: Describe the primary intent of your study and what you want to learn from participants. This helps the AI generate goals and questions that are relevant to your research.
- Company or Product: Briefly describe your company or product so the AI has context when generating the guide.
- What participants will be reacting to or using: Describe what participants will interact with during the session, such as a new app flow, a packaging concept, or a website.
- Assumptions or hypotheses to test: Enter any specific assumptions you want the AI to probe during the interview.
Once all fields are filled, click Generate Variations to let the AI create your discussion guide, then click Proceed to move to the Research Goals review.
Upload or Paste Guide
Select this option if you already have a discussion guide you want to use. You can either paste your guide text directly into the text field, or upload a file. Supported formats are PDF, DOCX, and TXT with a maximum file size of 200 MB. Once your guide is uploaded or pasted, click Proceed.
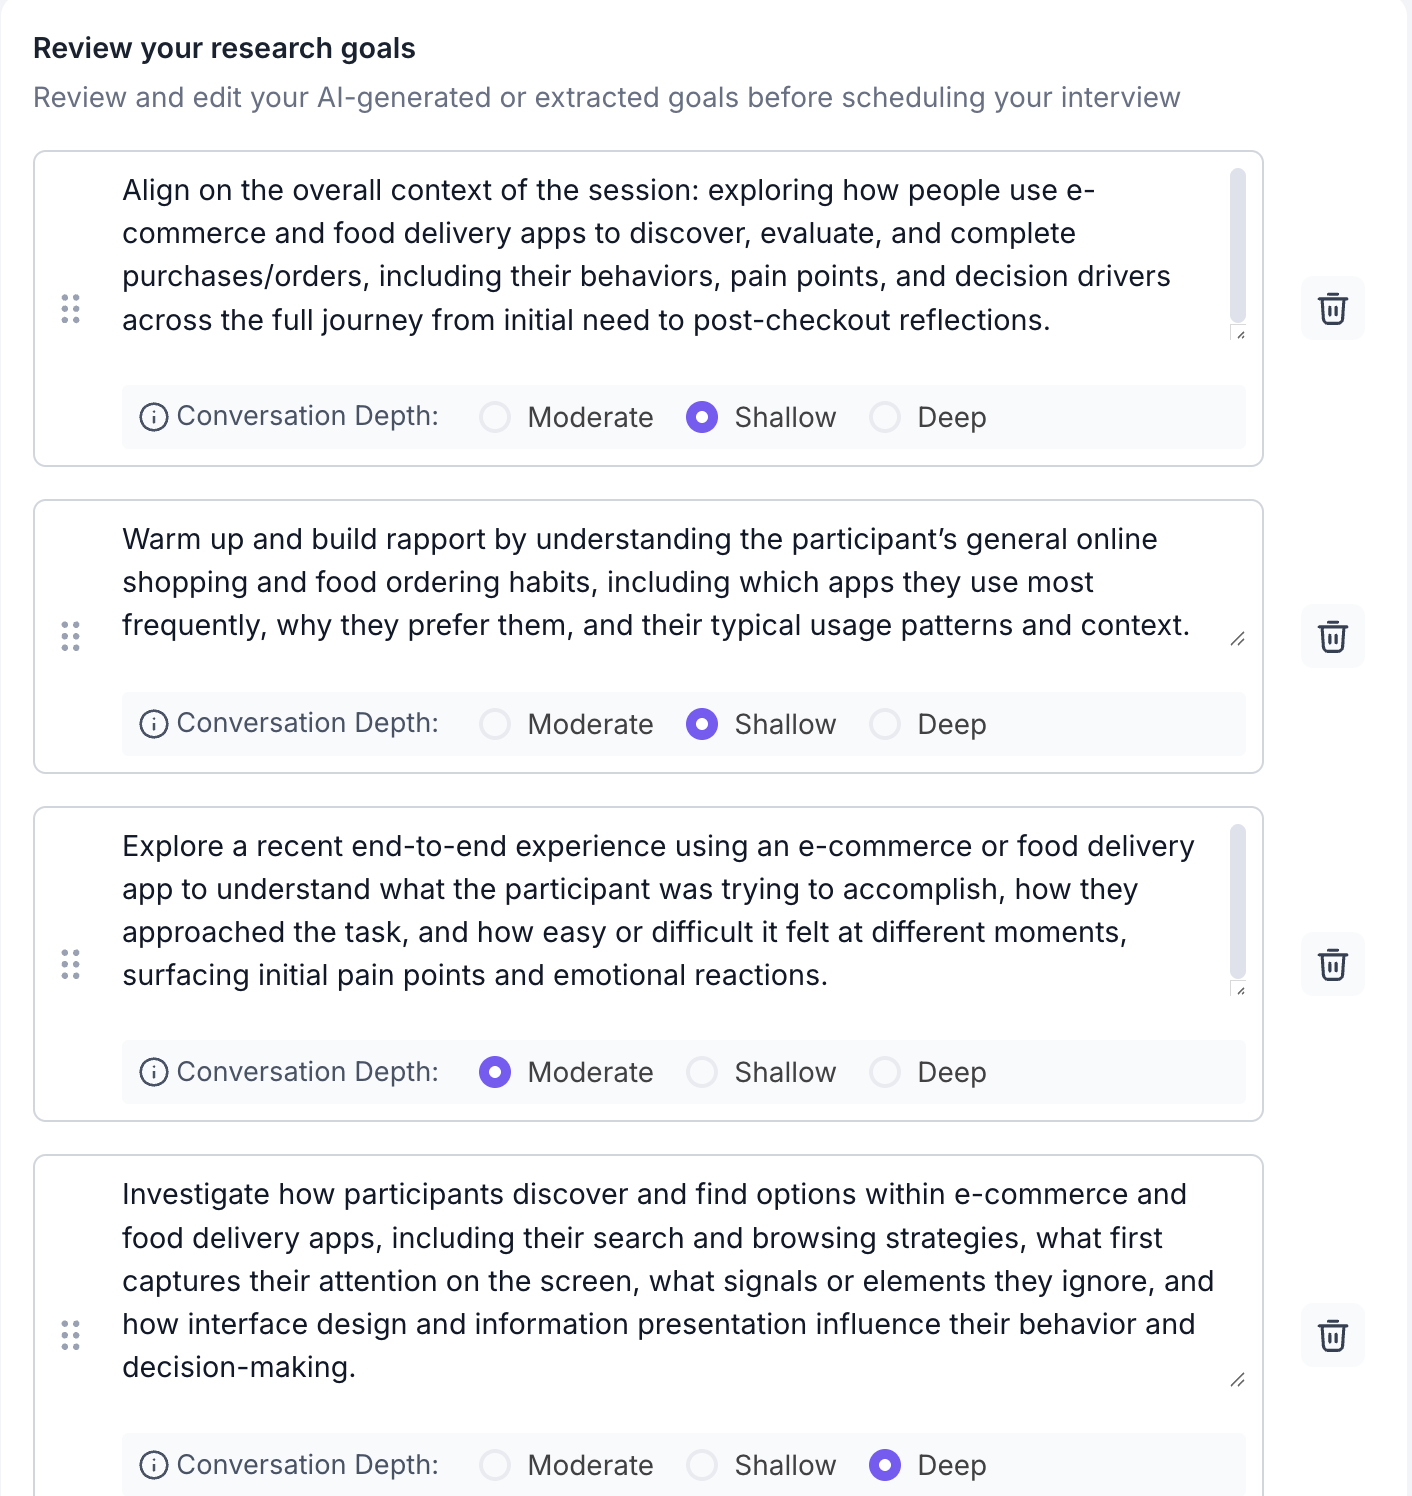
Step 2: Review Your Research Goals
After proceeding from either option, Decode extracts or generates a set of research goals from your discussion guide. These goals appear as individual editable cards. Each goal represents a topic area the AI moderator will explore with participants.
For each goal, you can set the Conversation Depth to control how deeply the AI explores that topic with participants.
- Shallow: The AI asks the question and moves on. Use this for warm-up topics or areas where a brief response is sufficient.
- Moderate: The AI asks the question and follows up once if the response is vague or incomplete.
- Deep: The AI probes extensively, asking follow-up questions to explore the topic in detail. Use this for your most important research areas.
You can edit any goal directly, delete goals, add new goals, regenerate all goals, or rearrange goals order by dragging and dropping to configure the flow.
Step 3: Fill In Details
Navigate to the Details section to configure how the session runs.
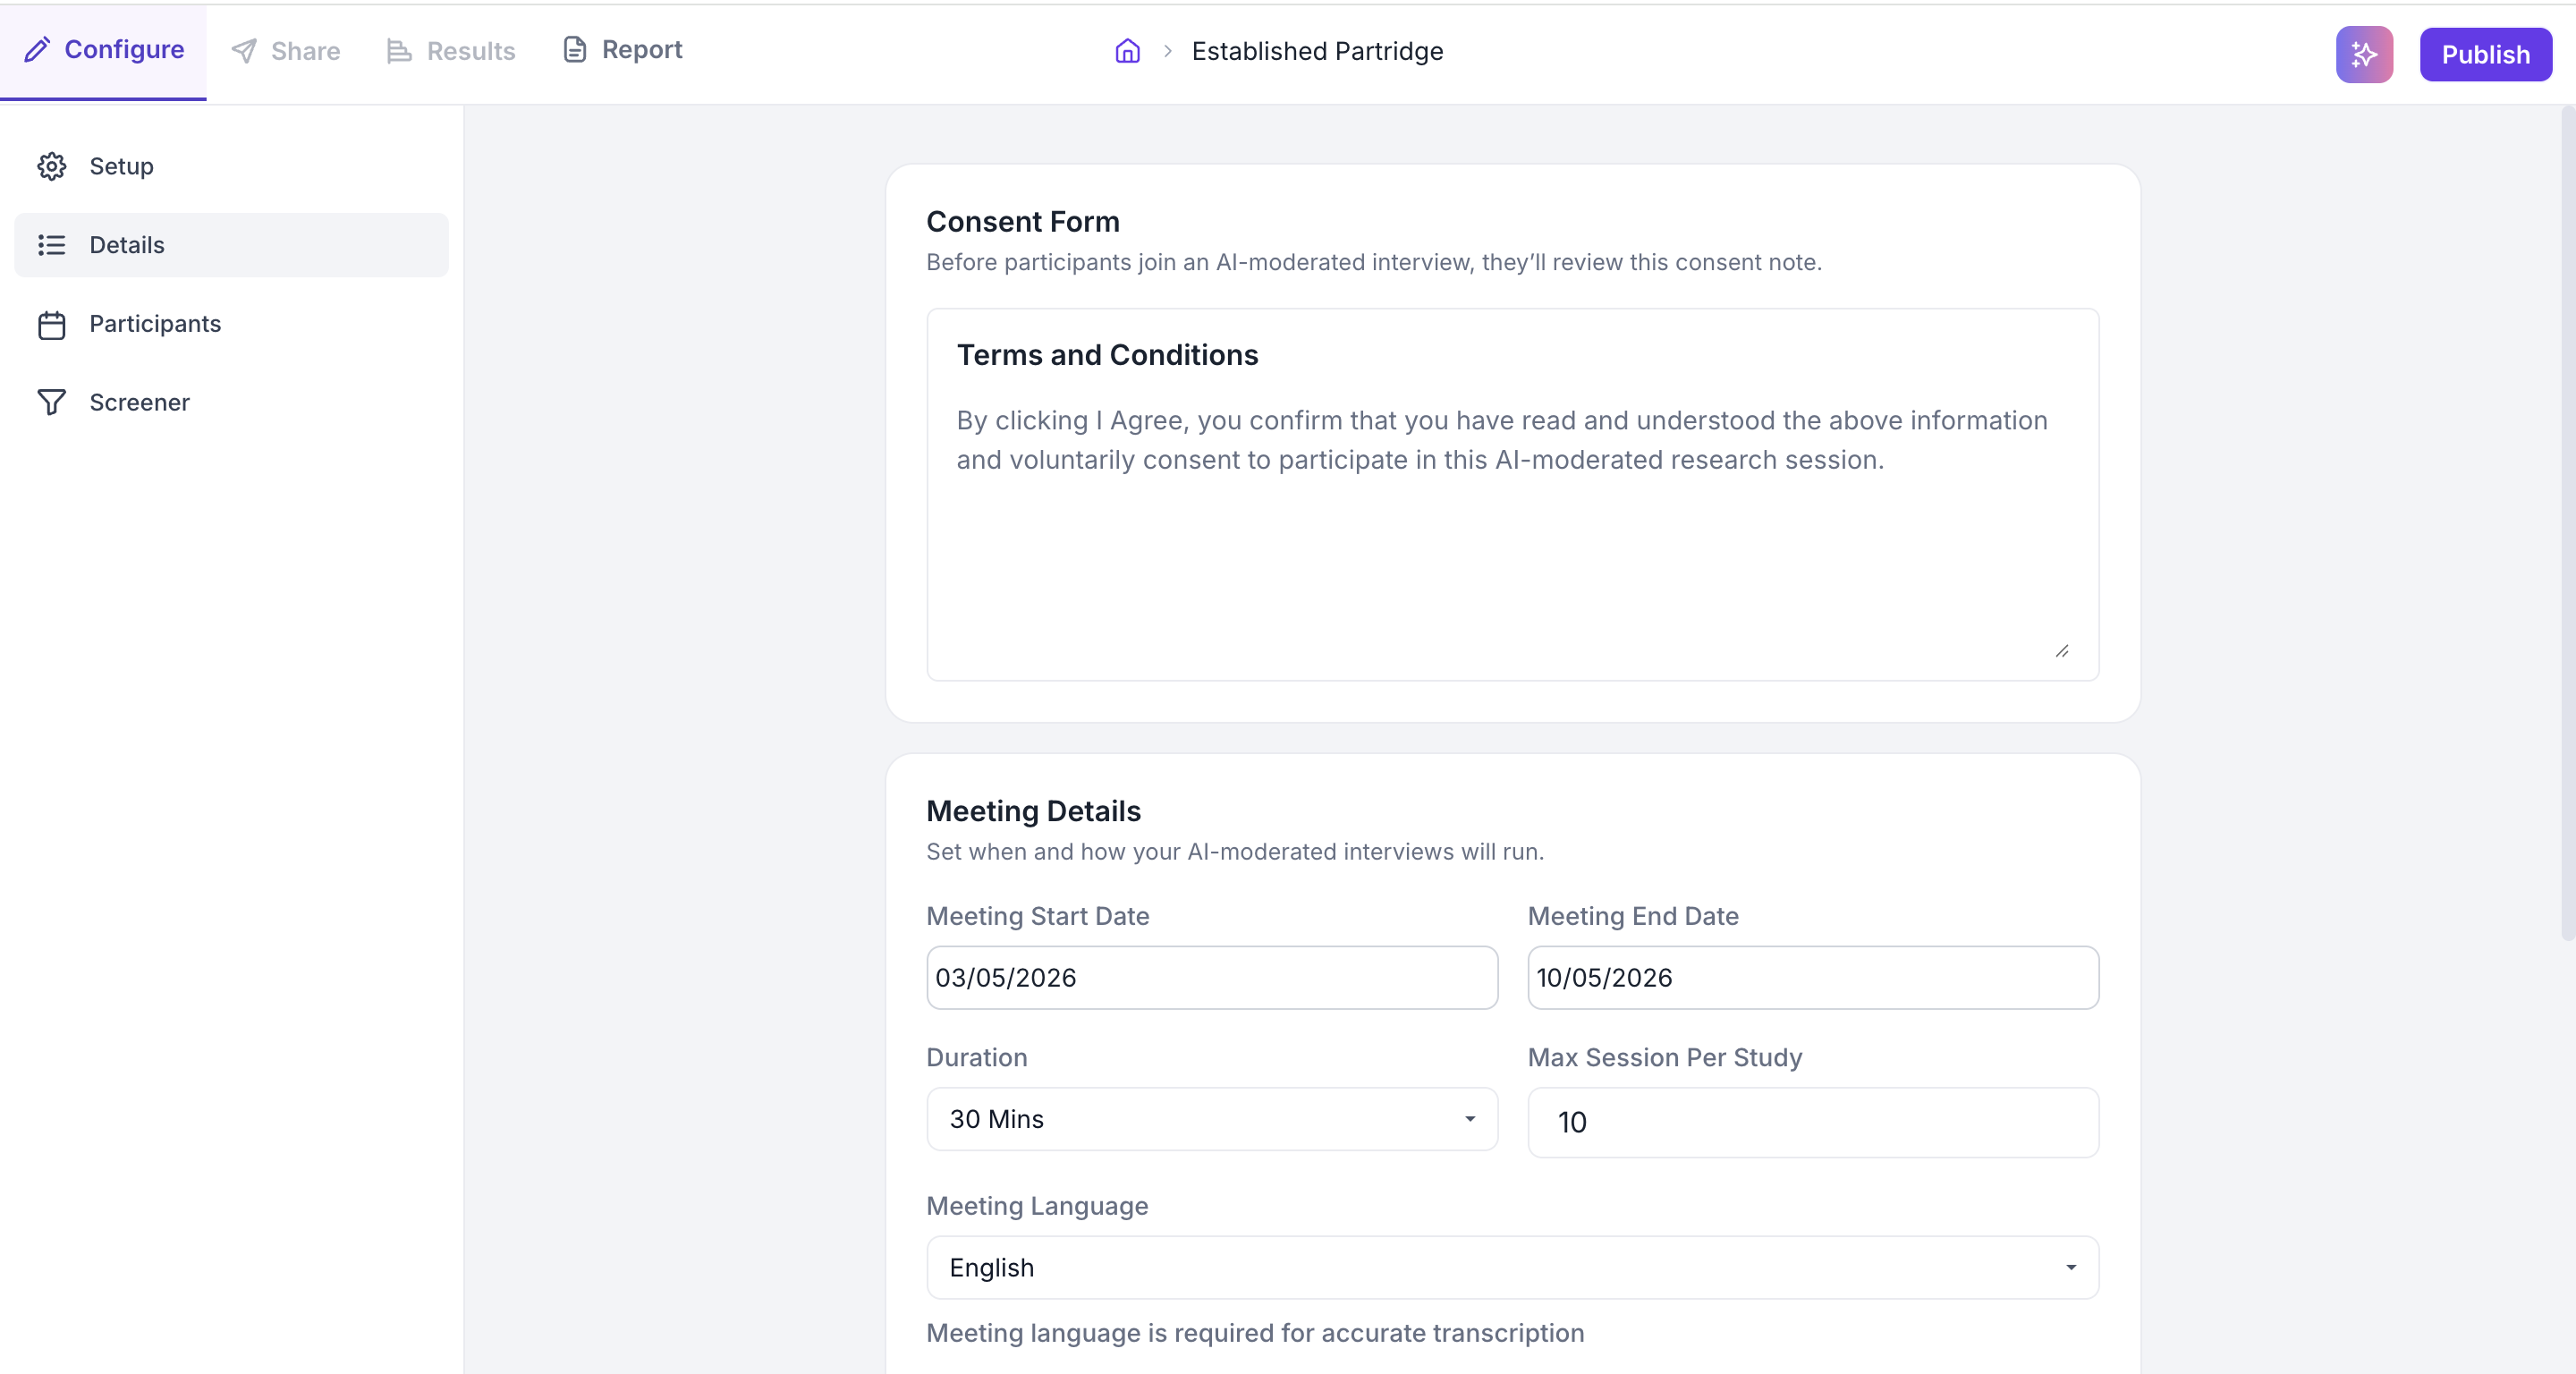
Consent Form
If you want participants to review and agree to specific terms before joining the session, add them here. Participants must accept the terms before they can proceed to the interview.
Meeting Details
Set the following fields for your study.
- Meeting Start Date and End Date: Set the date range for the study. Participants can only join the AI Interview within these dates.
- Duration: Select the expected length of each session. This helps the AI moderator pace the interview and cover all research goals within the allotted time.
- Max Sessions per Study: Set the total number of participants who can complete the interview using the study link. Once this limit is reached, the link will no longer accept new participants.
- Meeting Language: Select the language the interview will be conducted in. This is used for accurate transcription of participant responses.
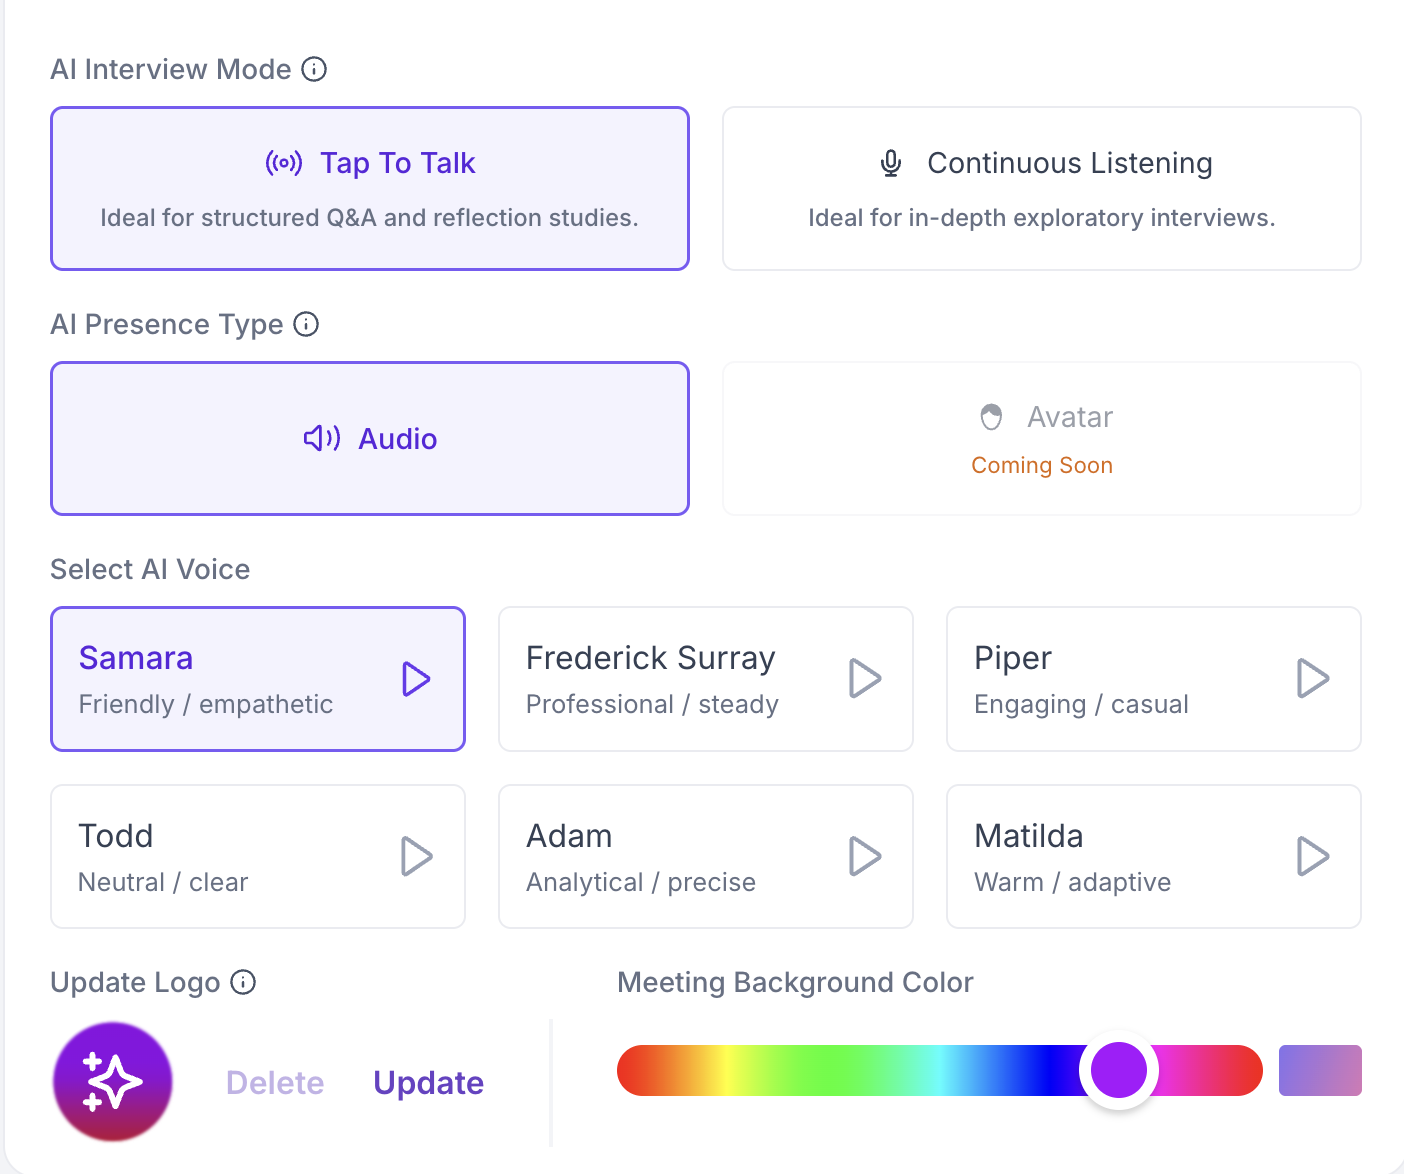
AI Interview Mode
Choose how participants interact with the AI moderator during the session.
- Tap to Talk: Use this for structured Q&A and reflection-based studies where clear turn-taking is important. The participant taps to start speaking and taps again when done. The AI listens and responds only during that window.
- Continuous Listening: Use this for exploratory interviews where a conversational flow works better. The participant speaks naturally without any interaction needed. The AI listens throughout and responds when the participant pauses.
AI Presence Type
Select how the AI moderator appears to participants during the session. Audio is currently available, where the AI speaks to participants through voice only. An Avatar option is coming soon.
Select AI Voice
Choose the voice the AI moderator will use during sessions. Six voices are available, each with a different style suited to different research contexts.
- Samara: Friendly and empathetic. Suited to studies involving personal experiences or sensitive topics.
- Frederick Surray: Professional and steady. Suited to business or enterprise research.
- Piper: Engaging and casual. Suited to consumer research or younger audiences.
- Todd: Neutral and clear. Suited to studies where a neutral, unbiased tone is important.
- Adam: Analytical and precise. Suited to technical or detailed research topics.
- Matilda: Warm and adaptive. Suited to studies where building rapport with participants matters.
Click the play button next to each voice to preview it before selecting.
Update Logo and Meeting Background Color
You can upload your organisation's logo to display during the session and choose a background colour for the meeting interface. These customisations make the session feel consistent with your brand for participants.
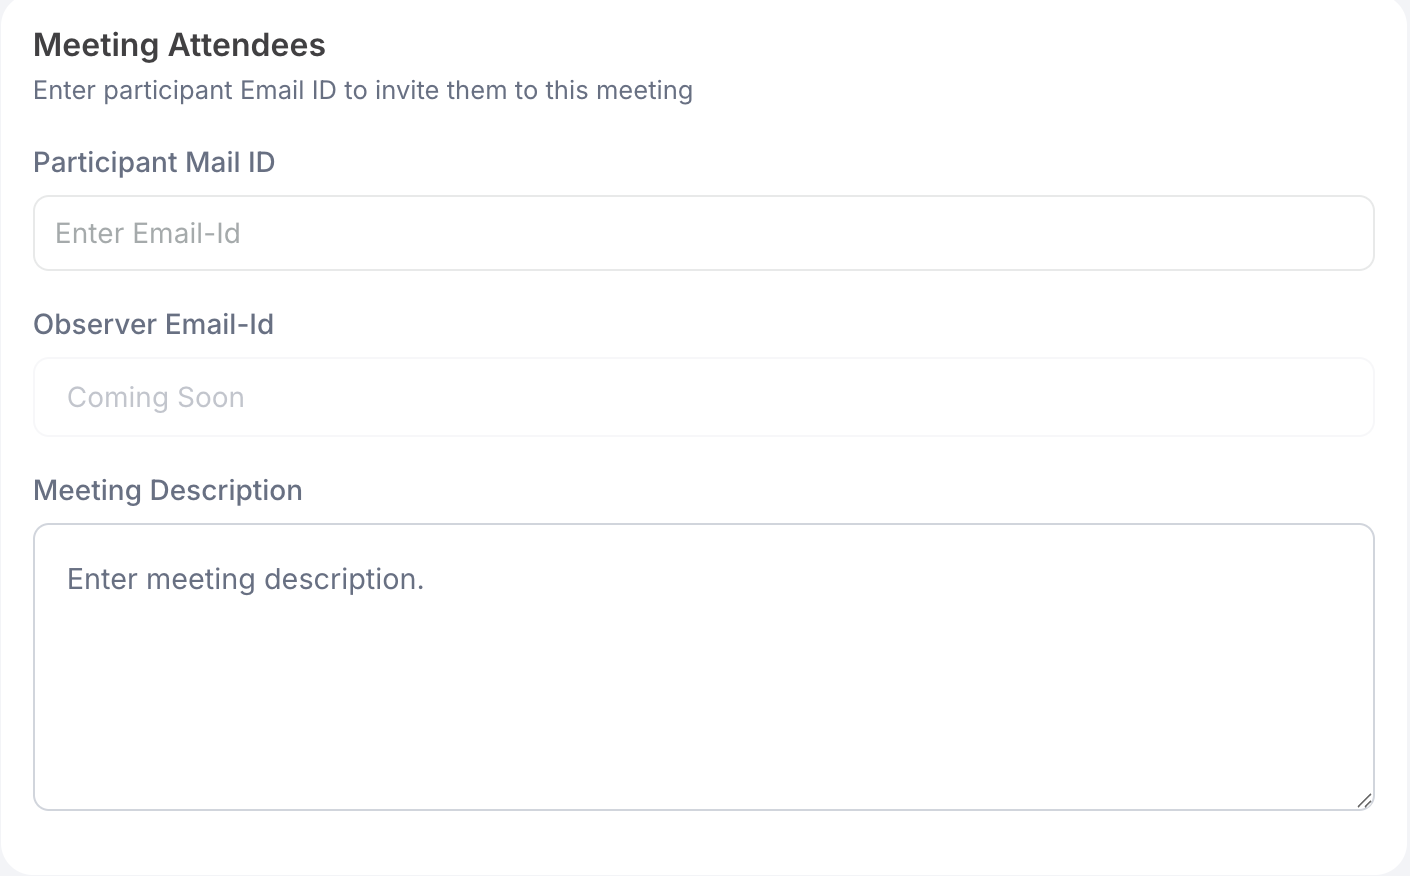
Step 4: Add Participants
Enter participant email addresses and they receive an invitation email with the study link. You can also add a Meeting Description to give participants context about what to expect.
Observer Email ID is coming soon. Once available, observers will be able to watch AI Interview sessions in real time.
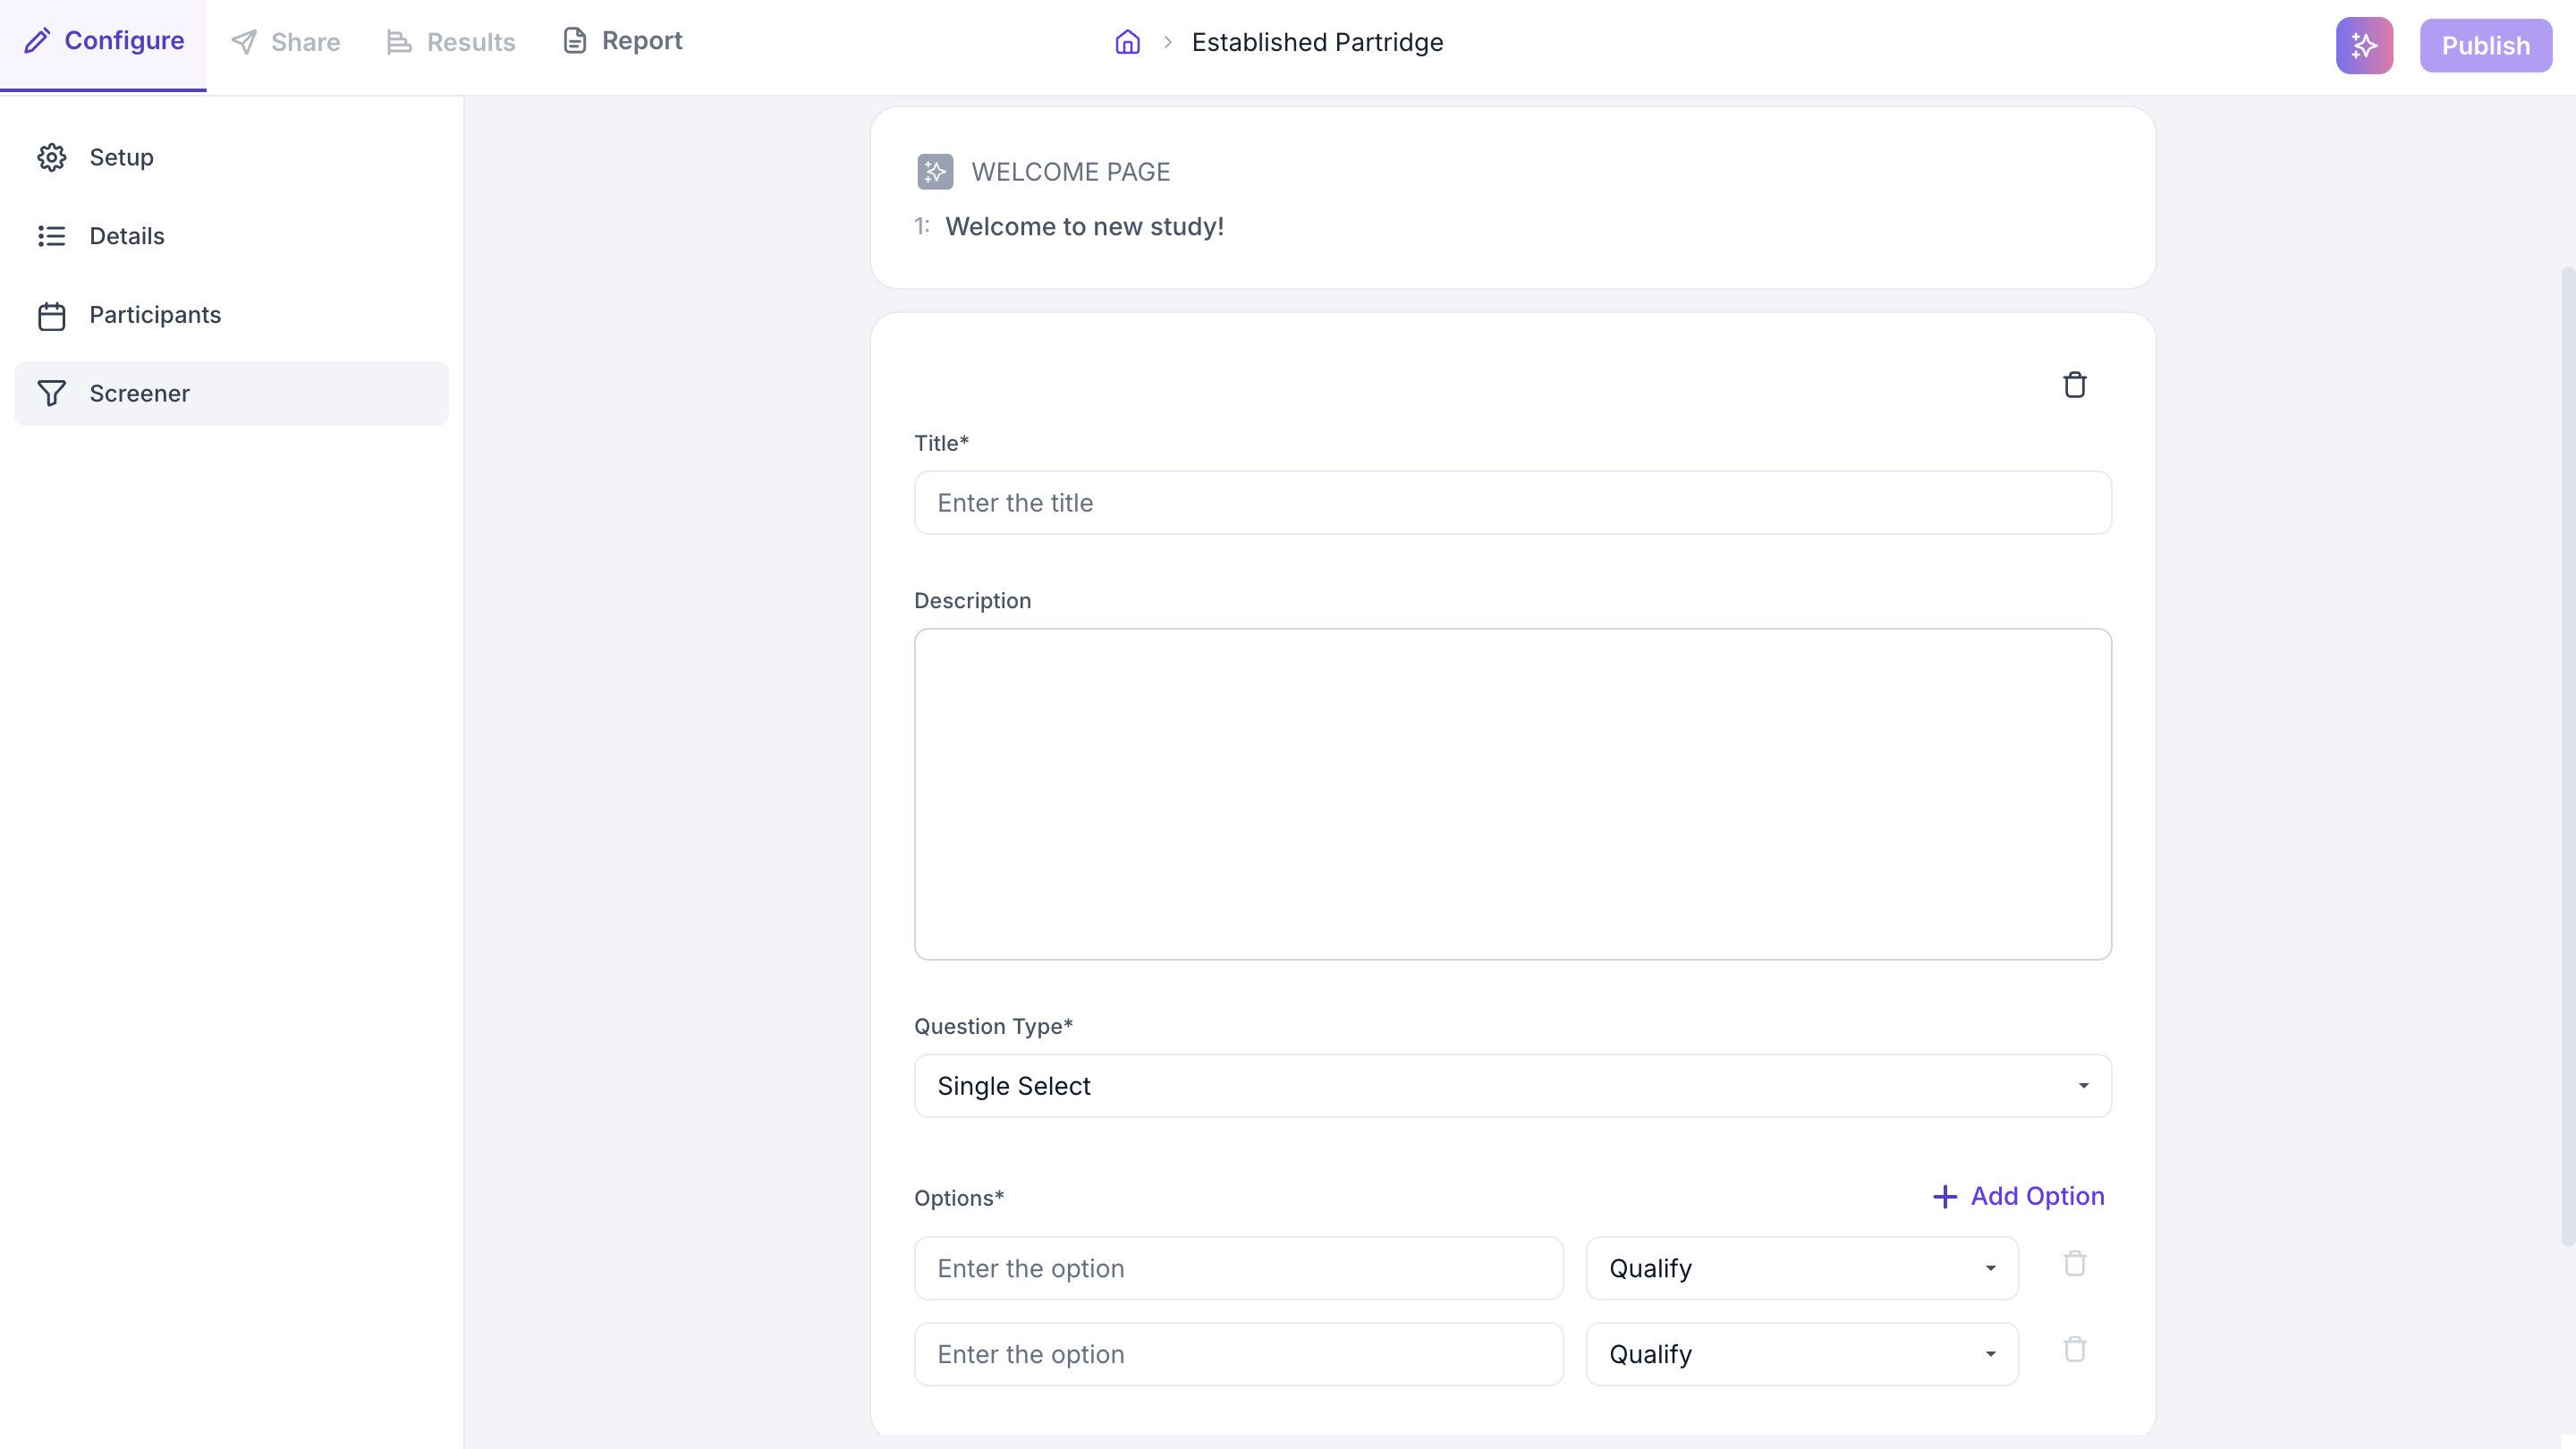
Step 5: Configure the Screener
The Screener works the same way as in a Qualitative Study. Add qualification questions to filter participants before they access the interview. Set the answer condition for each question to route ineligible participants to the Screenout Page.
Step 6: Publish
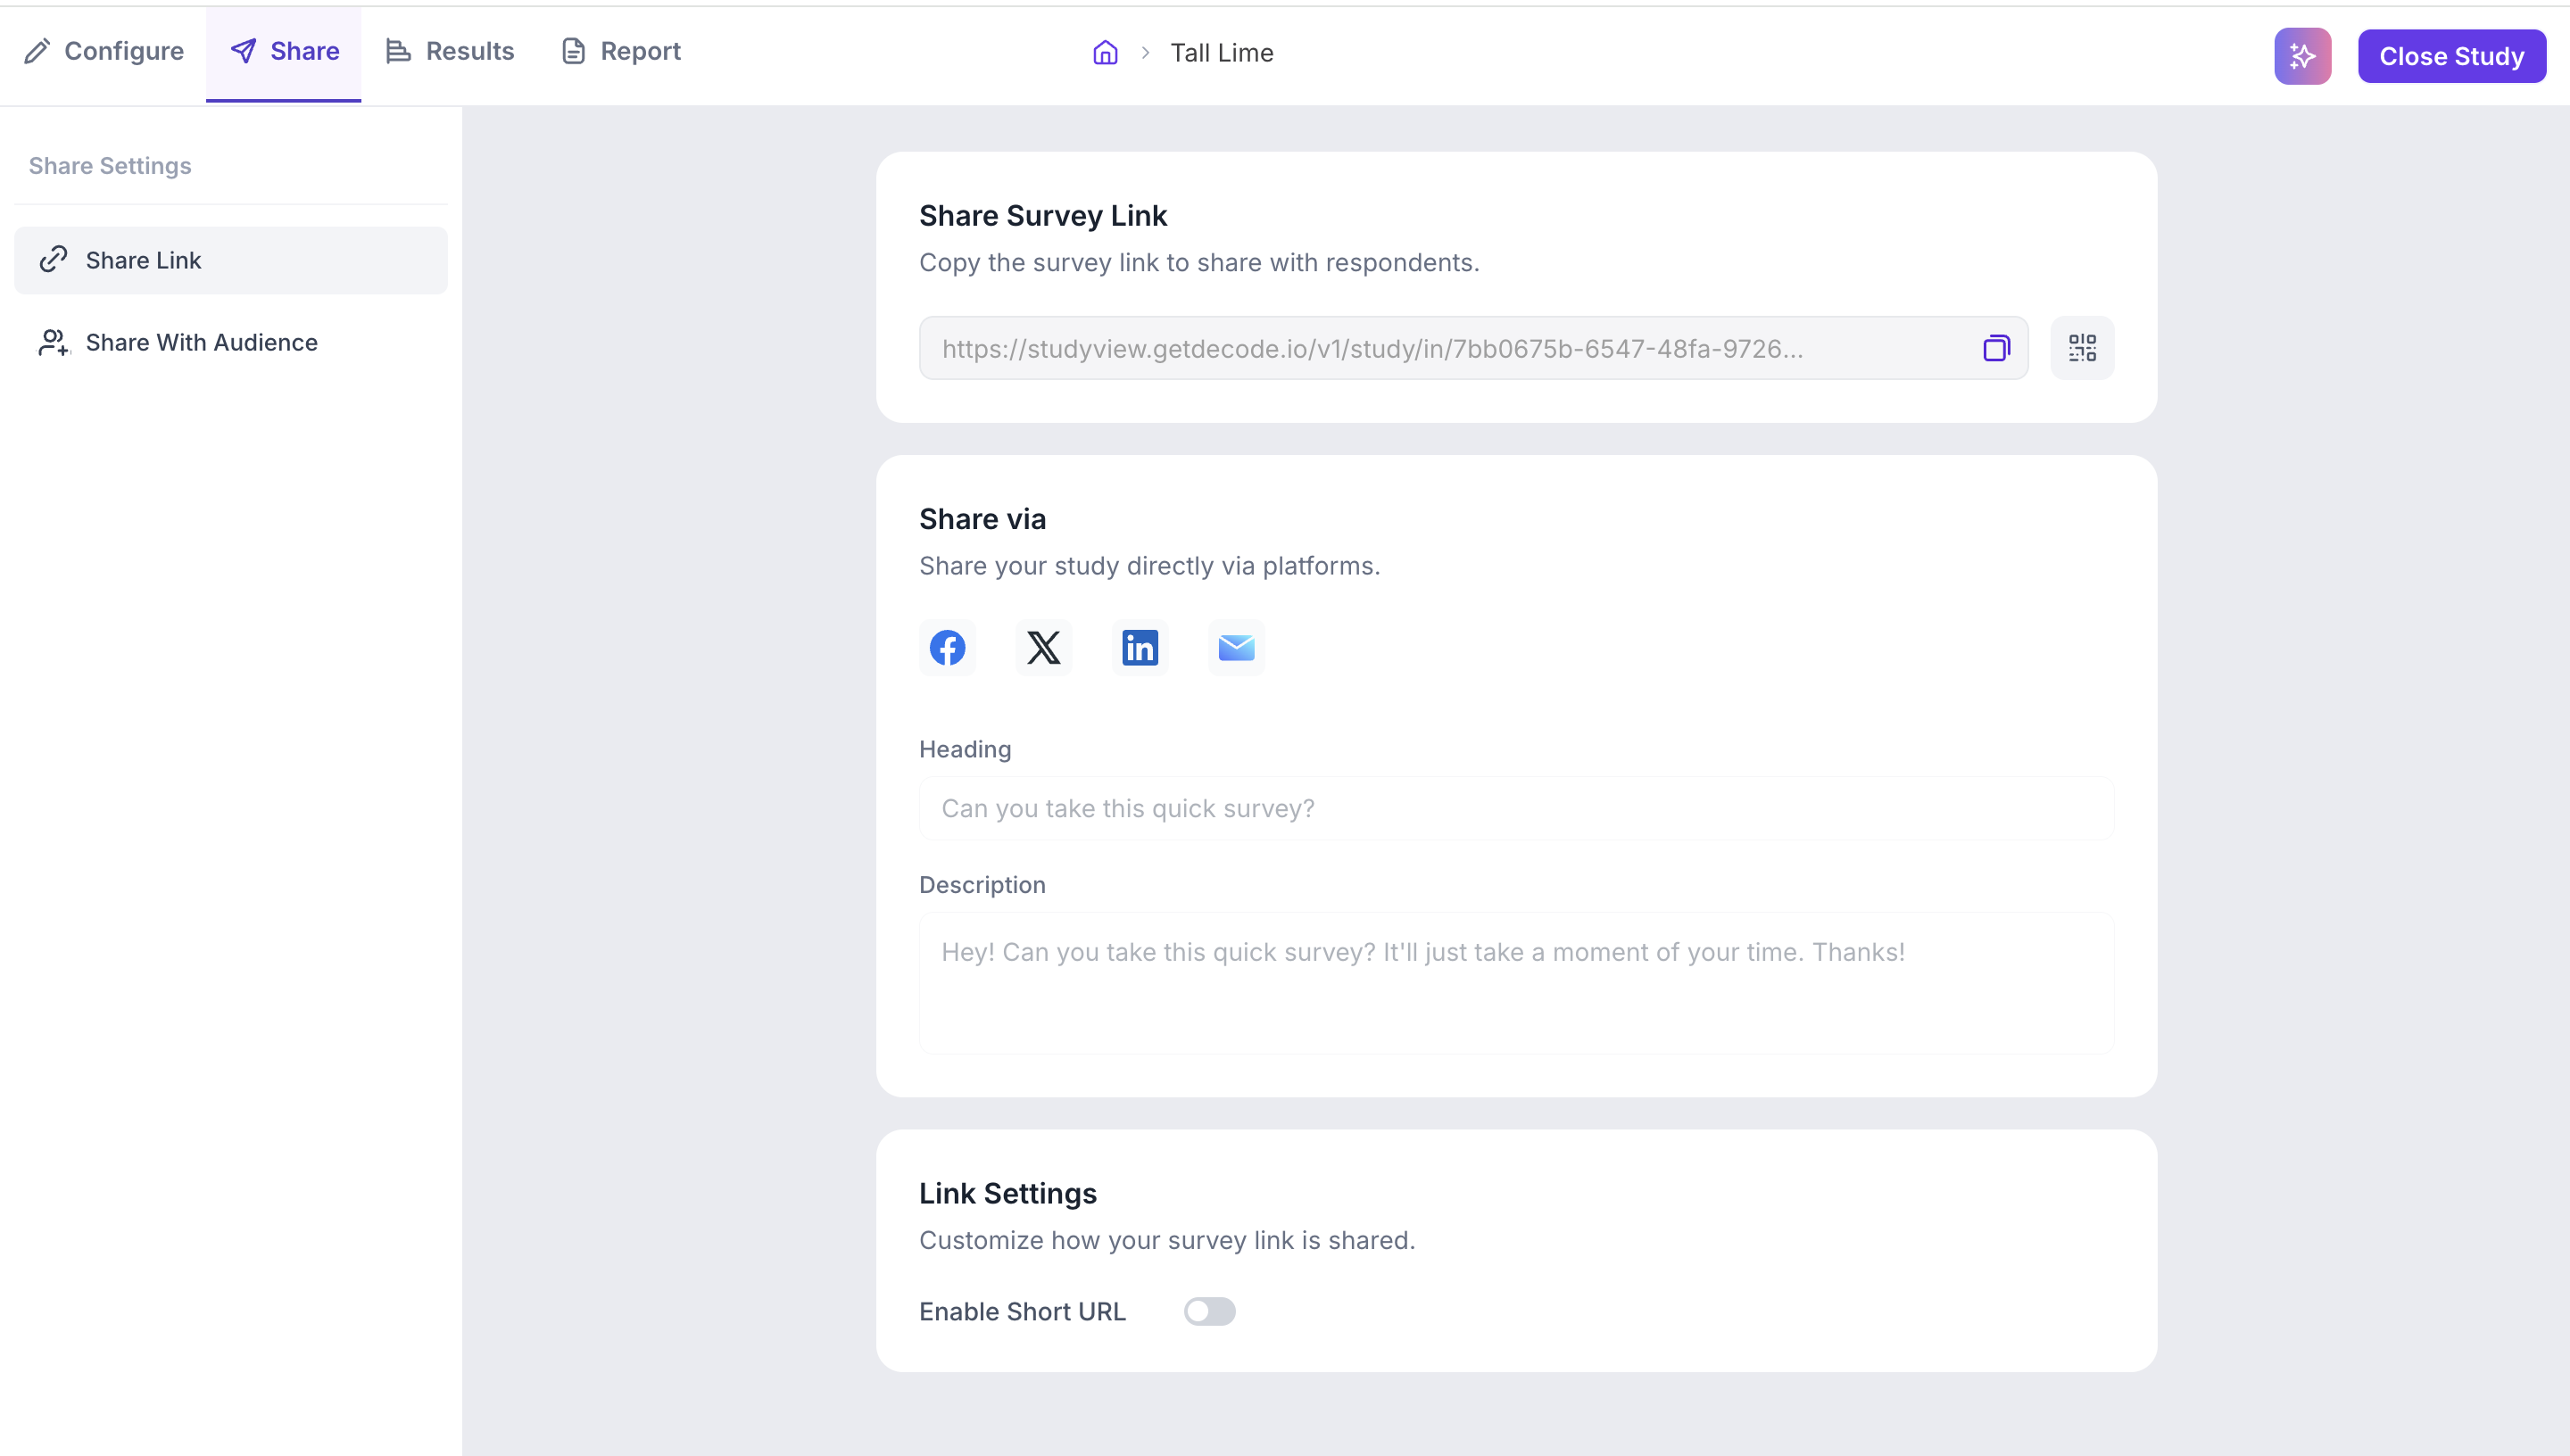
Once all sections are complete, click Publish in the top right. The study moves to the Share tab where the study link is available.
Sharing Your AI Interview Meeting Link
After publishing, go to the Share tab to distribute your study.
PARTICIPANT EXPERIENCE
This section explains what participants experience when they open the AI Interview link, from the entry screen through to the end of the session.
Step 1: Enter Email and Accept Privacy Policy
When participants open the study link, they will enter their email address, accept the Privacy Policy, and click Get Started. If a screener has been set up, screening questions appear at first. Participants who do not meet the criteria will get Screened out and cannot proceed.
Step 2: Enable Screen Recording
After passing the screener, participants are prompted to enable screen recording before the session begins. A pop-up explains why screen access is needed as below:
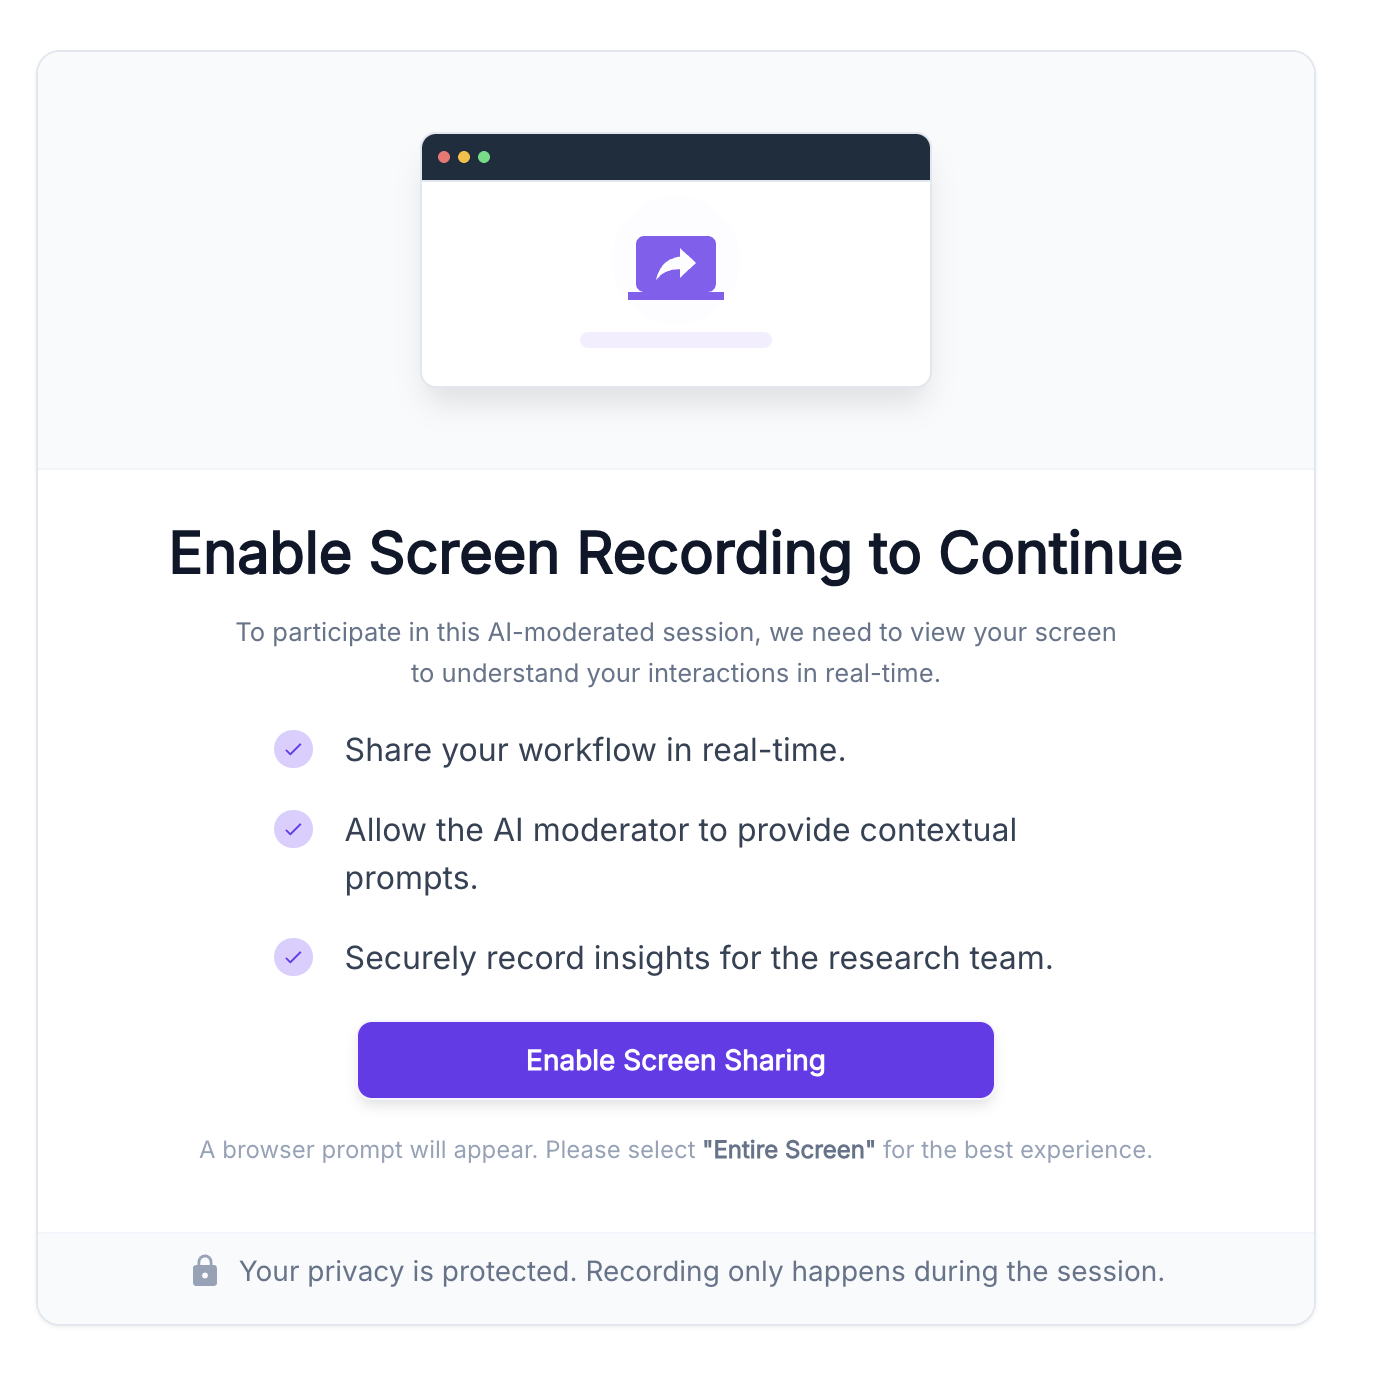
A browser permission prompt then appears and participants need to select Entire Screen and click Share to proceed.
Step 3: The Session
Once screen sharing is enabled, the session begins. The interface is split into two panels. The left panel shows the AI moderator the AI's spoken text displayed on screen, and a session timer at the bottom. The right panel shows the participant's own video feed.
The AI moderator greets the participant and guides them through the interview based on the research goals and conversation depth settings configured during setup.
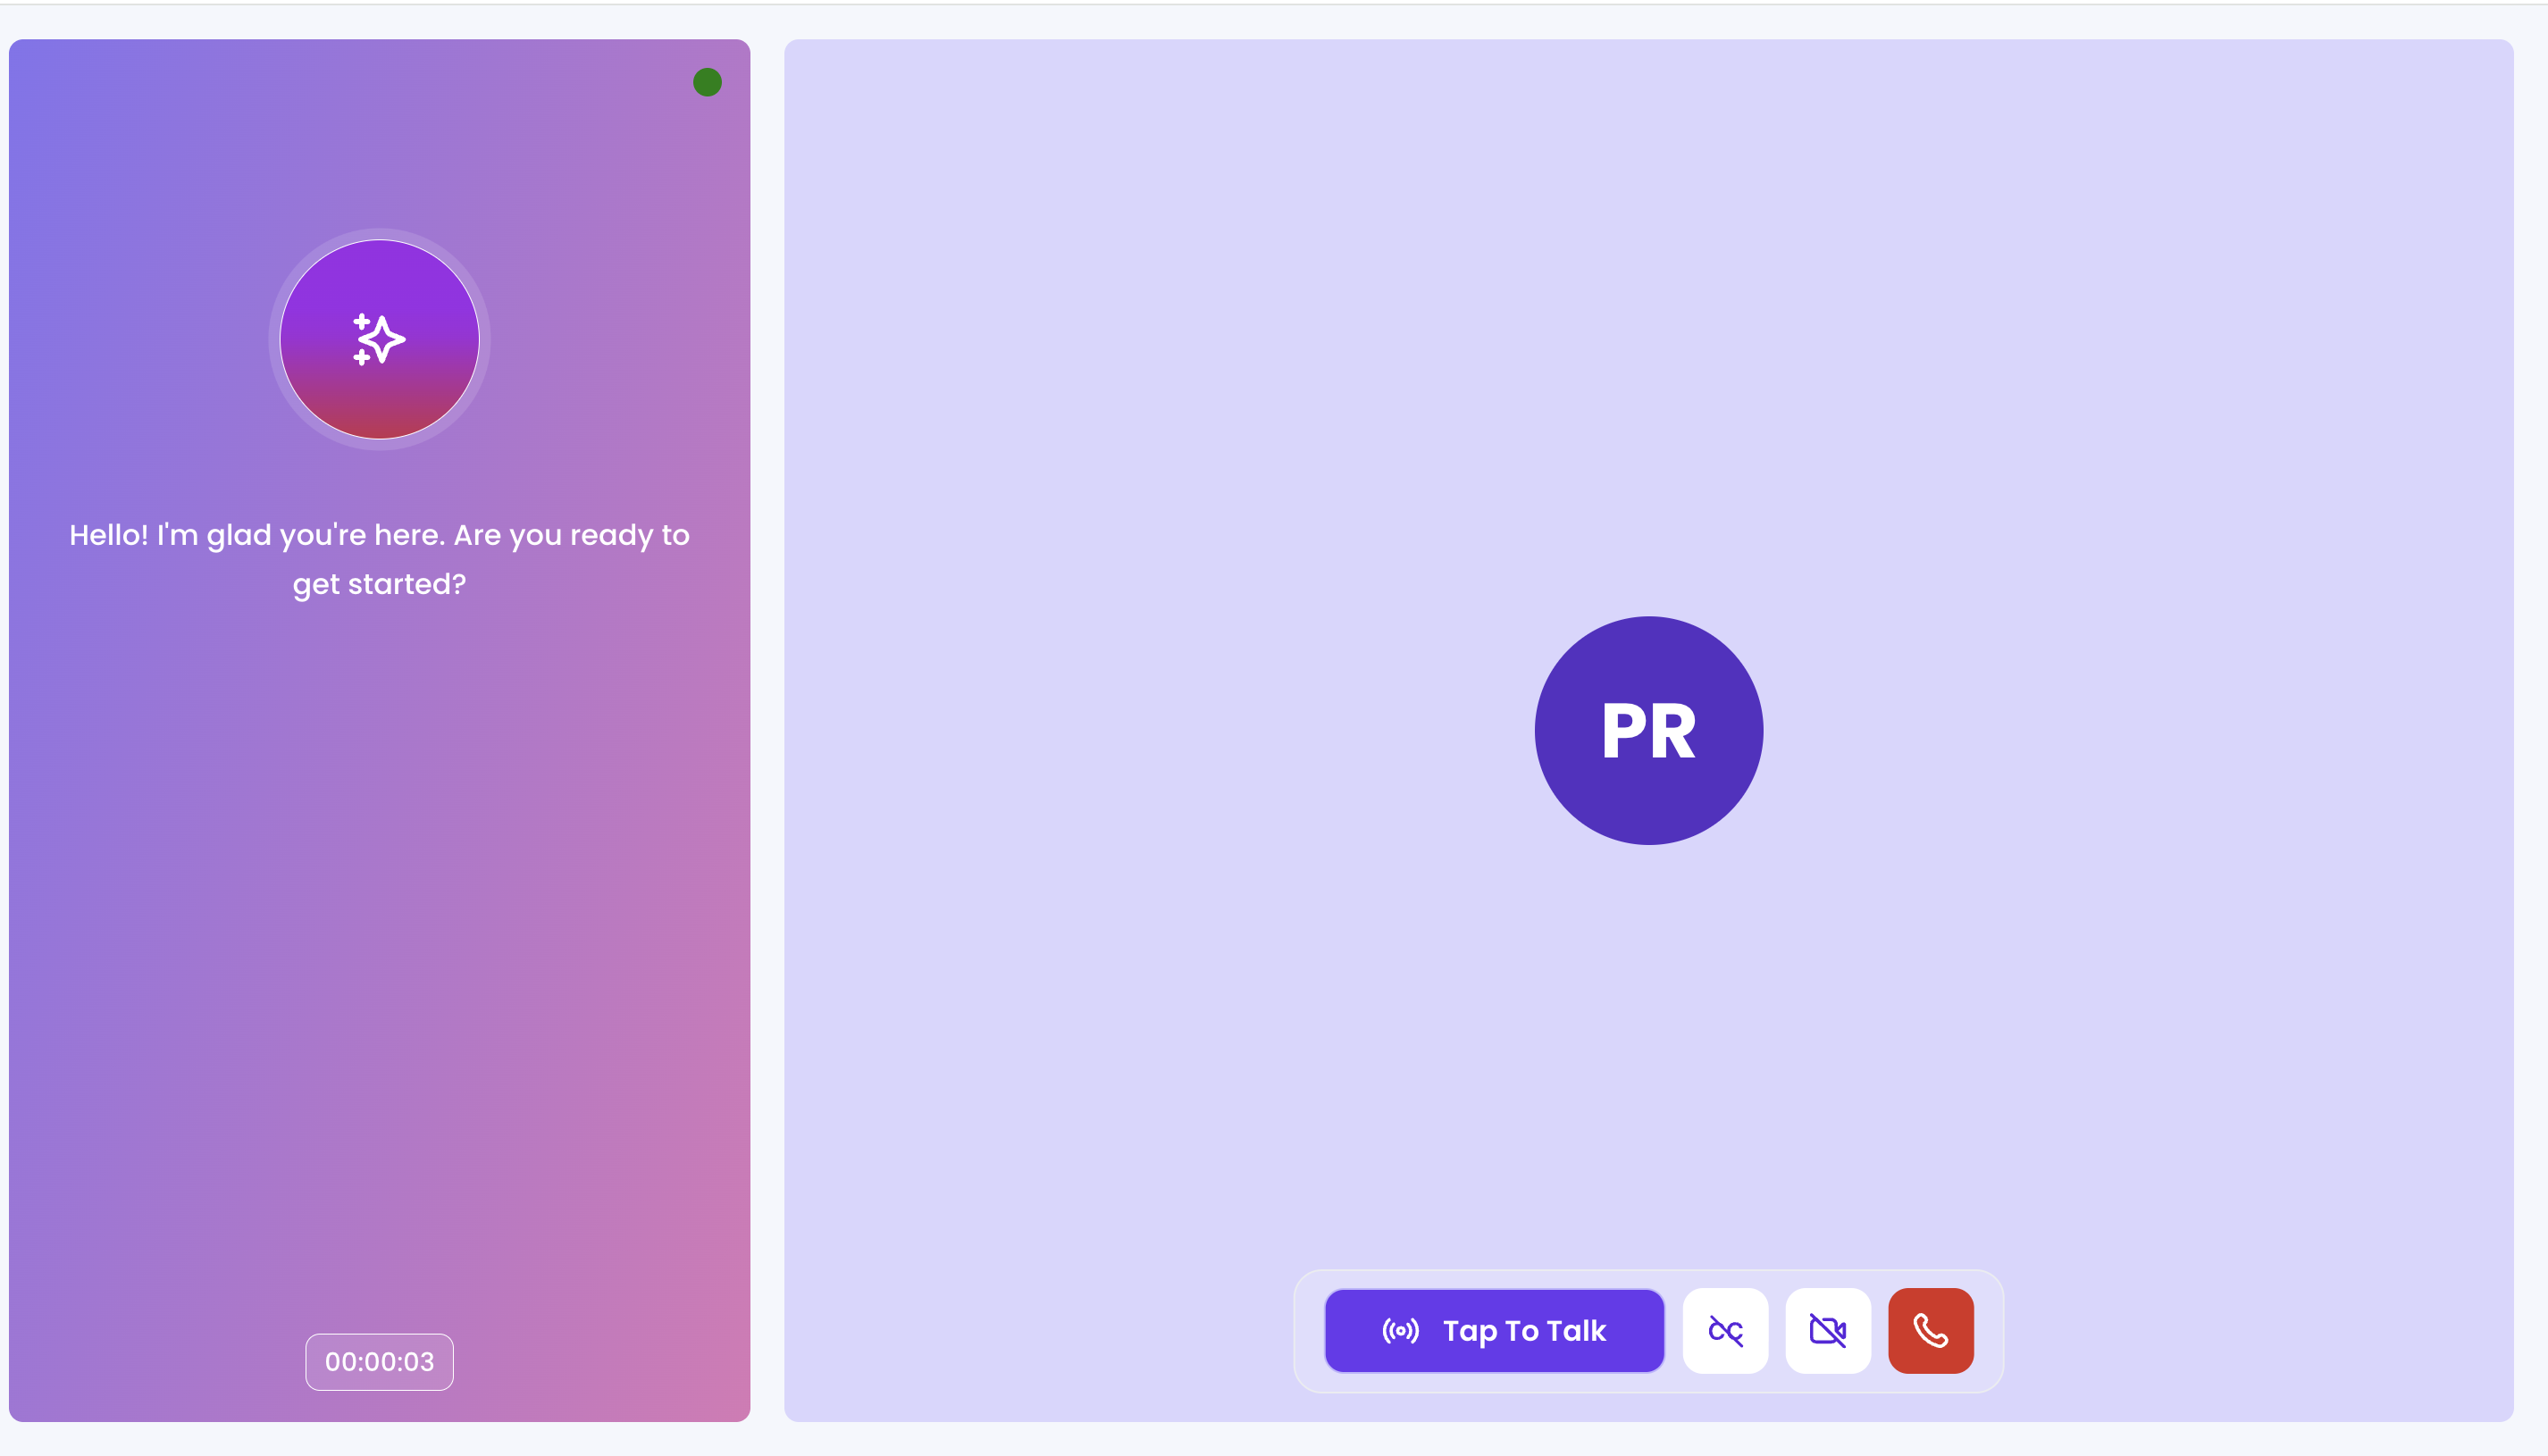
Tap to Talk Mode
In Tap to Talk mode, a prominent Tap to Talk button appears at the bottom of the screen. The participant clicks this button when they want to speak and clicks Tap to Stop when they are done. The AI listens only while the button is active and responds after the participant stops speaking.
Continuous Listening Mode
In Continuous Listening mode, the AI listens throughout the session. The participant speaks naturally and the AI responds when they pause. This mode creates a more conversational interview experience.
In-Session Controls
Participants have the following controls available at the bottom of the screen during the session.
- Tap to Talk: Available in Tap to Talk mode. Click to speak, click again to stop.
- CC (Closed Captions): Toggle subtitles on or off for their own speech during the session. The AI moderator's captions are on by default so participants can always read what the AI is saying.
- Camera: Turn the participant's video feed on or off.
- End Call: Leave the session.
RESULTS
The Results tab for an AI Interview follows the same structure as the Qualitative Study results. It includes Files (session recordings with transcripts and individual analytics), Highlights, Themes (Tags), and Analytics (AI Summary, Theme Analysis Panel, Question-Wise Insights, and Top Opportunity Areas and Strategic Recommendations).
Refer to the Understanding Your Qualitative Results article - https://help.getdecode.io/en/article/qualitative-study-insights