How to upload media/meeting recording in qualitative study?
Overview
Uploading videos is an important part of qualitative research in digital platforms, as it can provide rich and contextual information that other types of media cannot capture. In this article, we will explore how you can upload videos from your computer or decode the library in a qualitative research study and view the analytics of the videos using Decode.
Steps
💡Note: If you have a qualitative study already created, just open the study and follow the steps from Step 6.
Steps
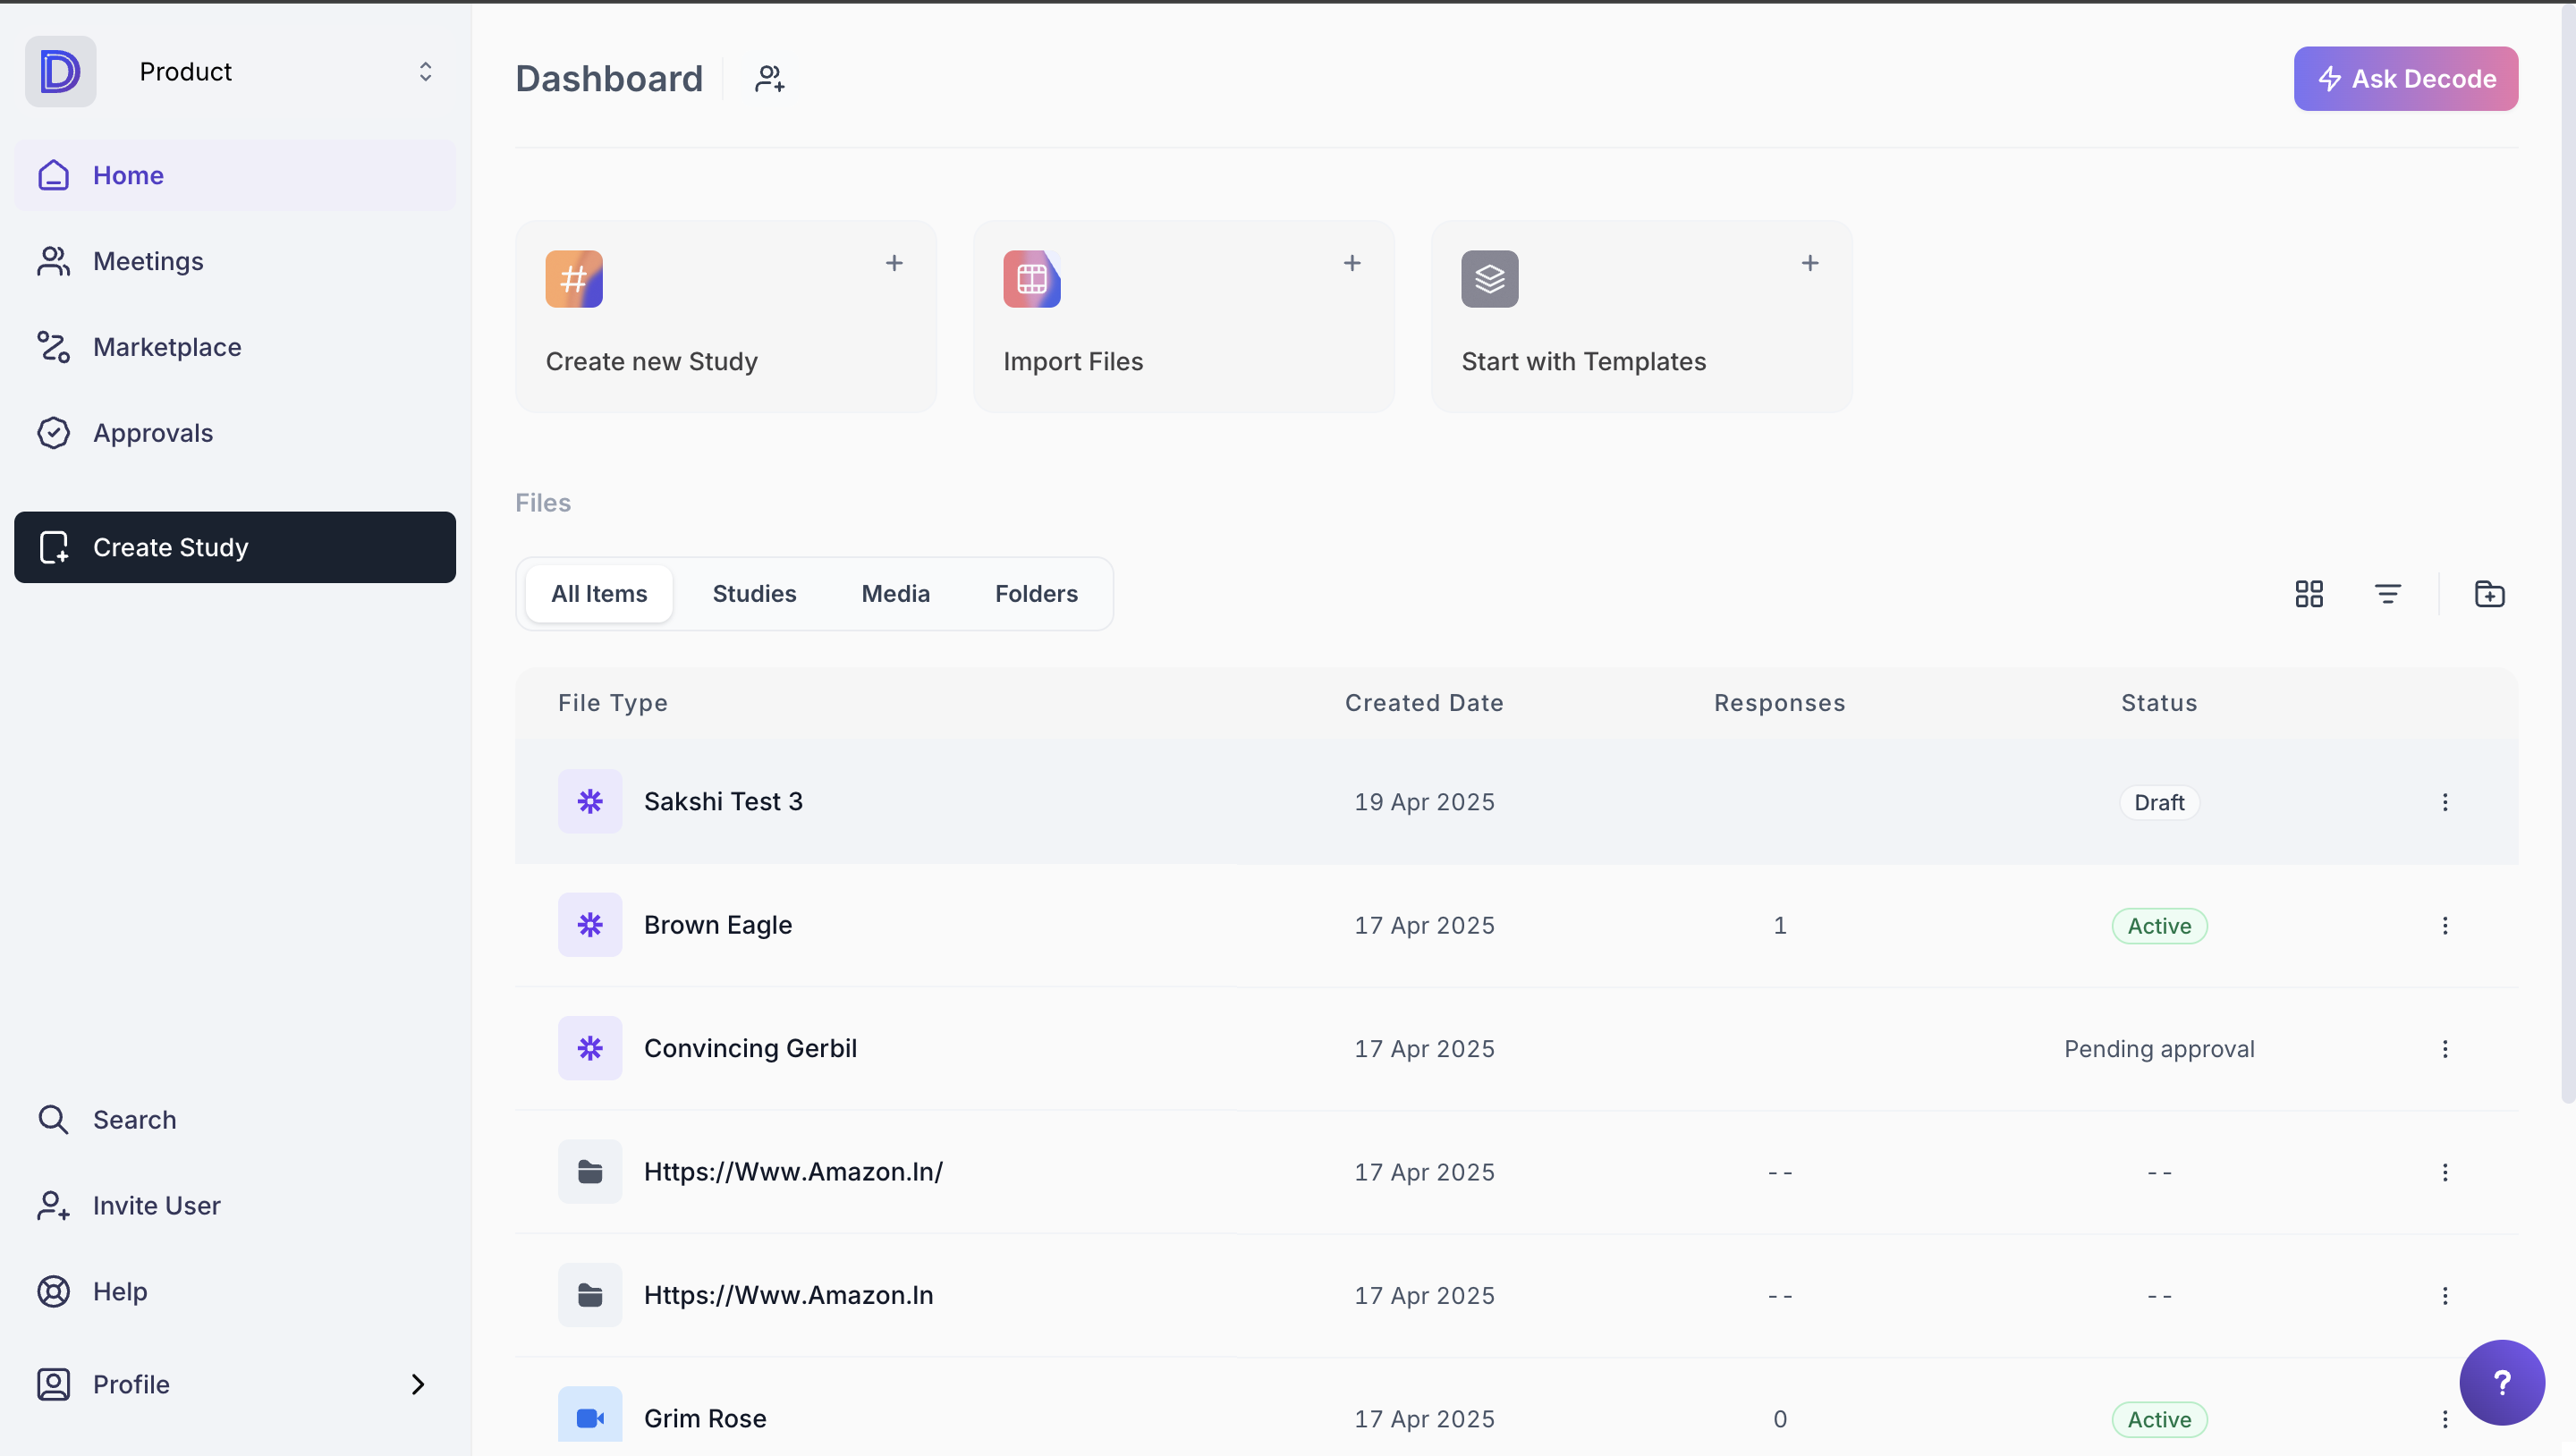
Step 1: Once you log in to your Decode account, you will be directed to the dashboard.
Step 3: On the Research page, from the left panel, expand the "Qualitative Study Templates" option by clicking on it and selecting the "Live meeting" option from the list.
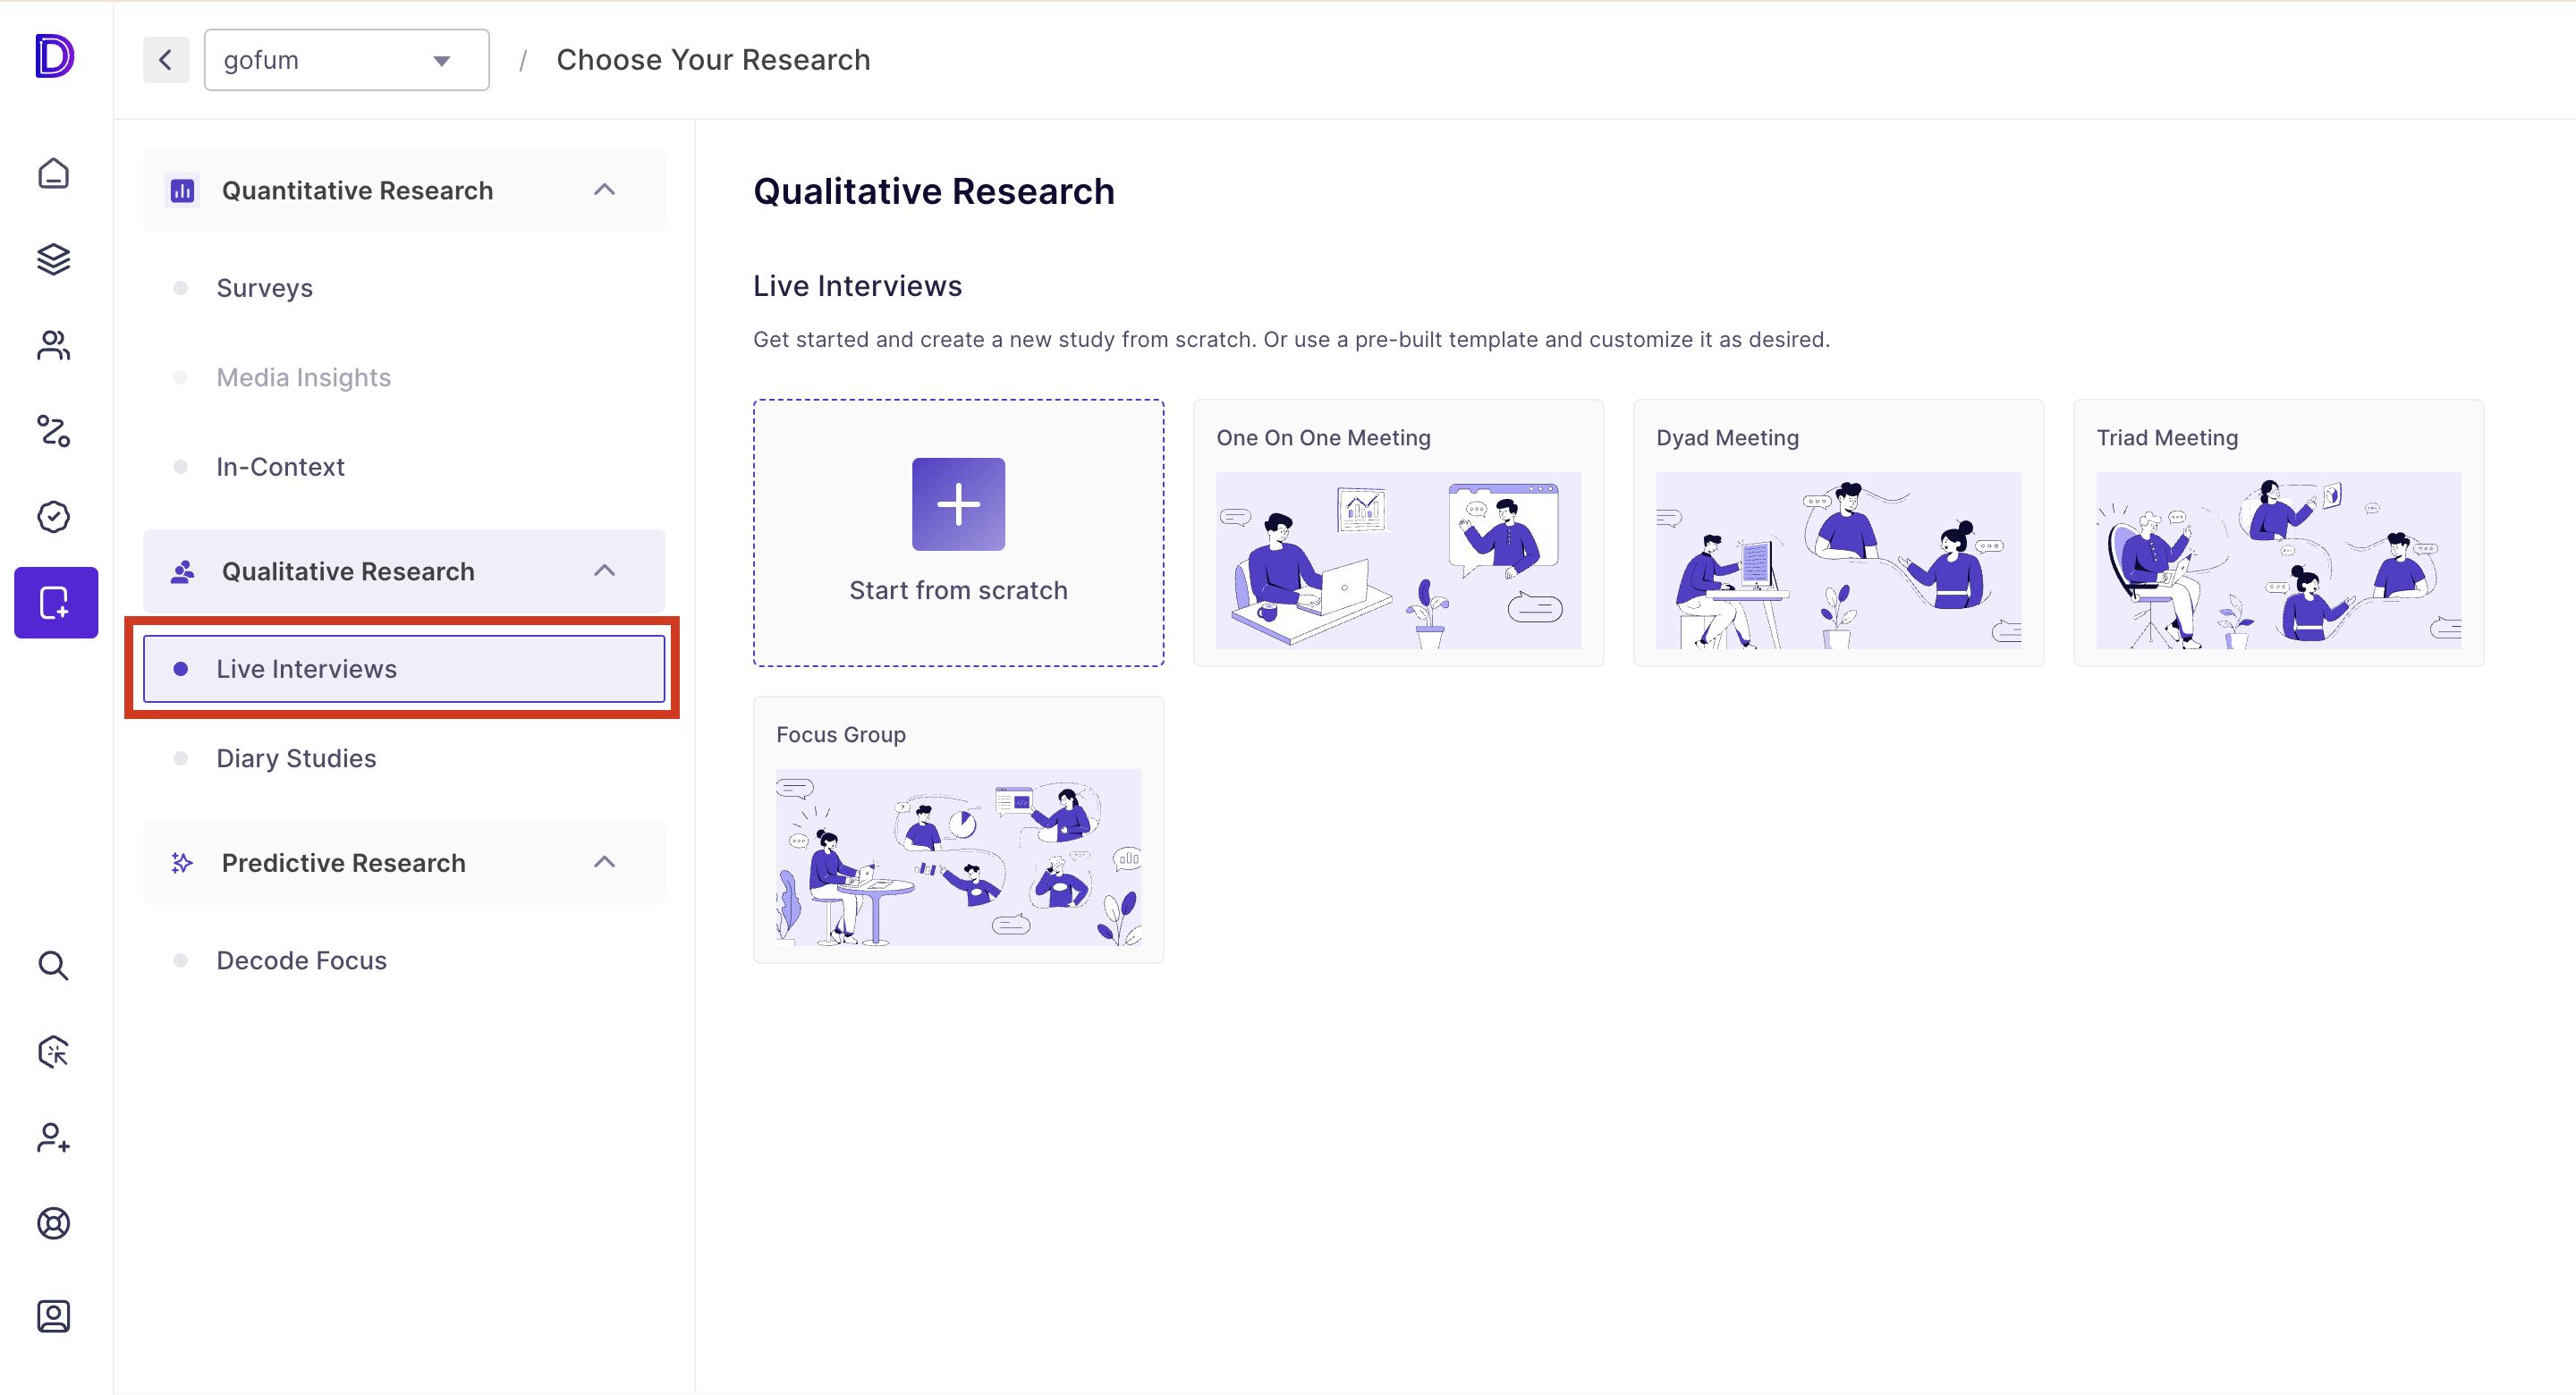
Step 4: You will be able to view the following meeting template:
- One on One meeting: You can invite one participant to this meeting and have a one-on-one discussion.
- Dyad Meeting: You can invite up to two participants to this meeting
- Triad Meeting: You can invite up to three participants to this meeting.
- Focus Group: You can invite up to six participants to this meeting
Step 5: Once you have selected the meeting template, a new page will open for adding the meeting details.
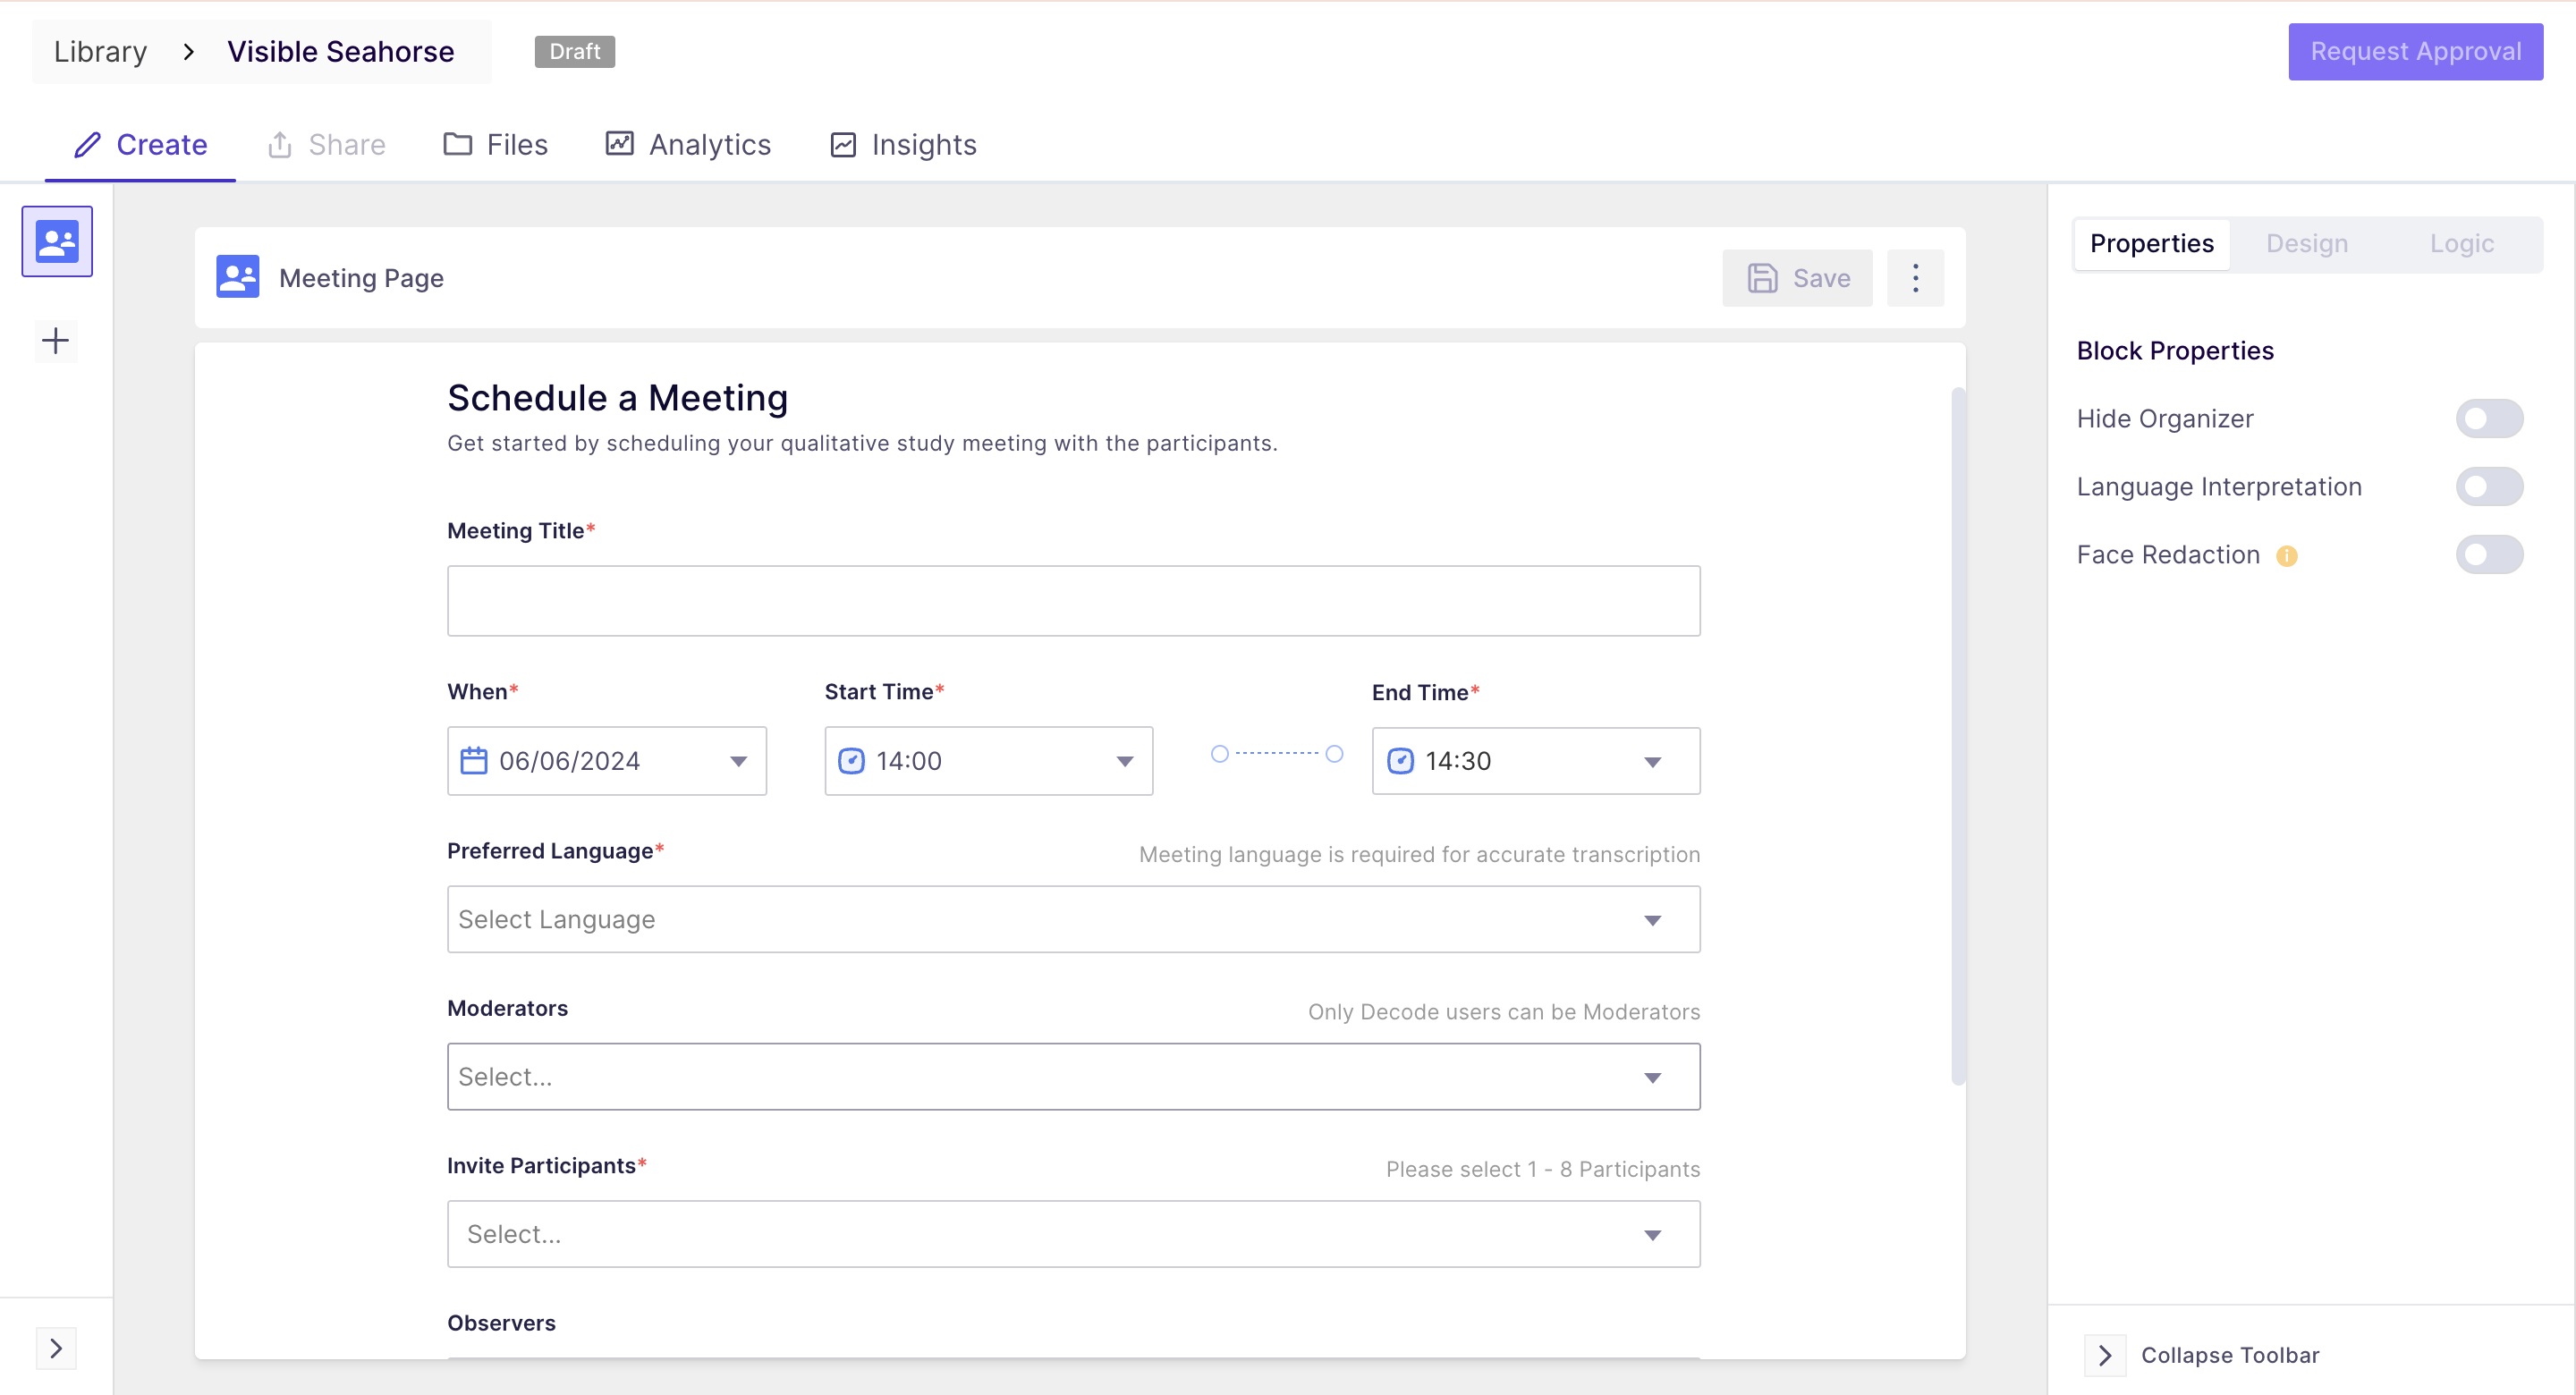
Step 6: To add a video file go to the files tab from the top navigation panel of the page.

You can add the meeting details first and then add the recording, or vice versa.
Note: unless you create a meeting in a qualitative study, you won't be able to publish it. The study cannot be published when only files are present, you need to add meeting details also.
Step 7: You can upload the video from your computer or the decode library. Click on either of the buttons to select the video file. Once you click on the button, a pop-up form will open for choosing media.
- For selecting video file from your local machine(laptop/computer)
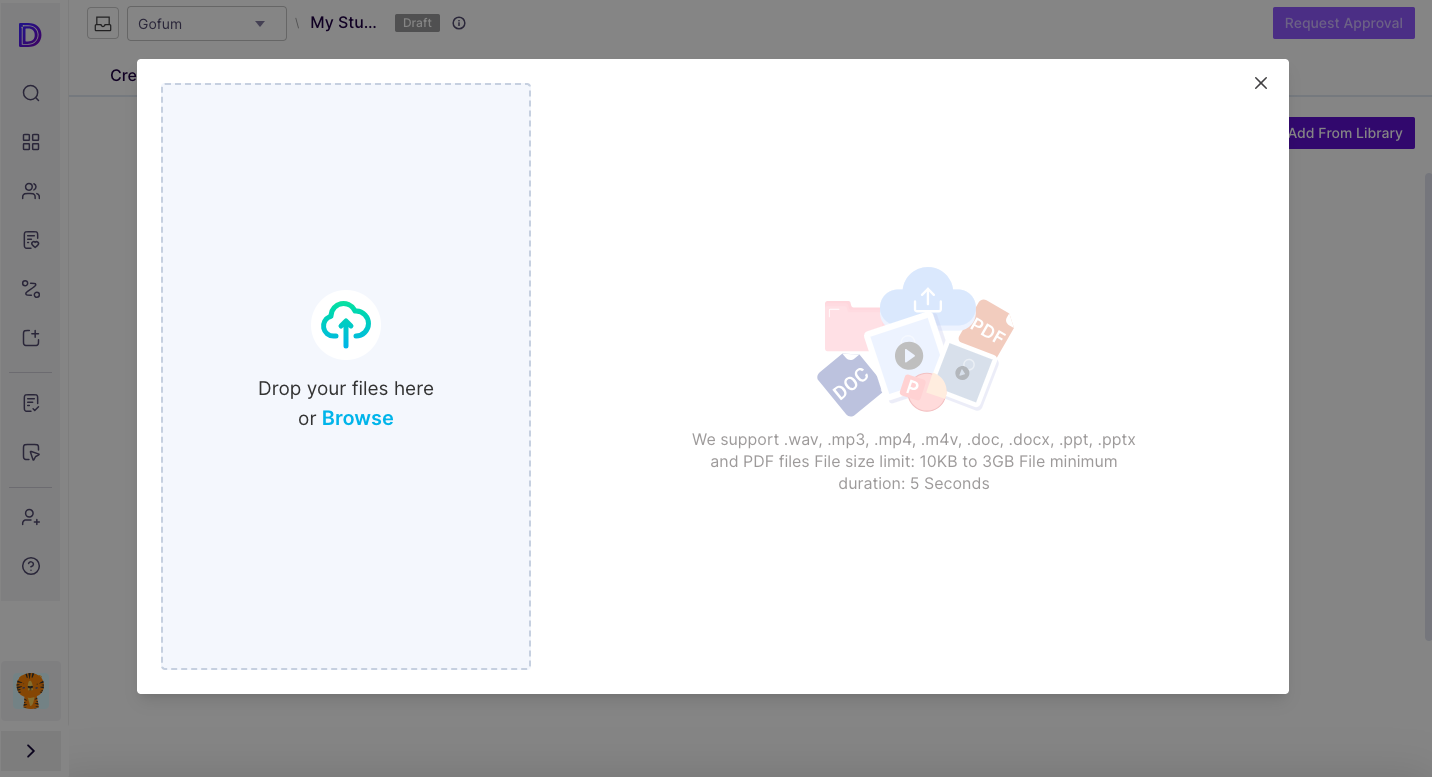
- For choosing a video file from Decode Library
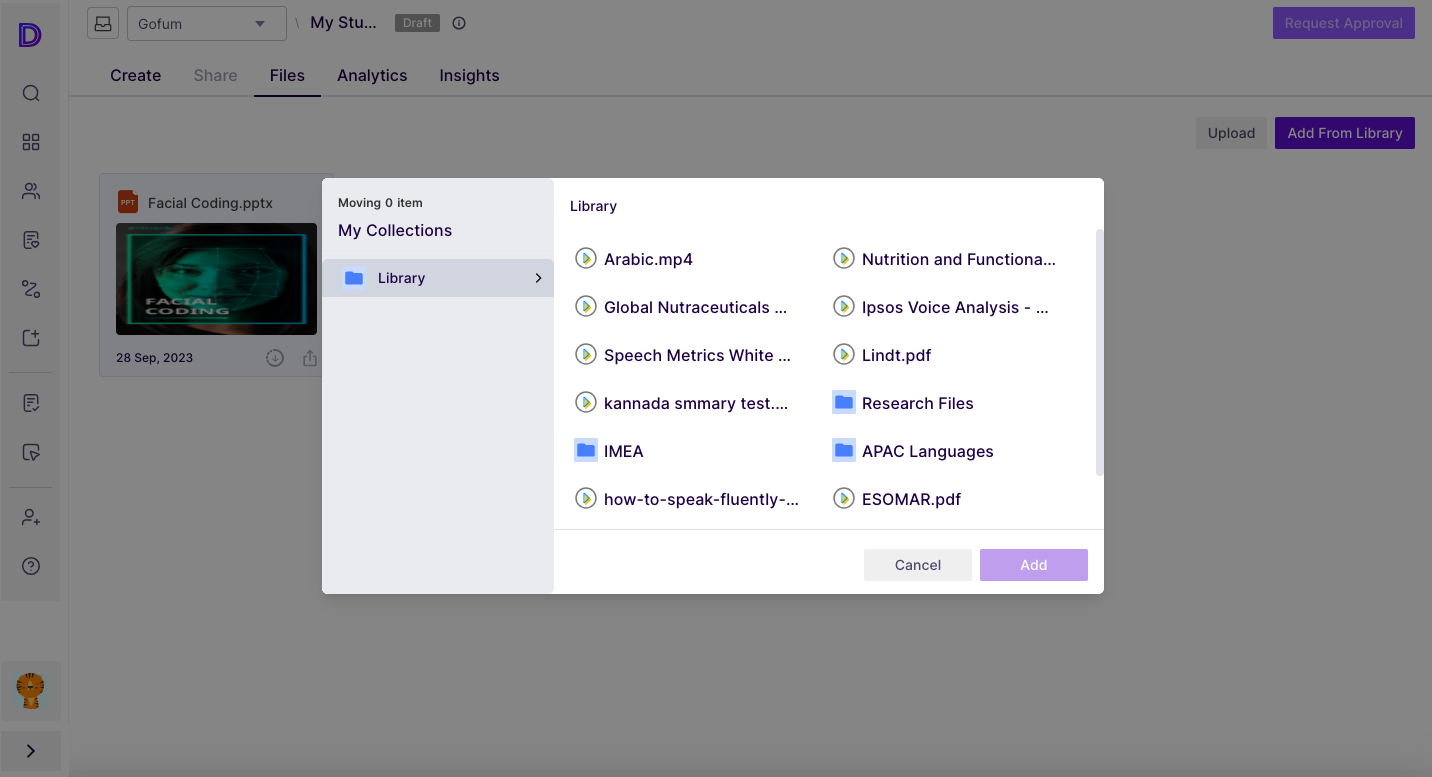
Step 8: If you have selected a video file from the decode library, it will be instantly added to the recording section.
For the media selection from your local machine, you will need to specify the media details like name, number of participants and language spoken in the video.
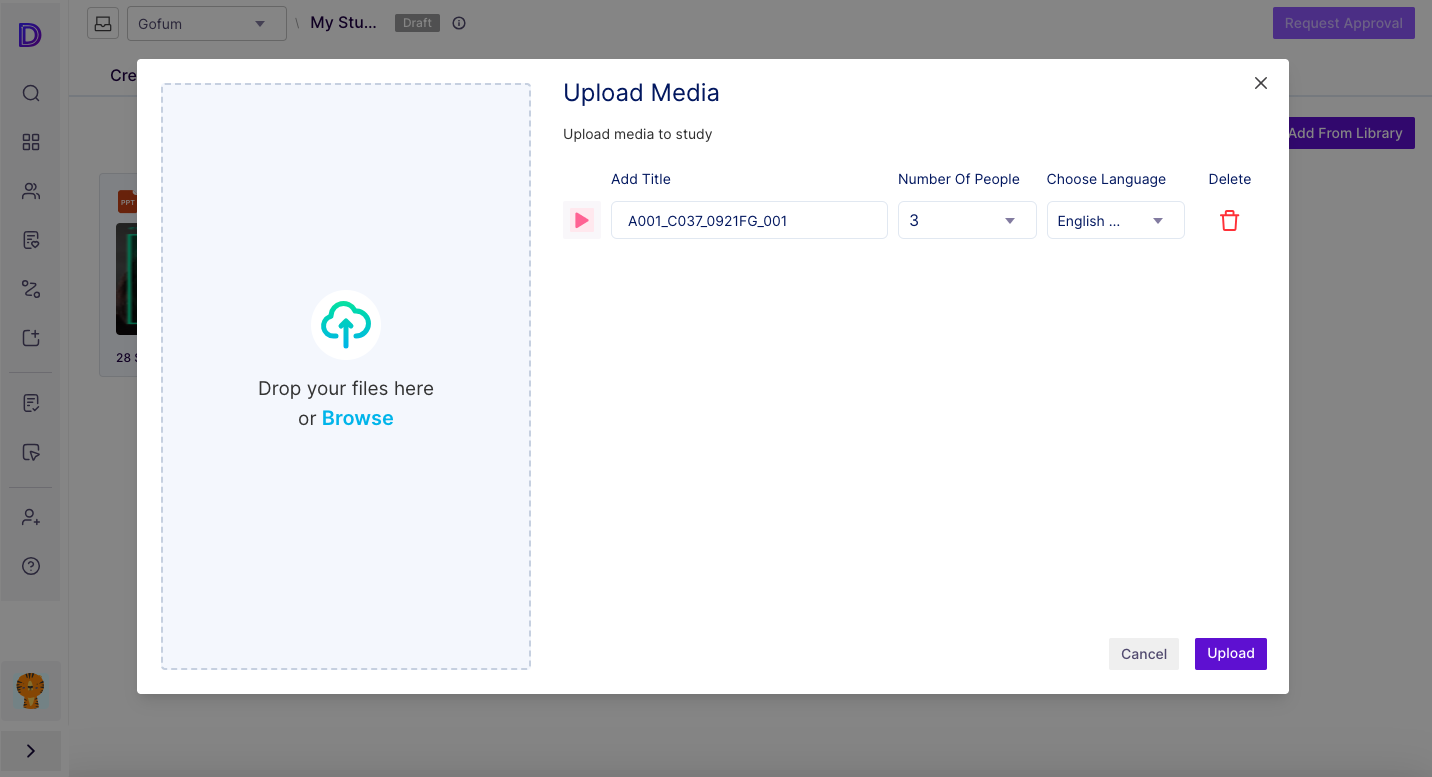
Once added, click on the upload button, and the upload will start, and you can track the upload using the loading progress bar. After the upload is done, a toaster message and upload message status will appear.
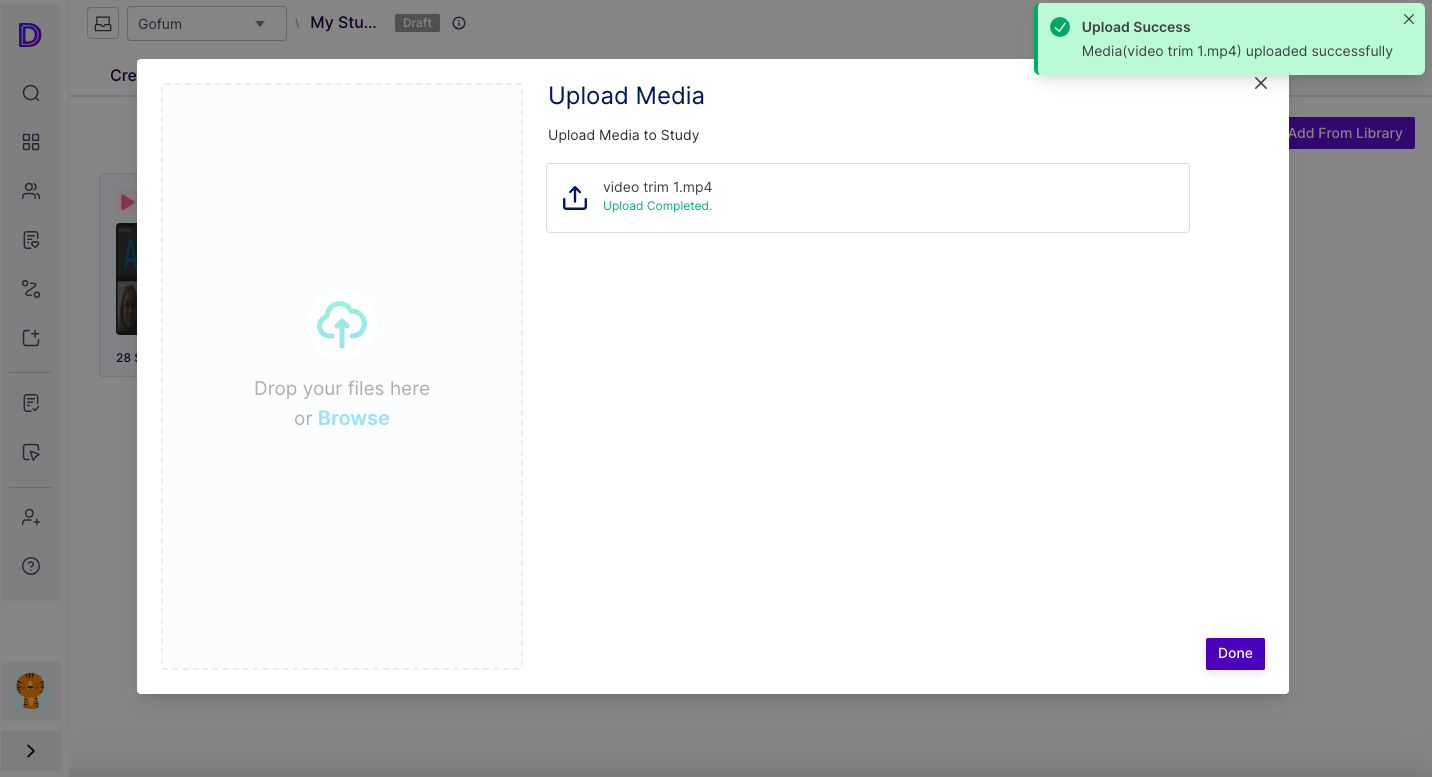
Step 9: After successful upload, the video files will appear in the recording section.
To view the detailed analytics of the video files, you can click on them.
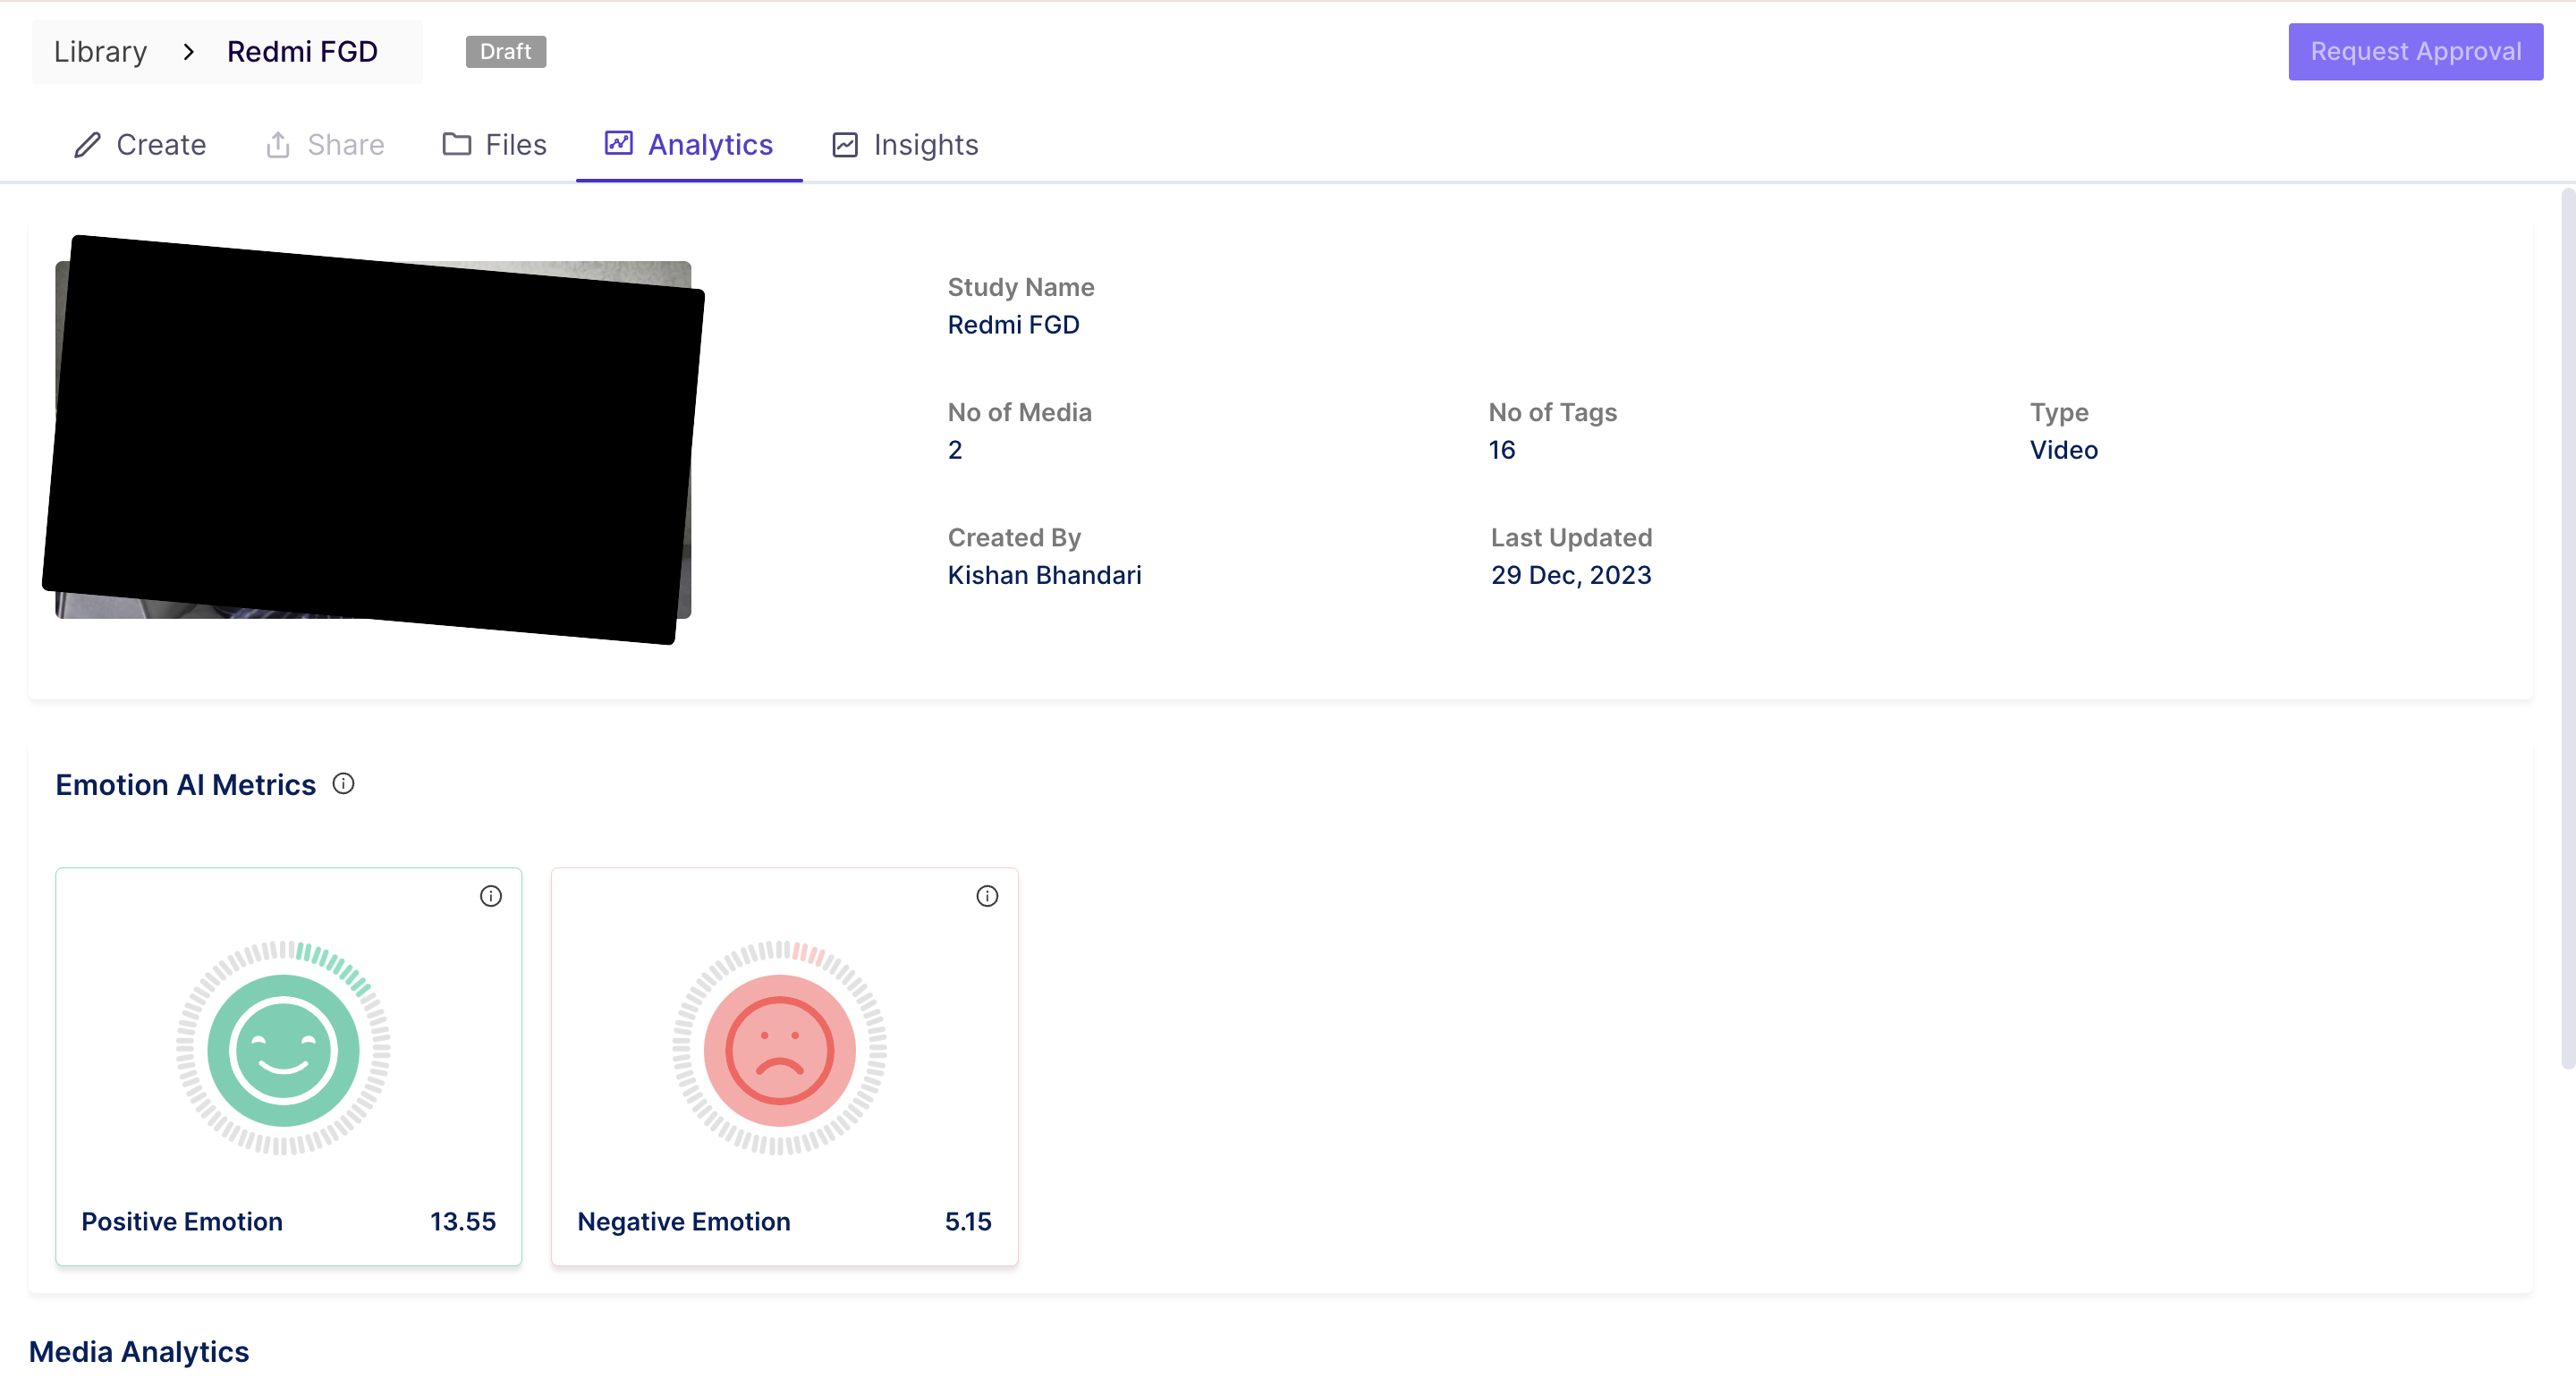
Step 10: To view the aggregated analytics of the videos, navigate to the "Analytics" tab present next to the recording tab in the top navigation bar.
In the Emotion Metrics section, you will be able to view the aggregated analytics of all the video files added to the study. You can also view individual analytics of the videos from the media analytics section below the Emotion analytics; here, you will find all the emotion scores videos-wise.