
Recruit your first participants
Once your study is ready, choose how you want to collect responses. You can invite your own participants using a share link or recruit participants through the Decode Panel. You can also use both options for the same study.
Option 1: Share a link with your own participants
Use a share link when you already have access to the people you want to participate, such as customers, employees, or community members.
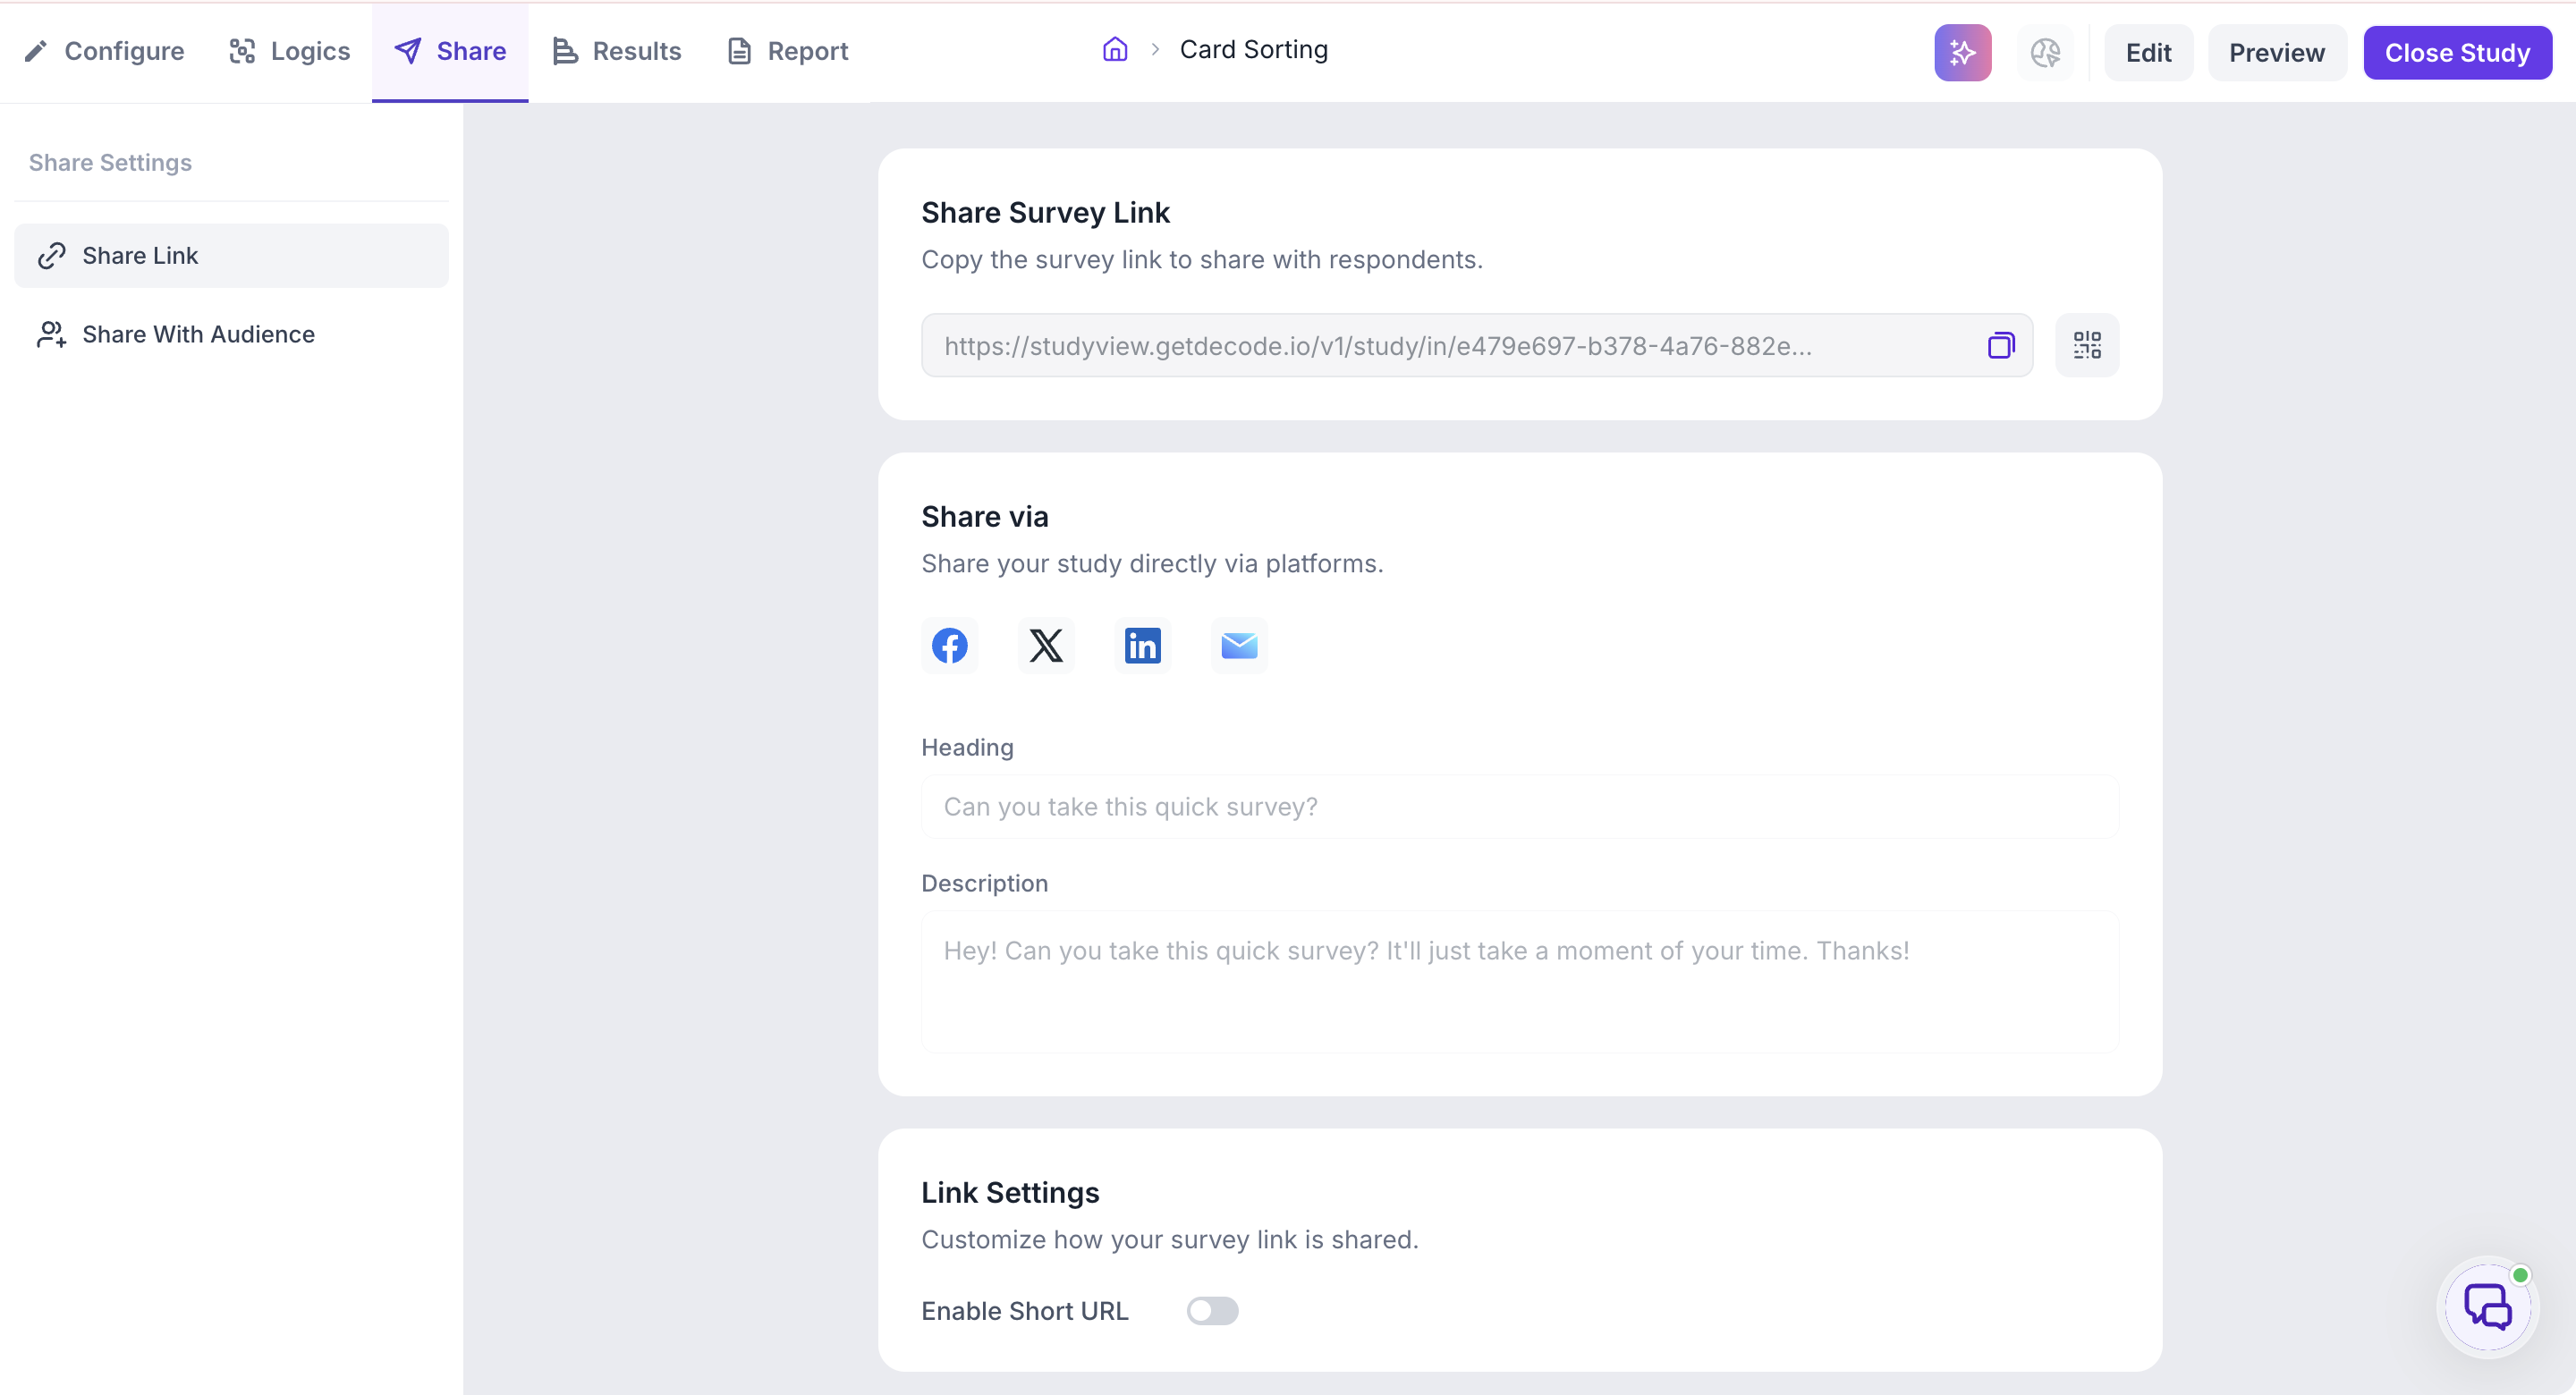
- Open your study and go to Share → Share Link.
- Copy the Share Survey Link.
- You can also use the QR code icon to generate a scannable code for in-person or in-store recruitment.
- Under Share via, you can share the study directly to Facebook, X, or LinkedIn, or send it by email.
- Edit the Heading and Description if you want to change the preview text participants see.
- Under Link Settings, you can enable Short URL to create a shorter link.
Option 2: Recruit from the Decode Panel
Use the Decode Panel when you need participants who match specific criteria and don't already have access to the audience you need.
1. Go to Share → Share With Audience.
2. Click Add Audience.
3. Under Panel Information, enter a Panel Title for your audience.
4. Set your participant Criteria:
- Country - Select the country for your audience.
- Age - Set the required age range.
- Gender - Select Male, Female, or Others.
5. Set your Study Settings:
- Completes Required - The number of completed responses you need.
- Length of Interview (in mins) - Enter the estimated length of the study.
- No. of Days in Field - Set how long you want the study to remain open to the panel.
- Device Type - Select desktop, mobile, or both, based on how participants will access your study.
6. Review the details shown in the right-hand panel:
- Order Summary shows your selected criteria and study settings.
- Price Breakdown shows the cost per response and total cost in credits.
- Available Credits shows the credits available in your workspace.
- Available Participants shows whether enough participants are available for your selected criteria.
7. Click Continue to save the audience.
Launch your panel audience
After you save the audience, it appears as a card under Recruit From Panel. The card shows the Total Participants and Total Response counts and includes a Launch button.
Recruit multiple audiences
You can create multiple audiences if you want to run separate participant groups.
For example, you can create separate audiences for different:
- Countries
- Age groups
- Other participant criteria
Click Add Audience to create another audience.
The Total Participants and Total Response figures at the top show the combined counts across your audiences.
Tip: If this is your first study, start with a smaller number of completes. Review the responses, identify anything that needs improvement, and then scale up.